
Origami Dog
Two sheets of paper, and one of them is only a quarter the size of a normal square - that is all this little dog takes. The trick is that the body and the head are folded separately and then joined, which means you are never fighting a complicated shape with too many layers at once. It also means the head stays loose, and patting your dog makes it nod. The author reckons that wobble is the best part of the whole model, and it is hard to disagree.
The other good decision here is scale. Fold this from two full 15cm sheets and you get a dog the size of a tissue box; cut the paper into quarters first and the proportions suddenly look right. Pick a brown sheet if you want something recognisably dog-like, and do not bother with glue unless the head keeps falling off - tape or a dab of glue on the inside works, but an unglued dog has more personality.
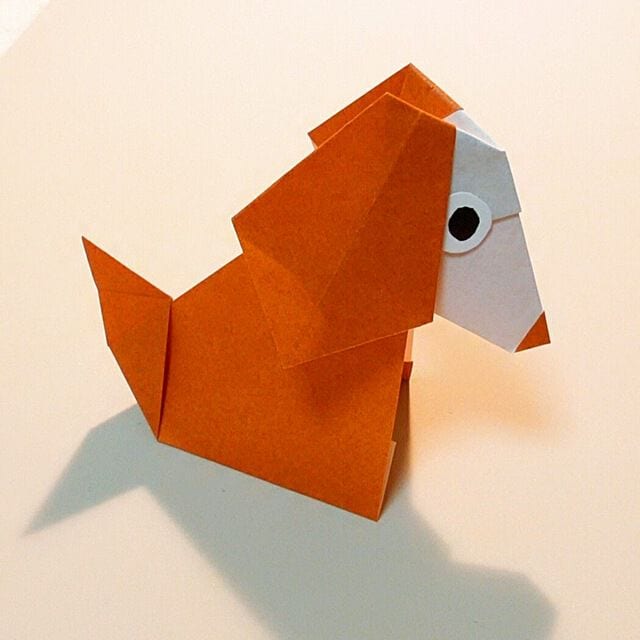
This time I will show you how to fold an origami dog. It takes two sheets of quarter-size origami paper, and the folding itself is simple.
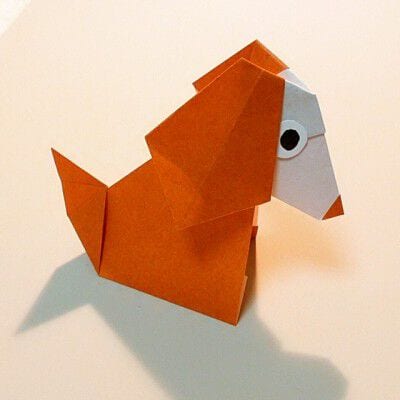
The dog is one of the twelve zodiac animals, and my son was born in a dog year, so I wanted to fold one for him. I suspect he will not be quite so pleased about it at his age (laughs).
It is cute and easy to fold, so try making it with the children on a rainy day. There are other simple ways to fold a dog too, and I would like to introduce those as well.
Now, let me introduce you how to fold an origami dog easily and three-dimensionally.
Easy and three-dimensional folding of an origami dog
You can of course fold it from two ordinary 15cm sheets, but then the dog turns out quite large. This time I cut the paper down to quarter size, about 7.5cm, which I think works better.
Pick whatever color you like. I made mine brown this time.
Cut the origami paper into quarters and use two of the pieces.
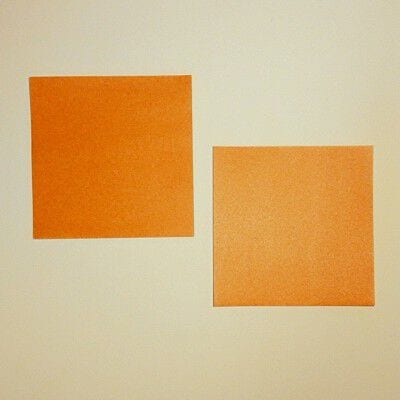
Let's fold it from the body first!
Prepare the first piece and fold it upward about 1.2 cm from the bottom to make a crease.
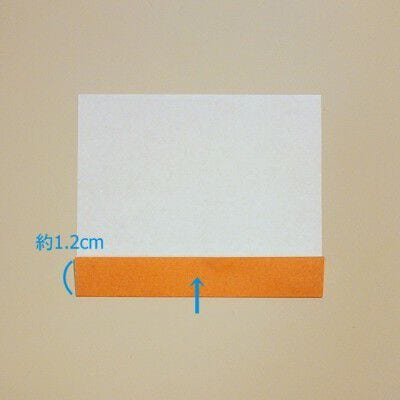
Rotate 90 degrees to the right and fold it up about 1.2 cm from the bottom to make a crease.
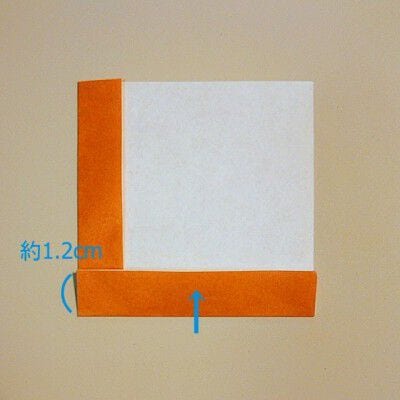
Fold the overlapping part on the left edge to the position of the line and make a crease.
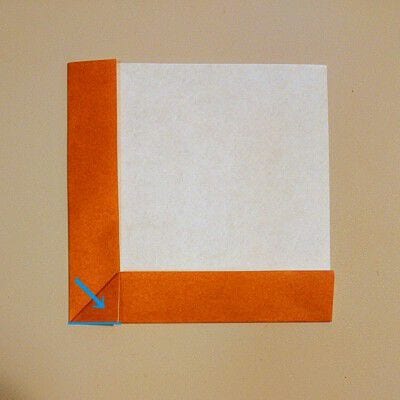
Open all the creases.
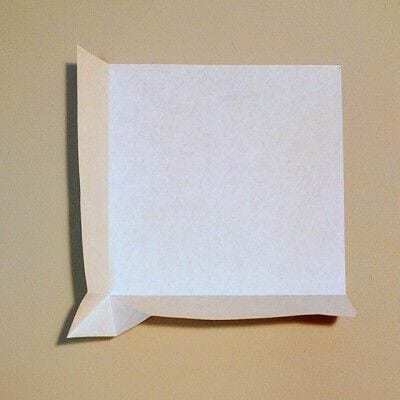
Fold it so that the lower left corners are aligned as shown in the figure, and tilt the corners to the left.
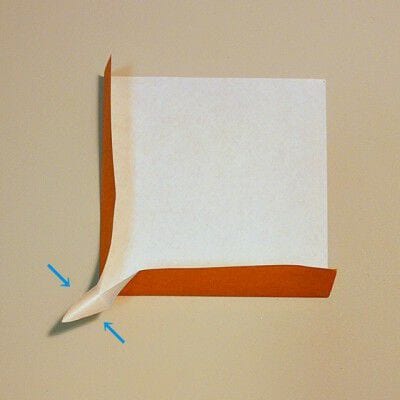
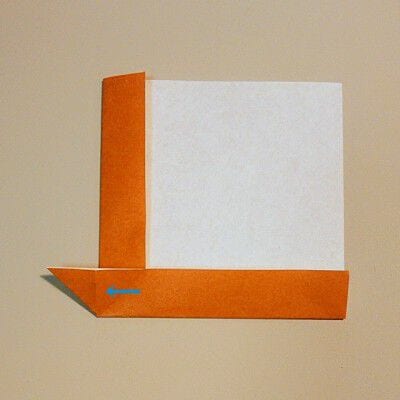
Fold it in half so that the lower right is on the upper left and make a crease.
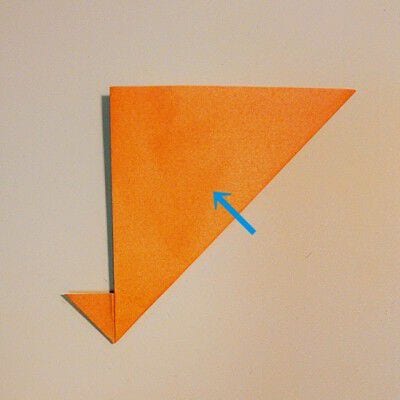
Open so that the brown color is on the front.
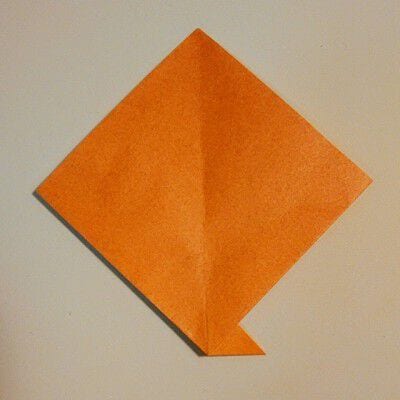
Fold back the bottom corner so that the entire corner you just tilted to the left is on the front.
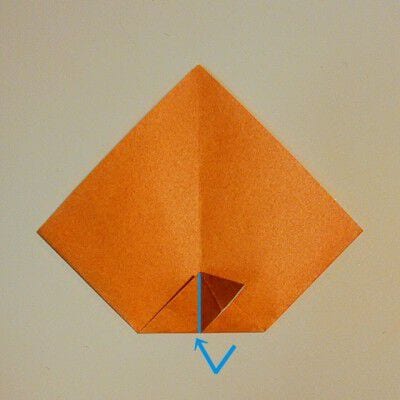
Turn it over.
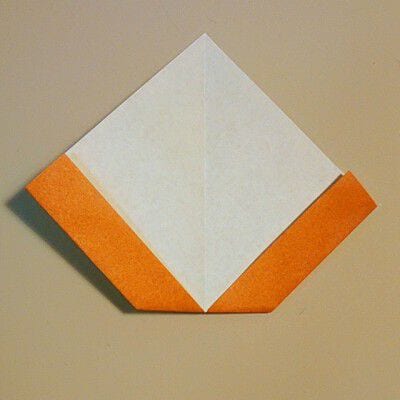
Fold the left side in half along the center line so that it comes to the right, and you have a dog's body.
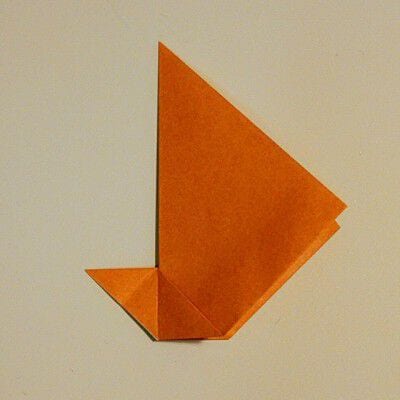
Next, fold the part that will be the face. This is not difficult either, so let's go immediately!
Fold it into a triangle and make a crease.
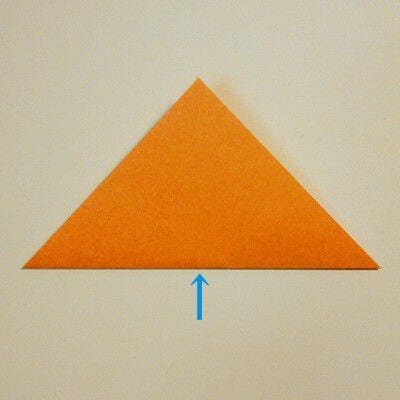
Open it, turn it so that the creases are vertical, and fold it from top to bottom.
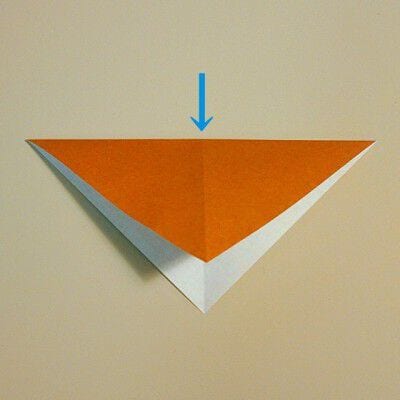
Fold the bottom corner up to the line position.
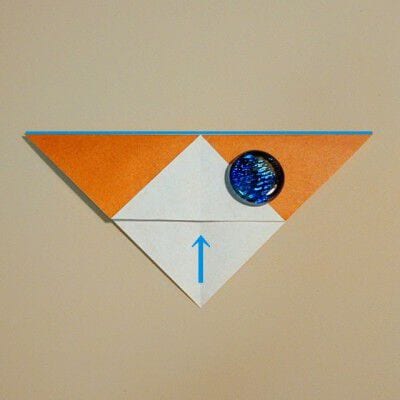
Fold it so that the right corner is aligned with the center line.
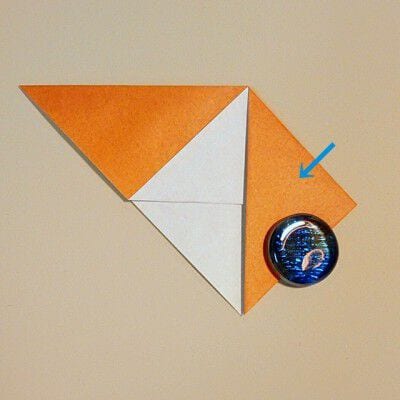
Fold the left side in the same way.
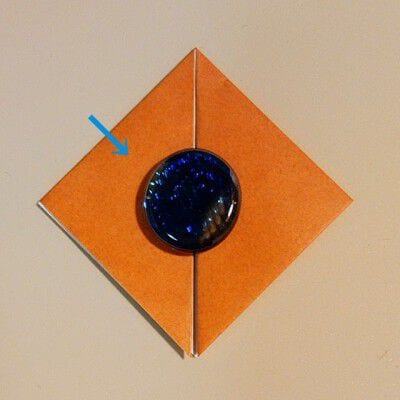
Open the right side and fold it evenly from the center line to make dog ears.
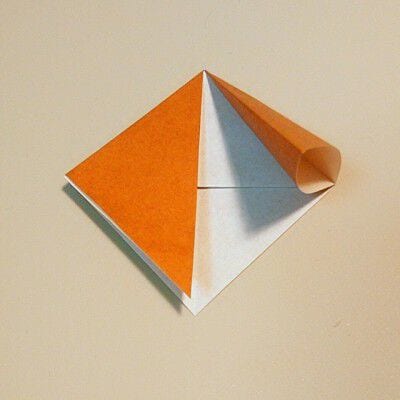
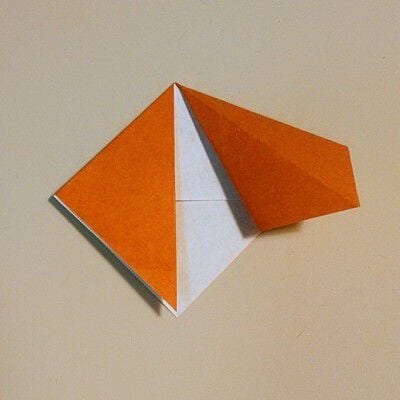
In the same way, open the left side and fold it.
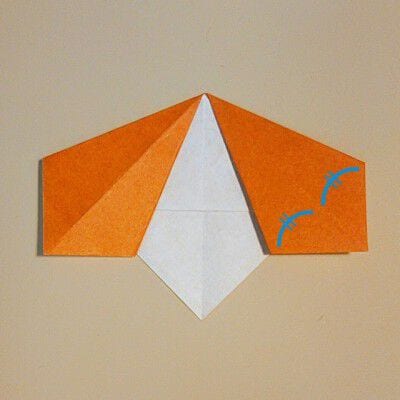
Fold the bottom corner up a little to make a dog nose.
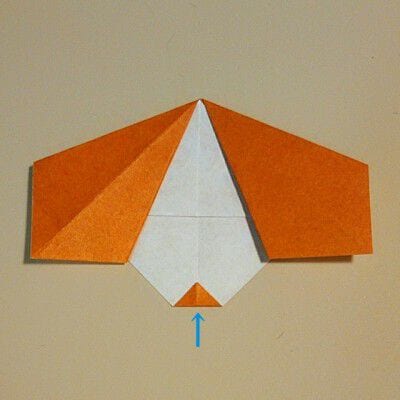
Turn it over.
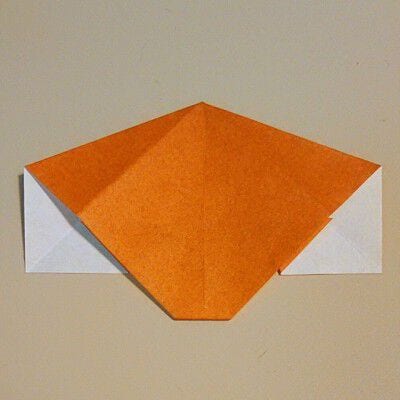
Fold it in half along the centerline so that the right side is on the left.
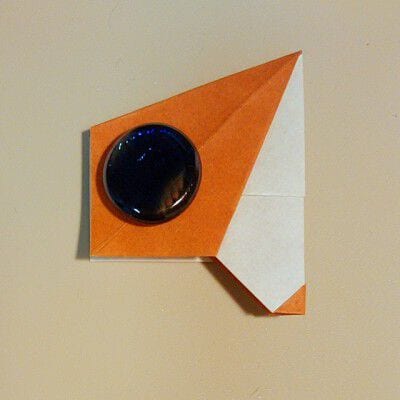
Fold the top corner down about 2 cm and make a crease.
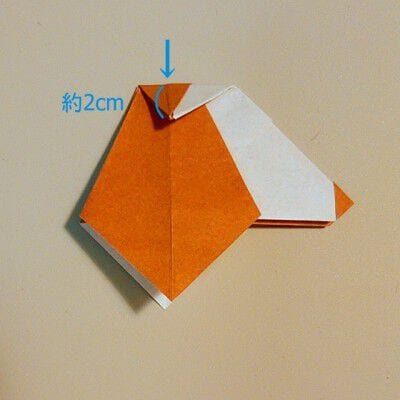
Put it back and fold it along the crease.
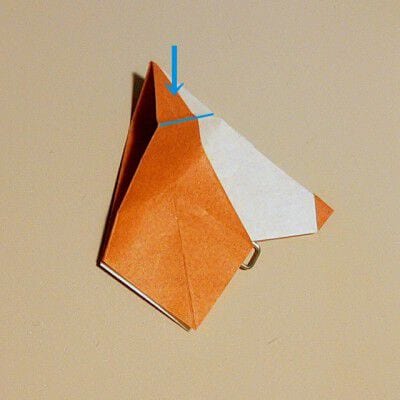
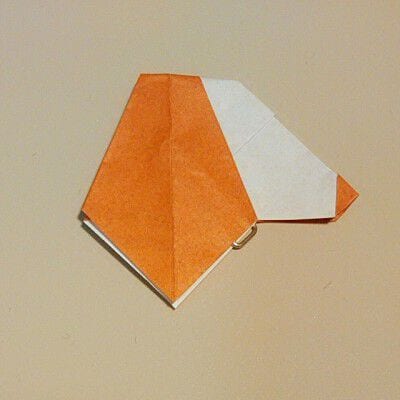
Add the eyes and the dog's head is done.
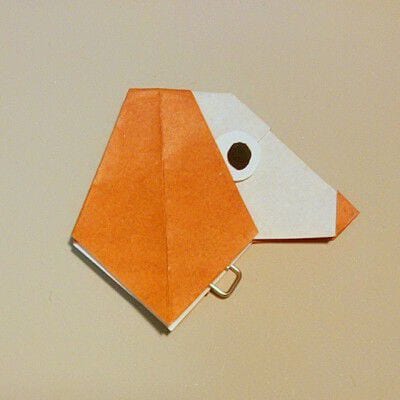
Join the head to the body you folded from the first piece.
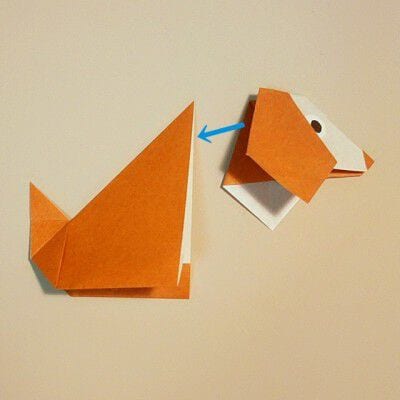
Open the body out a little, adjust the angle of the head, and your dog is done!
Thanks for following along! How did yours turn out?
You can fix the head to the body with glue or clear tape on the inside. Leave them unglued and the head wobbles when you touch it, which I think is rather cute.




