
Flat Rectangular Origami Box
Some boxes reward you slowly, fold by fold, as the walls climb. This one works the other way: the first thirteen steps are nothing but creases, horizontal valley-folds crossed by four more valley-folds, all applied and unfolded again so the paper ends up covered in a neat grid. Then, quite suddenly, steps fourteen to seventeen open that grid into a box and push it into its final, settled shape.
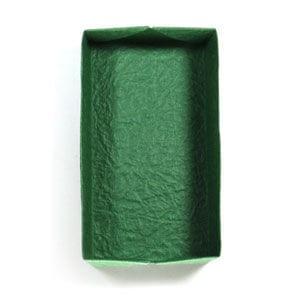
What you get is not a cube but a long, low tray - about 2:4:1 in width to length to height - which is exactly the proportion a desk drawer organizer or a pencil tray wants. The tutorial rates it very easy and asks for only one special move, the Z-fold. Folding it in paper that looks different front and back makes every step easier to follow, which is a small hint that will save you a great deal of squinting.
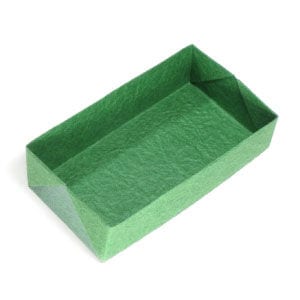
This page is for those who want instructions for folding a flat rectangular origami box.
This flat rectangular origami box is very easy to fold. The ratio among the width, the length, and the height of the rectangle is 2:4:1. The one special folding technique involved in this model is the Z-fold.
Before working on this model, you need to know what a valley-fold and a mountain-fold are. If you know these two folding techniques, then you will have no problem making an origami box.
If you are ready, then let's get started.
You may use any kind of paper to fold the origami box (*it is easier if the front and the back side of the paper are slightly different whether it be in texture or color).
Make sure the paper you use is a square (all sides are equal and all the angles equal 90 degrees). The size of the paper is 15cm x 15cm.
This is the front side of a square paper.
This is the back side of a square paper.
STEP 1.
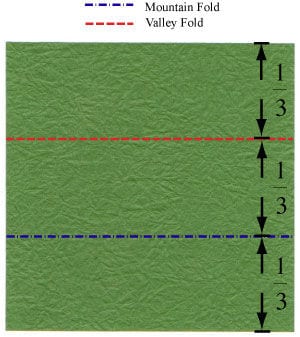
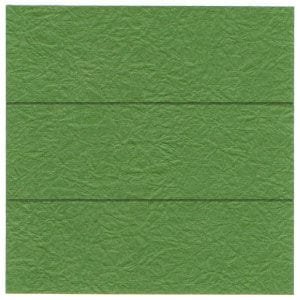
Let's start with the back side of the paper facing up. Prepare to apply a horizontal “Z-fold” and then unfold.
STEP 2.
Apply the horizontal “Z-fold” of the step #1 and then unfold.
STEP 3.
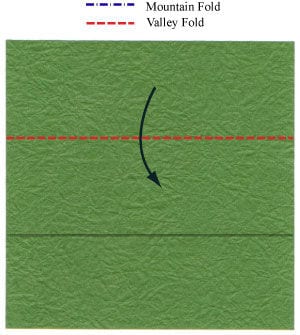
Prepare to apply a horizontal “valley-fold”.
STEP 4.
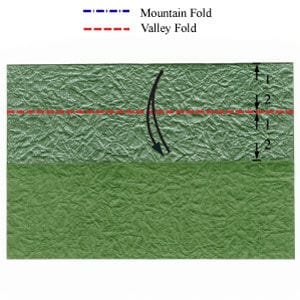
Apply the horizontal “valley-fold” of the step #3. Prepare to apply another horizontal “valley-fold” and then unfold.
STEP 5.
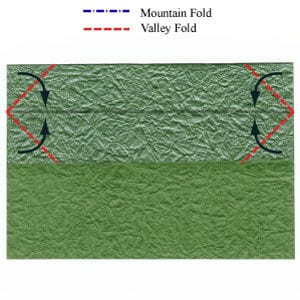
Apply the horizontal “valley-fold” of the step #4 and then unfold. Prepare to apply four “valley-folds”.
STEP 6.
Apply four “valley-folds” of the step #5. Prepare to apply a horizontal “valley-fold”.
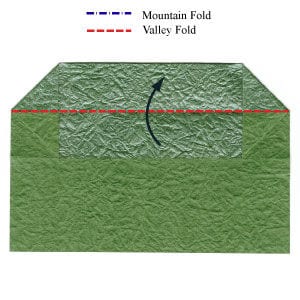
STEP 7.
Apply the horizontal “valley-fold” of the step #6. Prepare to apply a horizontal “valley-fold”.
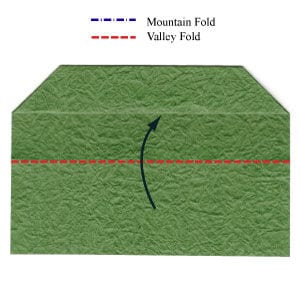
STEP 8.
Apply the horizontal “valley-fold” of the step #7. Prepare to apply a horizontal “valley-fold” and then unfold.
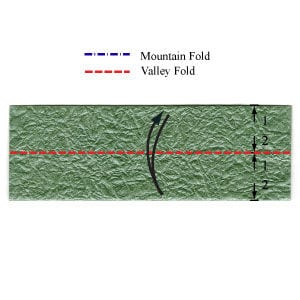
STEP 9.
Apply the horizontal “valley-fold” of the step #8 and then unfold. Prepare to apply four “valley-folds”.
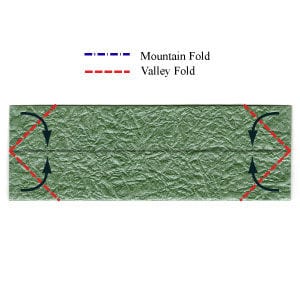
STEP 10.
Apply four “valley-folds” of the step #9. Prepare to apply a horizontal “valley-fold”.
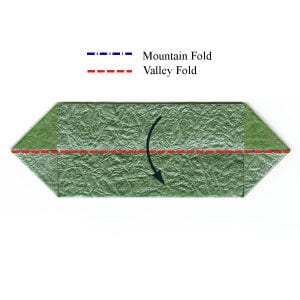
STEP 11.
Apply the horizontal “valley-fold” of the step #10. Prepare to rotate the model by 90 degrees.
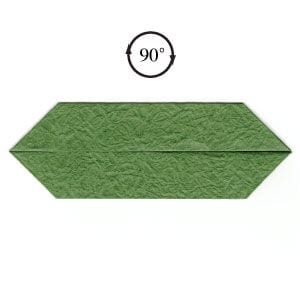
STEP 12.
Rotate the model by 90 degrees. Prepare to apply two horizontal “valley-folds” and then unfold.
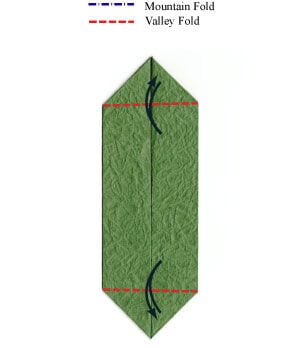
STEP 13.
Apply two horizontal “valley-folds” of the step #12 and then unfold. Prepare to open the box.
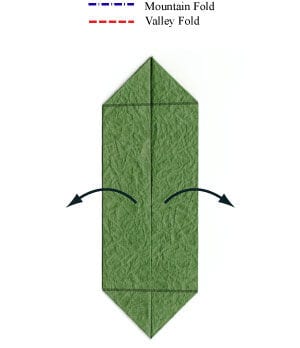
STEP 14.
Start opening the box.
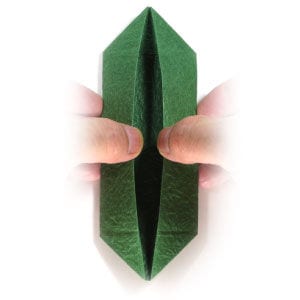
STEP 15.
Complete opening the box. Prepare to push the front side.
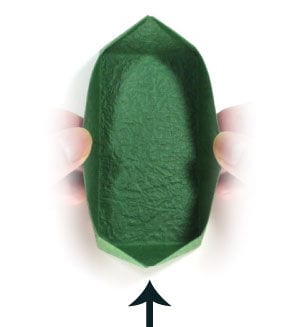
STEP 16.
Push the front side to make it flat. Prepare to push the back side following the arrow direction.
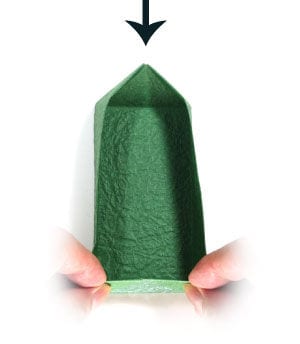
STEP 17.
Push the back side to make it flat.
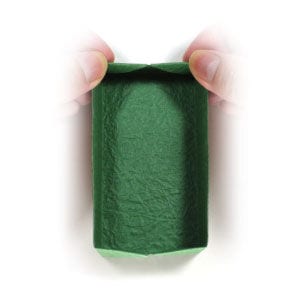
STEP 18.
The box is done now.
STEP 19.
Congratulations! You have just completed making a flat rectangular origami box.




