
Frog Origami Base
There is something quietly impressive about folding a frog that never jumps, yet looks ready to. Before you get there, you need the frog origami base — a sturdy, diamond-shaped foundation that grows straight out of the fruit base you may have already tried. If you have folded that one, you already know most of the moves; this tutorial just swaps a few folds for petal folds and turns the paper around a couple of times.
The best part is how musical the whole process feels. You work one side, turn the model over, work the other side — then rotate it, coax the layers open with four fingers, and finish with a second pass of the same folds. The repetition is not a mistake; it is the secret. By the final fold you will be holding a base that looks almost architectural, and you will be one short leap away from your first paper frog.
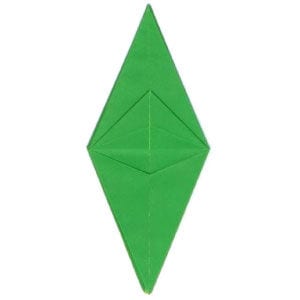
This page is for those who want instructions for folding a frog origami base.
This frog origami base is derived from the fruit origami base. The fruit base comes from the well-known square base. You can also find instructions for making a frog base from the traditional origami frog, up to step 27.
Before working on this model, you need to know what valley folds and mountain folds are. If you know these two folding techniques, then you will have no problem making the origami frog base.
If you are ready, then let’s get started.
The paper I am using here is a typical origami paper with 15cm x 15cm size.
This is the front side of the paper.
This is the back side of the paper.
STEP 1.
Let’s start with the fruit base. Prepare to apply two valley folds and then unfold.
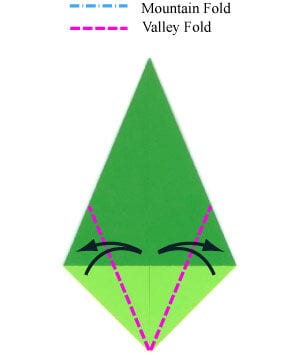
STEP 2.
Apply the two valley folds of step 1 and then unfold. Prepare to apply a “petal fold”.
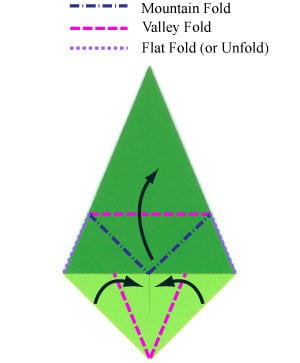
STEP 3.
Apply the “petal fold” of step 2. Prepare to turn the model over.
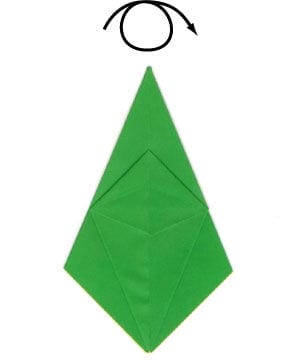
STEP 4.
Turn the model over. Prepare to apply two valley folds and then unfold.
STEP 5.
Apply the two valley folds of step 4 and then unfold. Prepare to apply a “petal fold”.
STEP 6.
Apply the “petal fold” of step 5. Prepare to rotate the model by 90 degrees.
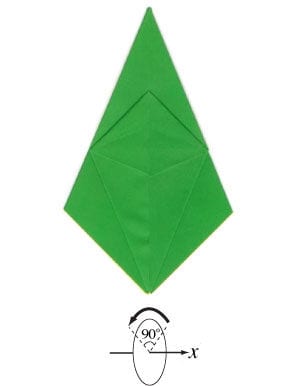
STEP 7.
Rotate the model by 90 degrees according to step 6. Prepare to rotate the model by 90 degrees horizontally.
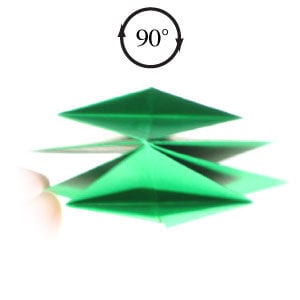
STEP 8.
Rotate the model by 90 degrees horizontally.
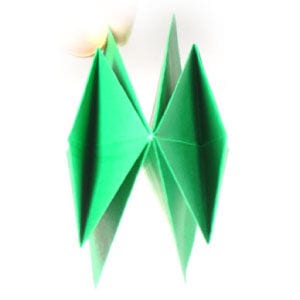
STEP 9.
Prepare to move four fingers following the arrow directions.
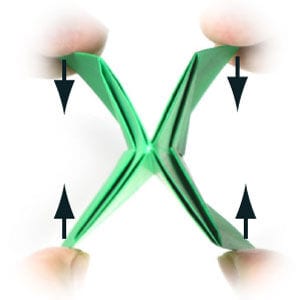
STEP 10.
Move four fingers following the arrow directions of step 9. Prepare to rotate the model by 90 degrees.
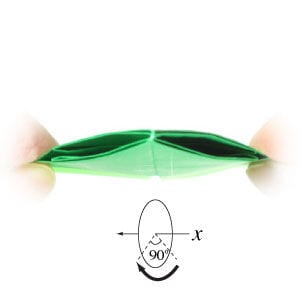
STEP 11.
Rotate the model by 90 degrees according to step 10. Now, half of the work of making the origami frog base is completed. Prepare to apply two valley folds and then unfold.
STEP 12.
Apply the two valley folds of step 1 and then unfold. Prepare to apply a “petal fold”.
STEP 13.
Apply the “petal fold” of step 2. Prepare to turn the model over.
STEP 14.
Turn the model over. Prepare to apply two valley folds and then unfold.
STEP 15.
Apply the two valley folds of step 4 and then unfold. Prepare to apply a “petal fold”.
STEP 16.
Apply the “petal fold” of step 5. Congratulations! You have just completed making a frog origami base.





