
How to Fold an Origami Heart Boat
Turn the boat upside down and it is a heart. That is the whole idea, and it is a better one than it sounds: the shape is neither drawn on nor cut out, it simply falls out of the way the hull is folded.
Be prepared to spend most of your time creasing rather than folding. Steps 1 to 7 do nothing but lay in guidelines — halves, quarters, both diagonals, a cushion fold, four more valley folds, twelve creases in all. Step 8 shows the pattern they make, and from step 9 the paper collapses along it. Get those early creases accurate and the collapse is almost automatic; get them sloppy and the hull never quite sits right.
Use a 15 cm square, and paper that is a different colour on each side — the reverse ends up as the inside of the boat, which is where the heart reads most clearly.
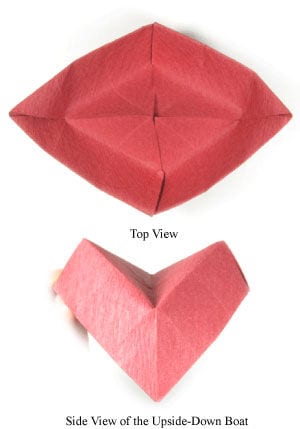
These instructions show how to fold an origami heart boat.
Seen upside down from the side, the origami heart boat resembles a heart shape.
Before starting, you will need to know what a valley fold and a mountain fold are. With those two techniques you will have no trouble making the heart boat.
Any kind of paper will do. The sheet used here is a 15 cm x 15 cm square, a comfortable size if you are not yet experienced at folding — once you know the model, try a smaller sheet.
This is the front side of the paper.
This is the back side, which here happens to be the same colour as the front. It does not have to be: choose a different colour if you like, since this side will become the interior of the heart boat.
STEP 1. Start with the back side of the paper facing up. Prepare to mountain-fold the paper in half horizontally and then unfold.
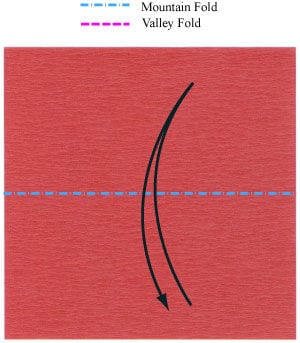
STEP 2. Mountain-fold in half horizontally and unfold. Prepare to mountain-fold in half vertically and then unfold.
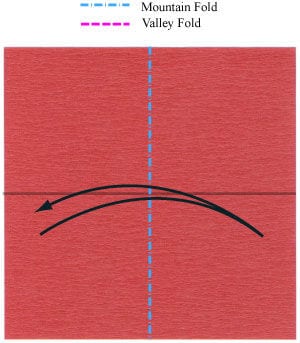
STEP 3. Mountain-fold in half vertically and unfold. Prepare to make a diagonal valley fold and then unfold.
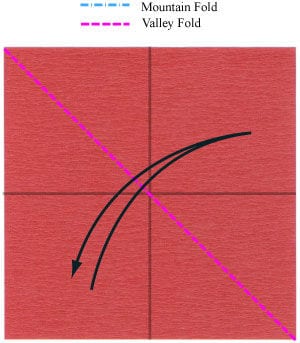
STEP 4. Make the diagonal valley fold and unfold. Prepare to make the second diagonal valley fold and then unfold.
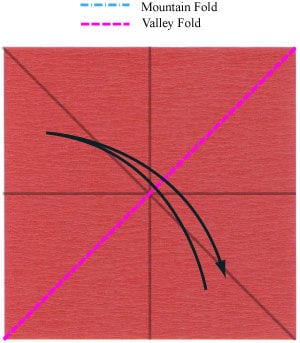
STEP 5. Make the second diagonal valley fold and unfold. Prepare to make a cushion fold and then unfold.
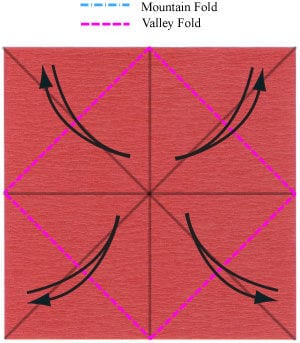
STEP 6. Make the cushion fold and unfold. Prepare to make four valley folds and then unfold.
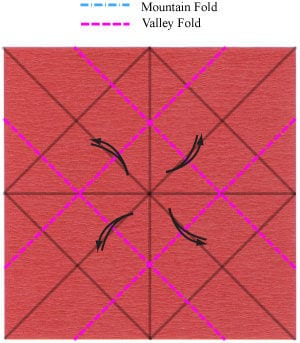
STEP 7. Make the four valley folds and unfold. Check that you have 12 crease lines in all.
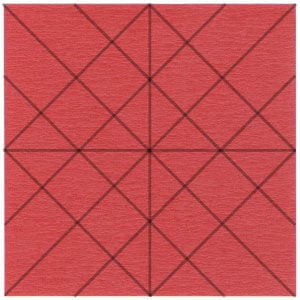
STEP 8. Prepare to fold the crease pattern shown on the left.
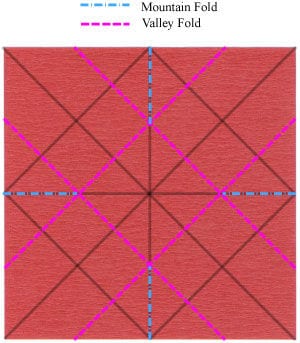
STEP 9. Fold the crease pattern from step 8. Prepare to make a mountain fold and then a valley fold.
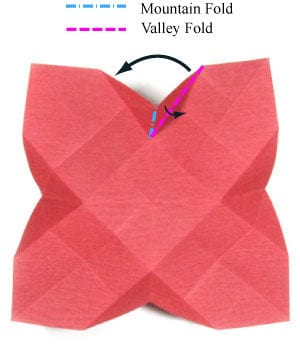
STEP 10. Make the mountain fold and then the valley fold. Prepare to make a valley fold.
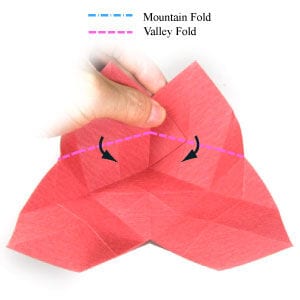
STEP 11. Make the valley fold. Prepare to rotate the boat model by 180 degrees.
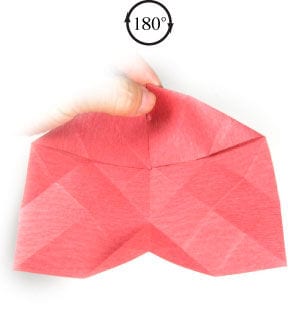
STEP 12. Rotate the boat model by 180 degrees. Prepare to make a mountain fold and then a valley fold.
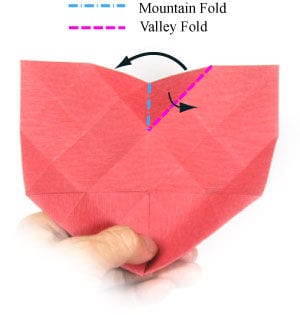
STEP 13. Make the mountain fold and then the valley fold. Prepare to make a valley fold.
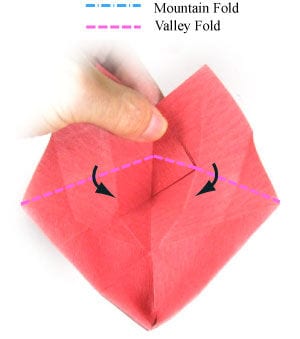
STEP 14. Make the valley fold. Prepare to turn the boat model over.
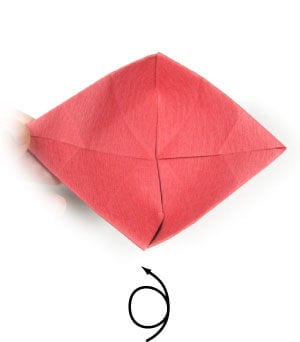
STEP 15. Turn the boat model over. Prepare to make a horizontal valley fold.
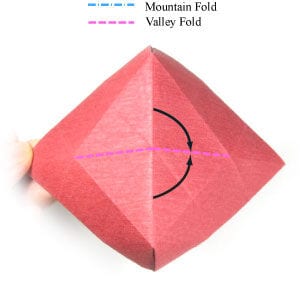
STEP 16. Make the horizontal valley fold. Prepare to release the fold you are holding.
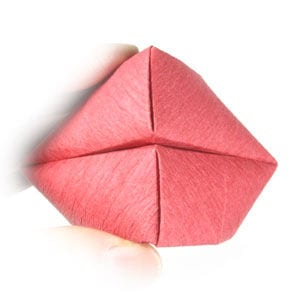
STEP 17. Release the fold from step 16. Prepare to rotate the boat model by 90 degrees.
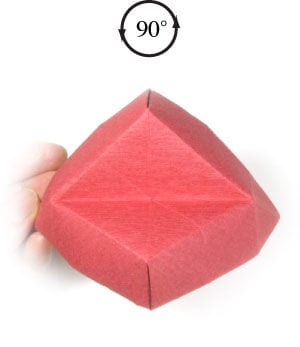
STEP 18. Rotate the boat model by 90 degrees. Prepare to rotate it by another 90 degrees.
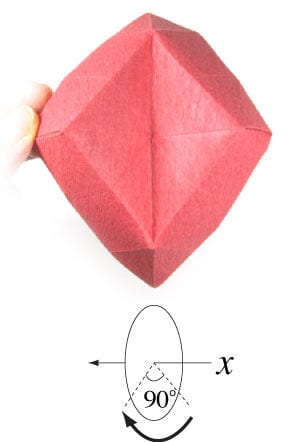
STEP 19. Rotate the boat model by 90 degrees. Now you can see the shape of the heart — this is the upside-down front view of the model. Prepare to rotate it by another 90 degrees.
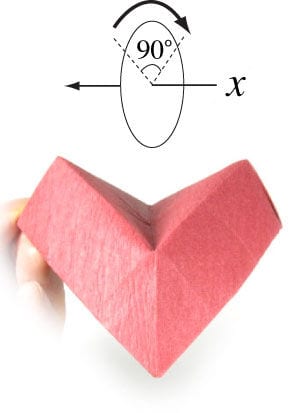
STEP 20. Rotate the boat model by 90 degrees. Prepare to rotate it by 90 degrees again.
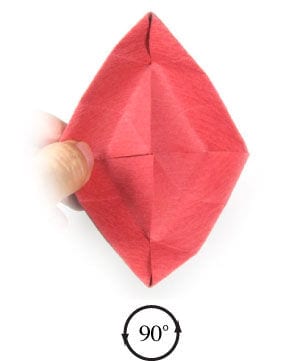
STEP 21. Rotate the boat model by 90 degrees. This is the top view of the model.
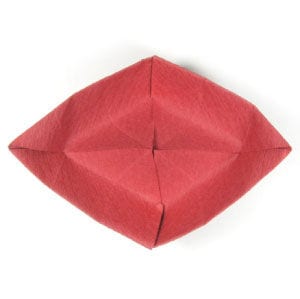
STEP 22. This is the perspective view of the model. Congratulations — you have completed making an origami heart boat.





