
Fish Base
If you've ever folded a traditional origami fish, the shape at the centre of it all is this little base — a flat, symmetrical platform with two pointed flaps standing up like fins. The fish base is one of the oldest tricks in the origami repertoire, and once you know it, you'll meet it again and again in fish, birds, butterflies and other animals that need a body, wings and a tail.
It looks more involved than the folds you've done so far, but it's really just two kite folds followed by a rabbit ear fold on each side. Everything happens on the creases you make in the first few steps, so the paper does half the work for you. Start with a square — white side up, as the traditional version asks — and we'll fold one together.
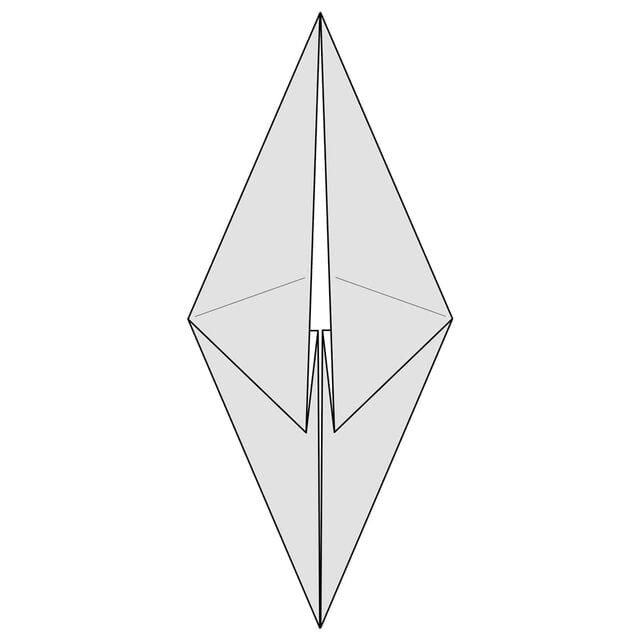
This base is used to fold a traditional origami fish — which is where its name comes from.
STEP 1. Start with a square sheet of paper with the white side up. Fold it in half along the dotted line and then unfold it. You will use this crease as a guide line in later steps.
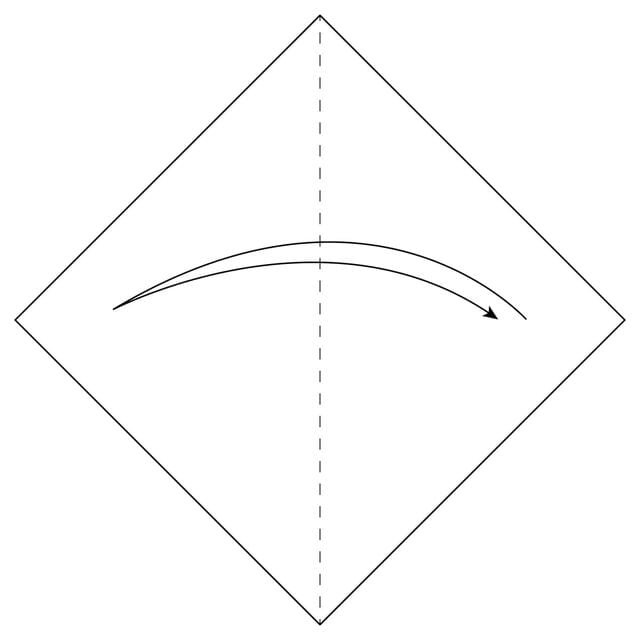
STEP 2. Fold the bottom right part of the paper to the centre along the dotted line.
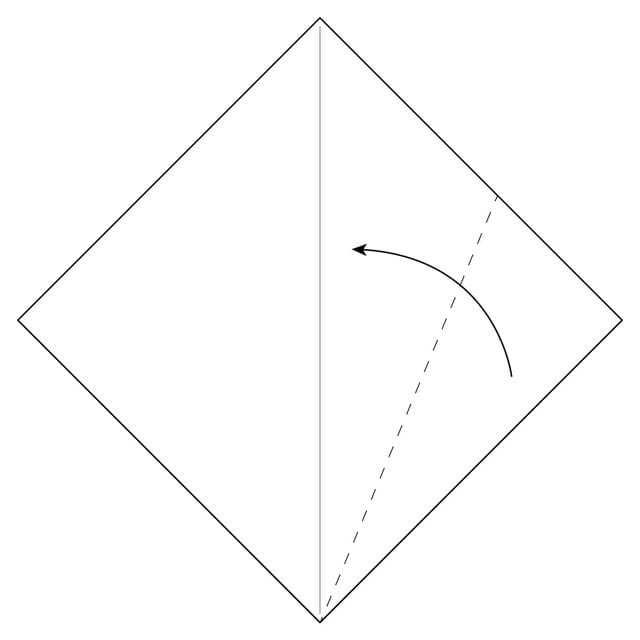
STEP 3. Crease this fold well and then unfold it.
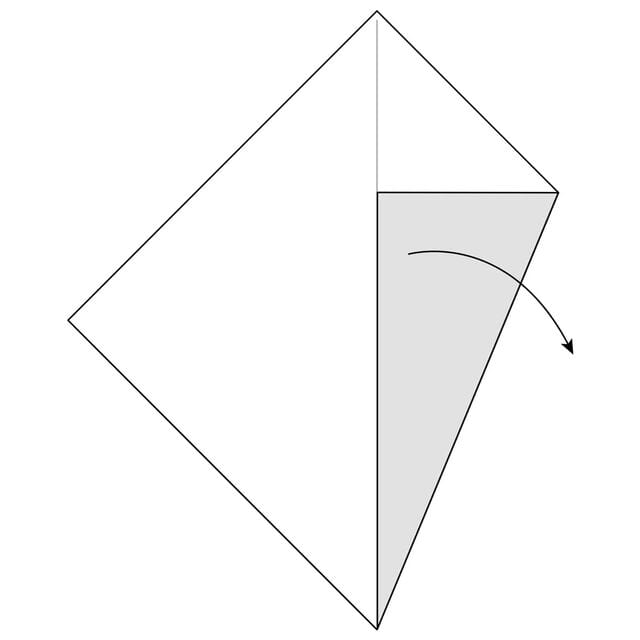
STEP 4. Fold the top right part of the paper to the centre along the dotted line.
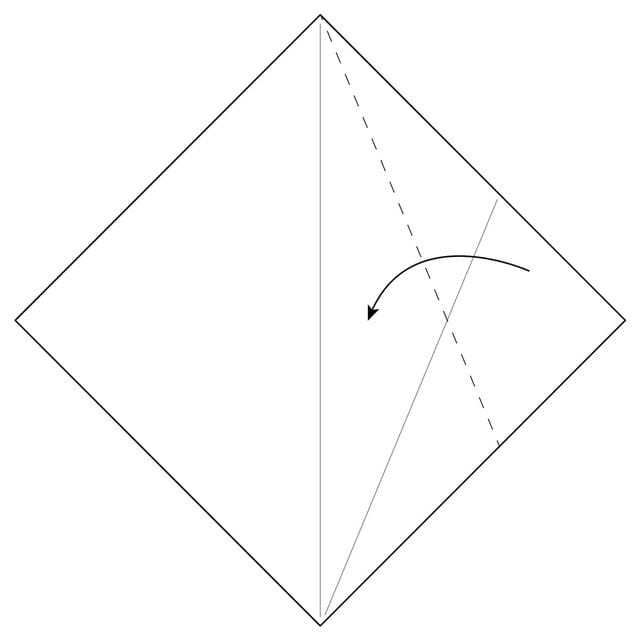
STEP 5. Crease this fold well and then unfold it.
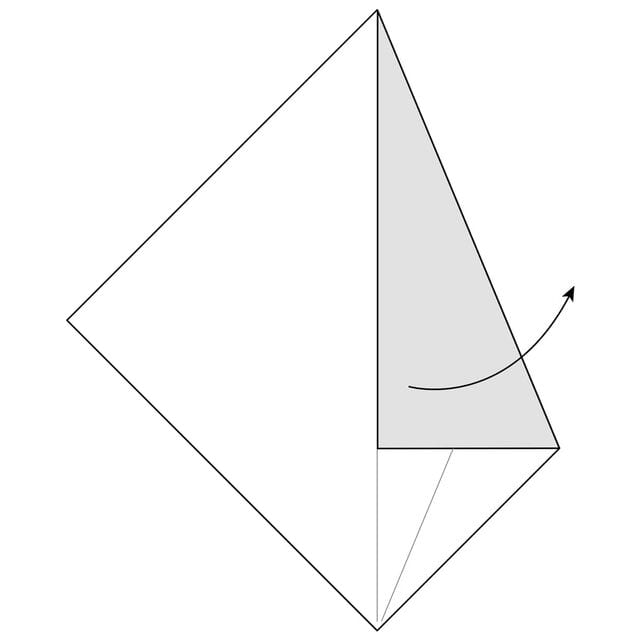
STEP 6. Make a rabbit ear fold on the right side of the model following the existing creases.
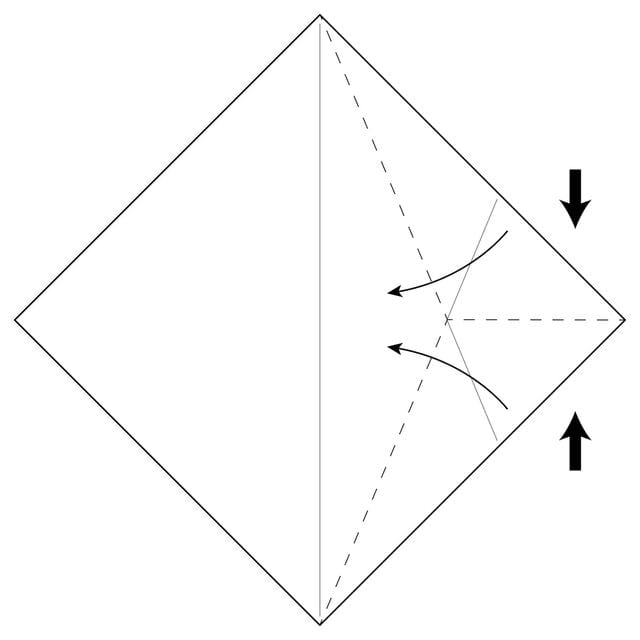
STEP 7. Fold the flap of paper down to the bottom and fold everything flat.
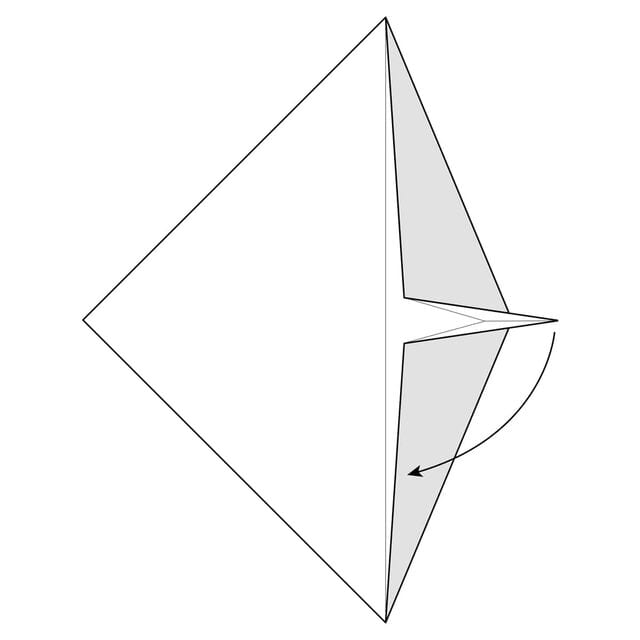
STEP 8. Fold the bottom left part of the paper to the centre along the dotted line.
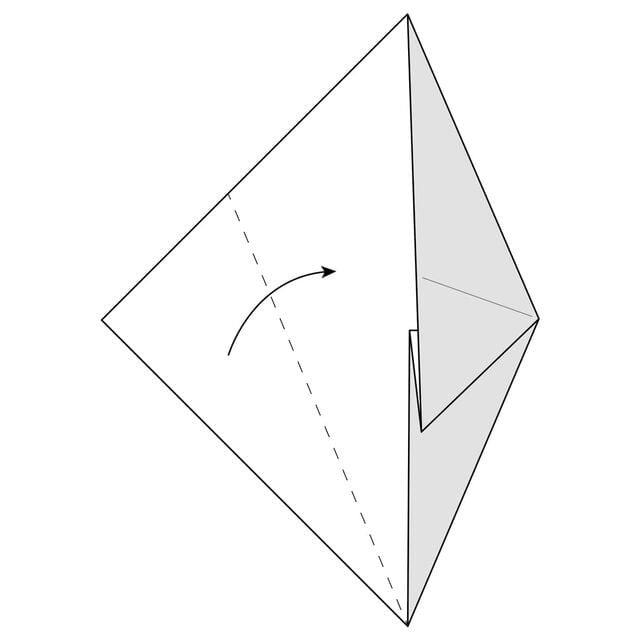
STEP 9. Crease this fold well and then unfold it.
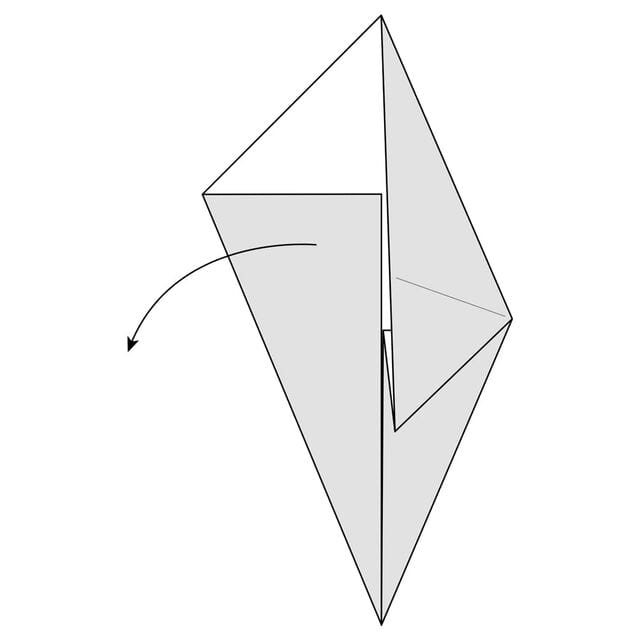
STEP 10. Fold the top left part of the paper to the centre along the dotted line.
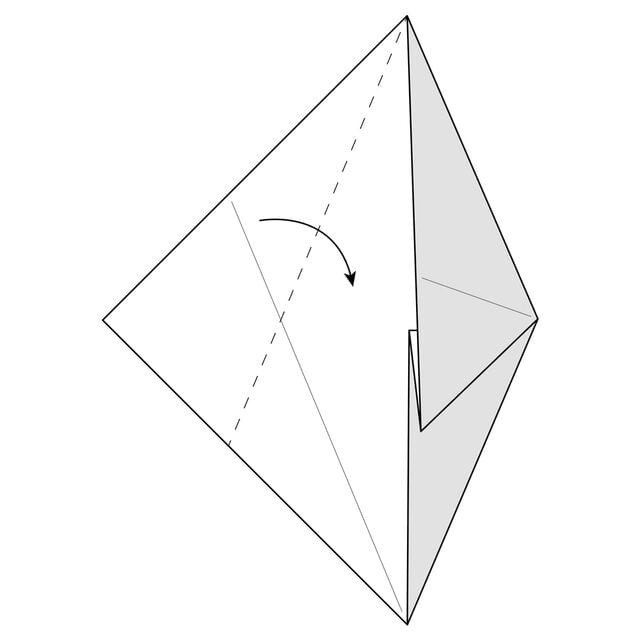
STEP 11. Crease this fold well and then unfold it.
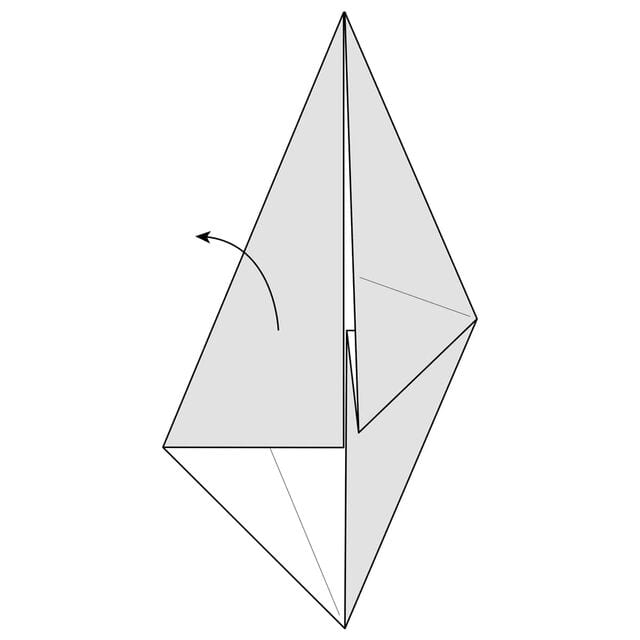
STEP 12. Make a rabbit ear fold on the left side of the model following the existing creases.
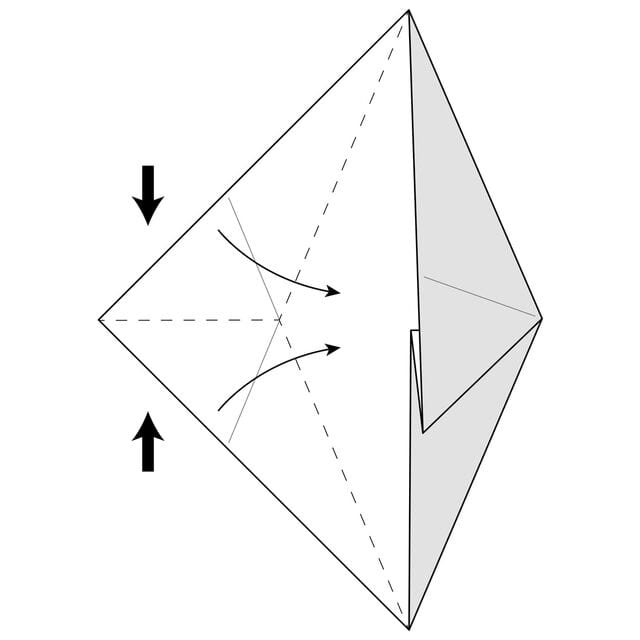
STEP 13. Fold the flap of paper down to the bottom and fold everything flat.
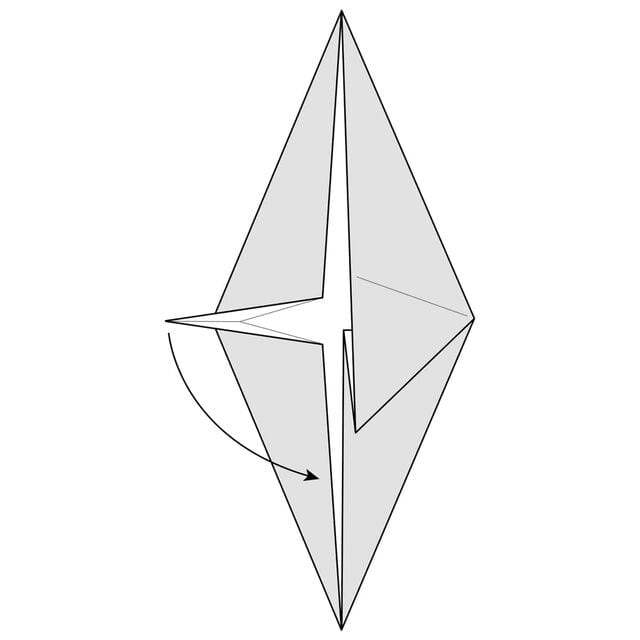
Your completed fish base is ready.




