Lily (Short Tutorial)
Few paper flowers are as instantly recognizable as the lily, and there is something quietly satisfying about watching a flat square turn into a blooming shape in just a handful of folds. This short version keeps things simple — if you can make a waterbomb base, you are already most of the way there.
Once it is done, try grouping a few in different pinks and whites, or tuck one into a handmade card. It is the kind of fold you will happily come back to whenever spring rolls around.




Step 1. Start with your paper coloured side up.
Fold it in half, then in half again, as shown. Crease well, then open it back out.
Step 2. Turn the paper over and fold it in half diagonally in both directions. Crease well and open it out again.
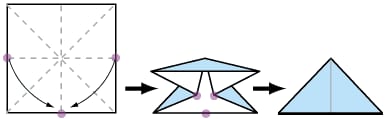
Step 3. Holding the points shown, bring them both down to the centre point on the bottom line. Flatten the model. This is called a waterbomb base.

Step 4. Fold the top triangle into the centre and unfold. Using this crease, open out the triangle and flatten it.

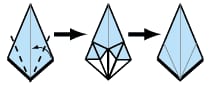

Step 5. Repeat Step 4 on all four flaps of the waterbomb base. The model will now look like this.
Step 6. On the uppermost diamond, fold the outside corners into the centre line, crease well, then open.
Step 7. Fold the whole model in half and open it.
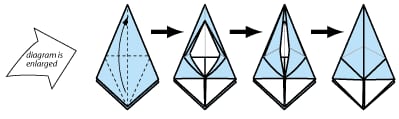
Step 8. Using the creases made in Steps 6 and 7, lift the bottom point of the model (the uppermost layer only) up to the top point, bringing in the sides of the model at the same time, as shown.

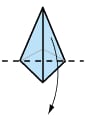
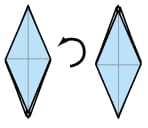
Step 9. Repeat Steps 6, 7 and 8 on each of the four sides. The model should now look like this.
Step 10. Now fold down each of these triangles on all four sides.
Step 11. Rotate the model upside down, so the open part is at the top.
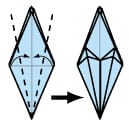

Step 12. Fold the outer flaps toward the centre and flatten them.
Step 13. Repeat Step 12 on all four sides of the model. The model should now look like this.
Step 14. Fold down all the petals, opening the flower as you go.

Completed lily!