
Easy Origami Pig
Most origami pigs are charming but a little floppy. This one is sturdier, and the reason is a clever move called the locking fold — the same trick that gives models like the New Kawasaki Rose their crisp, self-holding shape. You will spend the first half of the tutorial quietly laying down creases, twenty-four of them in a neat grid, and then, almost all at once, the paper collapses into a pig with two curled ears. It is a lovely reminder that patient preparation is what makes origami click.
Do not be put off by the thirty-five steps. Most are short, and the build keeps repeating the same handful of motions, so it settles into a pleasant rhythm once you get going. All you need is one square sheet of paper and a little patience. Add drawn or googly eyes at the end, and you will have a pig with far more personality than anything folded from a few quick triangles.
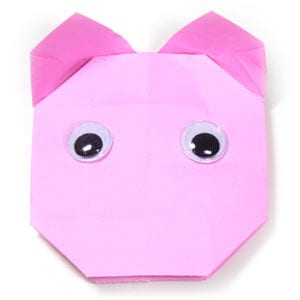
This page is for those who want to learn how to fold an easy origami pig.
This easy origami pig takes 35 steps to complete. The key technique you will learn here is the “locking fold”, a somewhat advanced technique used for models such as the New Kawasaki Rose.
Before starting this model, make sure you know what valley-folds and mountain-folds are. With those two basic techniques you will have no trouble folding this pig.
If you are ready, then let's get started.
You may use any kind of paper for this pig. Here I use origami paper with the same color on both sides, sized 15cm x 15cm.
This is the front side of the paper.
This is the back side of the paper.
STEP 1
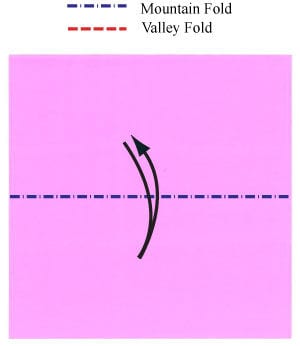
Start with a “gate-fold”, then apply a horizontal “mountain-fold” and unfold.
STEP 2
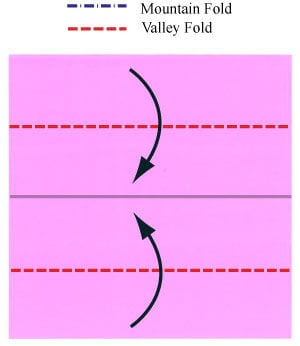
Make the horizontal mountain-fold from step 1, then unfold. Prepare to apply two valley-folds.
STEP 3
Apply the two valley-folds from step 2. Prepare to turn the model over.
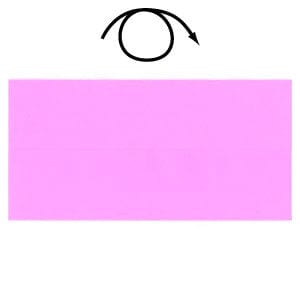
STEP 4
Turn the model over. Prepare to apply two valley-folds only on the front-most layer.
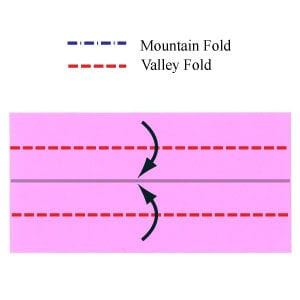
STEP 5
Apply the two valley-folds from step 4. Make sure the folds affect only the front-most layer. Prepare to open the paper.
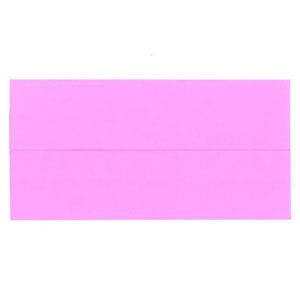
STEP 6
Open the paper. You should have five crease lines. Prepare to apply a vertical mountain-fold and then unfold.
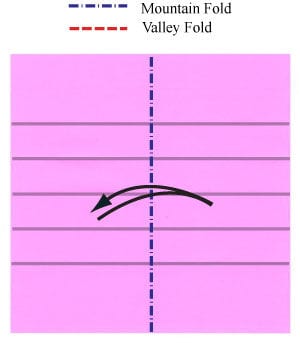
STEP 7
Apply the vertical mountain-fold from step 6, then unfold. Prepare to apply two vertical valley-folds.
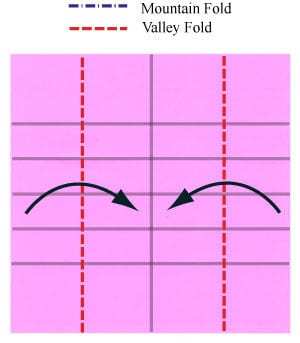
STEP 8
Apply two vertical valley-folds. Prepare to turn the model over.
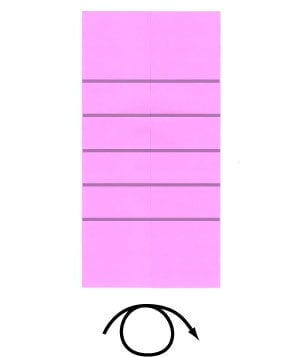
STEP 9
Turn the model over. Prepare to apply two valley-folds only on the front-most layer.
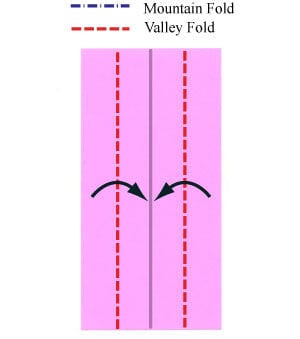
STEP 10
Apply the two valley-folds from step 9. Make sure the folds affect only the front-most layer. Prepare to open the paper.
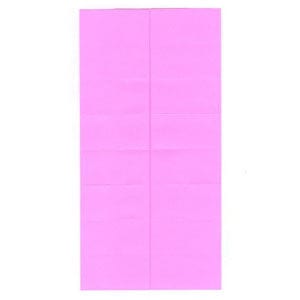
STEP 11
Open the paper. You should have 10 crease lines. Prepare to apply a valley-fold and then unfold.
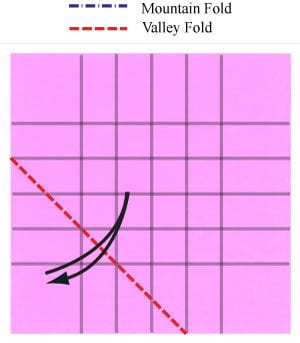
STEP 12
Apply the valley-fold from step 11, then unfold. Prepare to apply a valley-fold and then unfold.
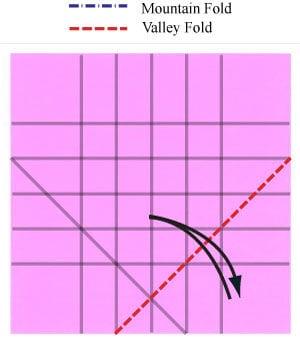
STEP 13
Apply the valley-fold from step 12, then unfold. Prepare to apply a valley-fold and then unfold.
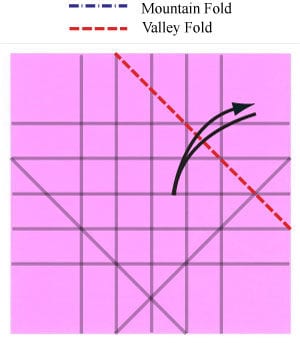
STEP 14
Apply the valley-fold from step 13, then unfold. Prepare to apply a valley-fold and then unfold.
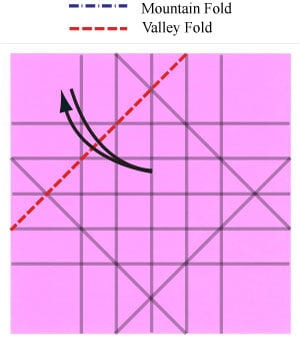
STEP 15
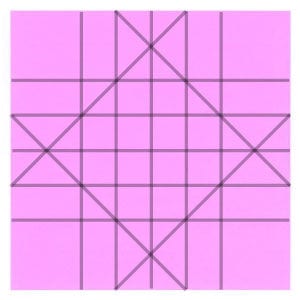
Apply the valley-fold from step 14, then unfold. Now, you have 24 crease lines.
STEP 16
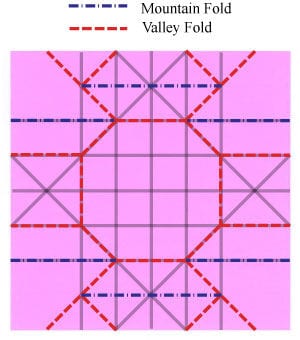
Next we will apply the crease pattern shown on the left, starting from step 17.
STEP 17
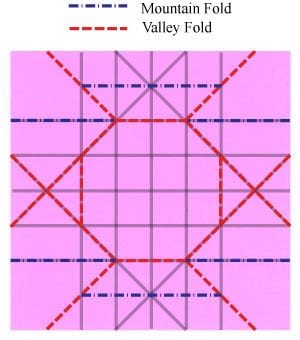
Prepare to apply the crease pattern (CP) shown on the left.
STEP 18
Apply the crease pattern from step 17.
STEP 19
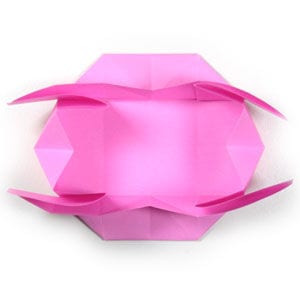
Start flattening the upper part of the model.
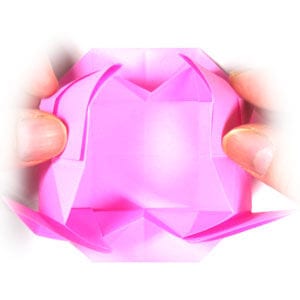
STEP 20
Continue flattening the upper part of the model.
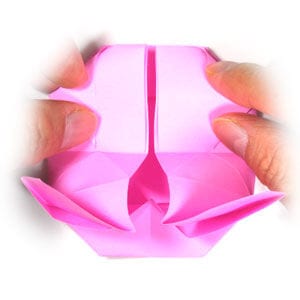
STEP 21
Finish flattening the upper part of the model.
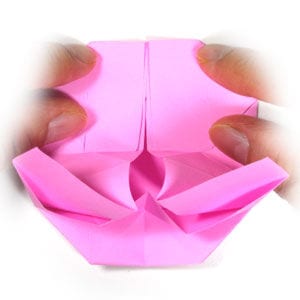
STEP 22
Start flattening the lower part of the model.
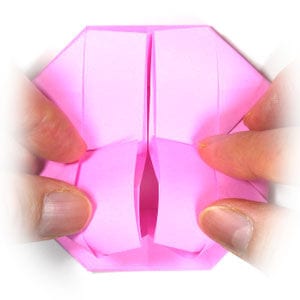
STEP 23
Finish flattening the lower part of the model.
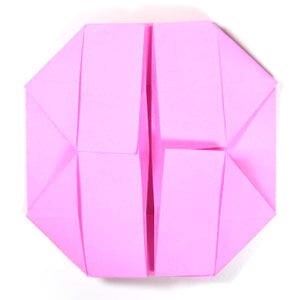
STEP 24
Now concentrate on the upper-left part of the model.
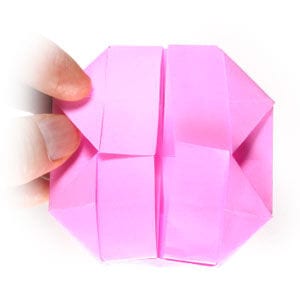
STEP 25
Open the front-most layer on the upper-left part of the model. Prepare to turn the model over.
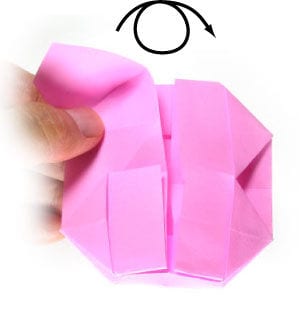
STEP 26
Turn the model over. Now look at the ear whose surface is concave downward; we will make it concave upward.
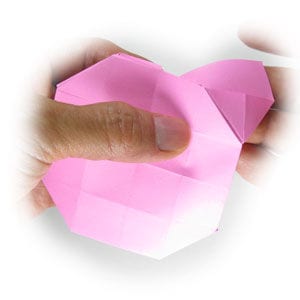
STEP 27
Start to press the top with your thumb.
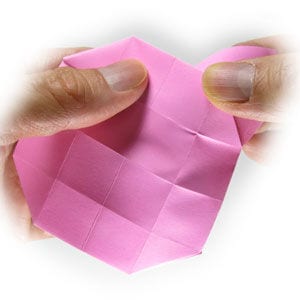
STEP 28
Continue pressing the top with your thumb.
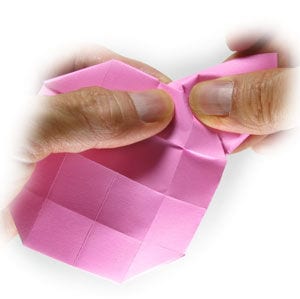
STEP 29
Flatten the top.
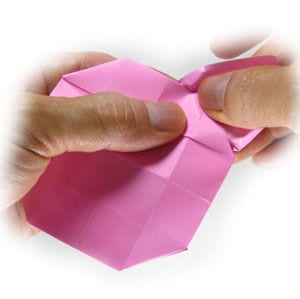
STEP 30
Smooth the surface of the petal so that its shape becomes concave upward. Prepare to turn the model over.
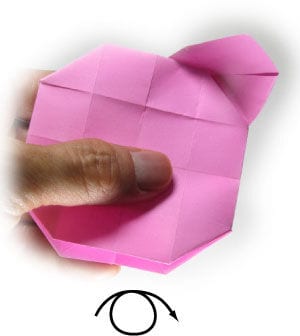
STEP 31
Turn the model over. Now concentrate on the upper-right part of the model.
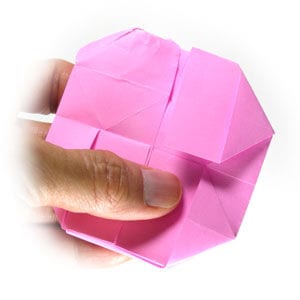
STEP 32
Open the front-most layer on the upper-right part of the model. Prepare to turn the model over.
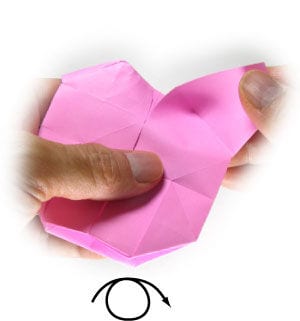
STEP 33
Turn the model over. Prepare to repeat steps 26-30.
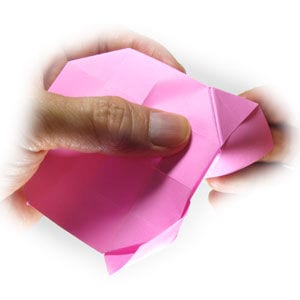
STEP 34
Repeat steps 26-30. Prepare to draw eyes or put googly eyes.
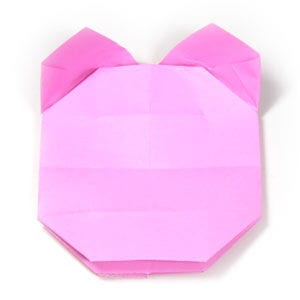
STEP 35
Draw eyes or add googly eyes. Congratulations! You have just completed an easy origami pig.




