
Origami bear face
A paper bear face is one of those folds that delivers a lot of charm for very little effort. With a single square of origami paper and nine simple steps, you get a round little head with two pointed ears and a muzzle just waiting for a face. The folding itself is all basic moves—valley folds, a center pinch, and a couple of tucks—so it is a great pick for children or first-time folders. Follow the photos, draw on the eyes and nose at the end, and you'll have an adorable bear ready to glue onto a card or a notebook.
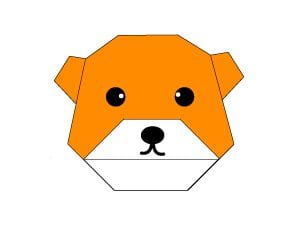
Learn how to make an easy origami bear face. Follow the instructions below—it’s fun to fold and satisfying to watch take shape. The diagrams and step-by-step photos will guide you through to a finished model.
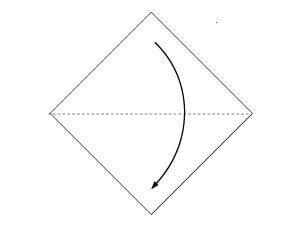
STEP 1.
Start with the paper white-side up. Fold the top corner down to the bottom corner.
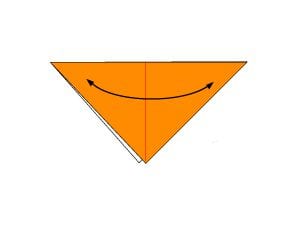
STEP 2.
Fold in half to make a crease by folding the left corner to the right corner, then unfold.
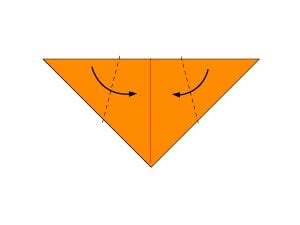
STEP 3.
Fold both corners to the center along the dotted line as shown.
STEP 4.
Fold the corners of the upper layer outward as shown.
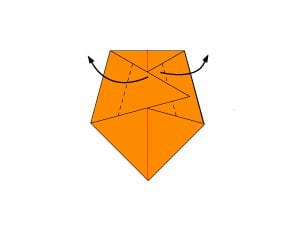
STEP 5.
Fold the corners inward along the dotted line.
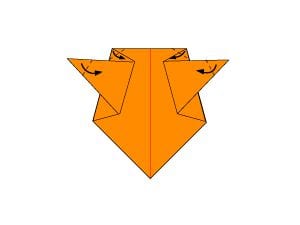
STEP 6.
Turn the paper over.
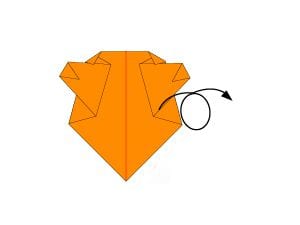
STEP 7.
Fold the bottom corner up along the dotted line.
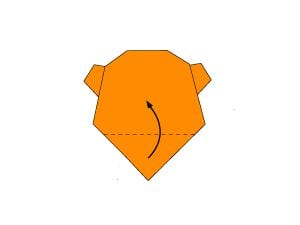
STEP 8.
Fold the bottom and top corners of the small square at the bottom behind the model.
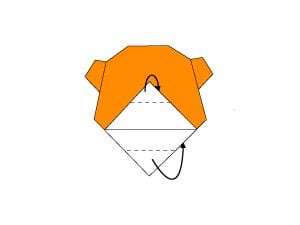
STEP 9.
Draw a face to finish.




