
Mitten
Have you ever finished folding a penguin or a little box and wished you could make something cozy to go with it? That's where this mitten comes in. It's one of those models that looks impossibly cute from the very first fold — a chunky, rounded hand-warmer that somehow comes together from a single flat square. You'll see it pop up in winter-themed origami scenes, tucked into Christmas decorations, or hanging from gifts as a handmade tag.
The whole thing takes just a few minutes, and the steps are wonderfully forgiving: the angles don't need to be exact, and the final shape does most of the work for you. Fold it in red or green and it instantly feels like the holidays; use patterned paper and it becomes a tiny statement piece for your desk. Best of all, it teaches you a couple of genuinely useful moves — layering folds and a thumb-forming tuck — that you'll reuse in plenty of other models down the line.
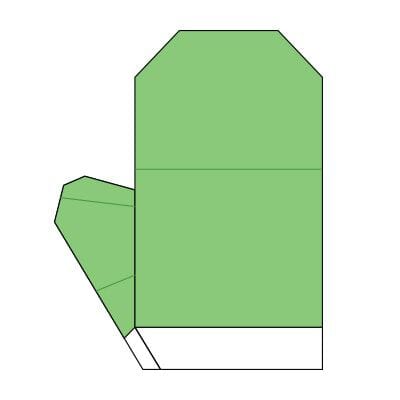
These instructions will show you how to fold an easy origami mitten. If you’re new to paper folding, we recommend taking a moment to review our beginner’s guide, which covers all the basic folds and techniques.
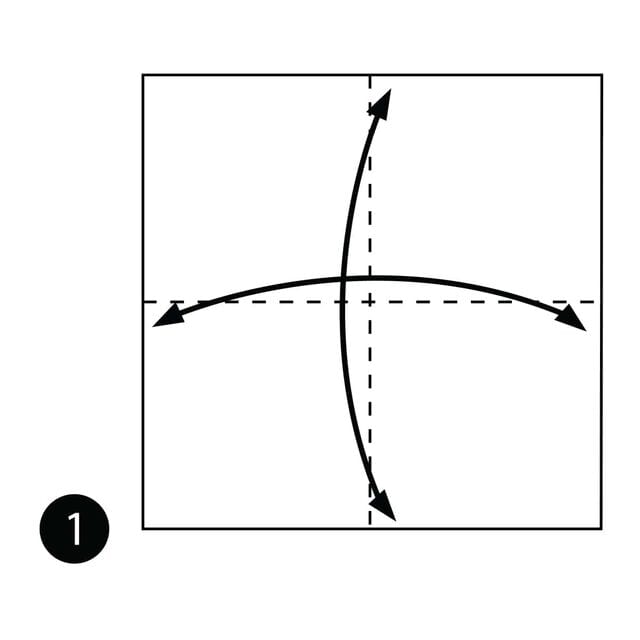
STEP 1. Fold the paper in half both ways, unfolding it after each fold.
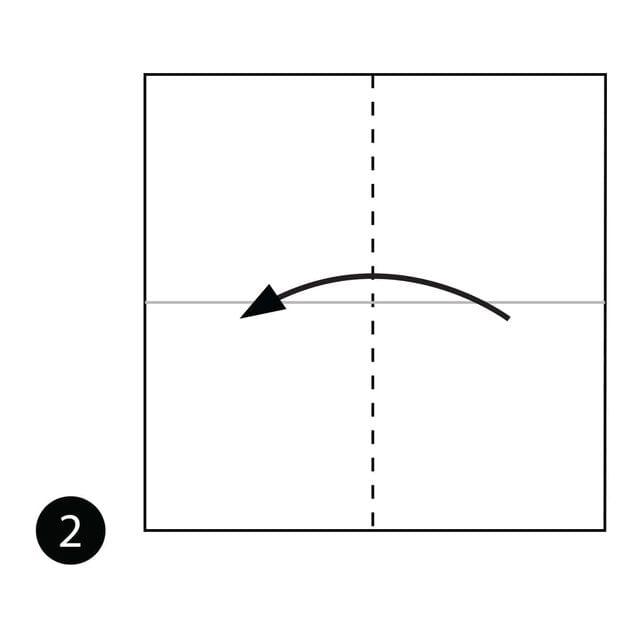
STEP 2. Fold the right side of the paper over to the left, in half.
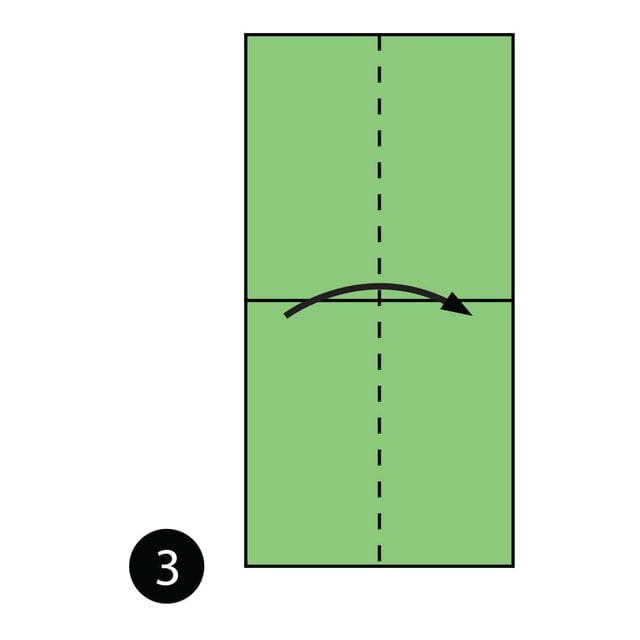
STEP 3. Fold the top layer of paper over to the right along the dotted line.
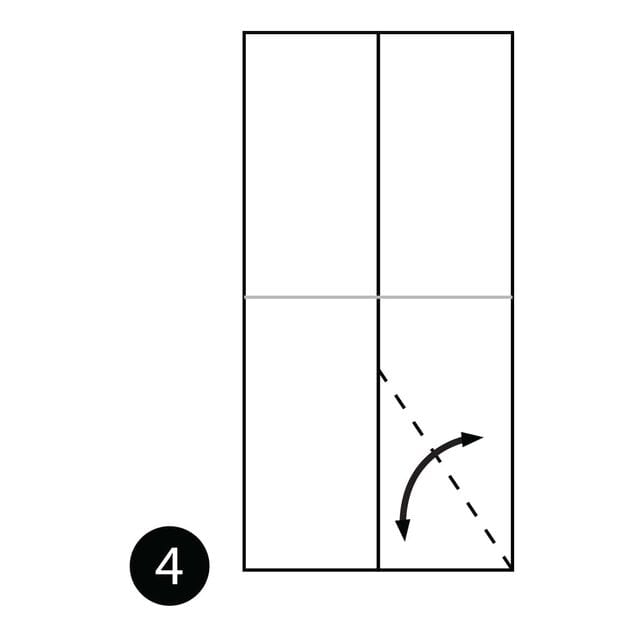
STEP 4. Fold the paper along the dotted line and then unfold it. Don’t worry about getting the angle of this fold exactly right — just get it close to what you see here.
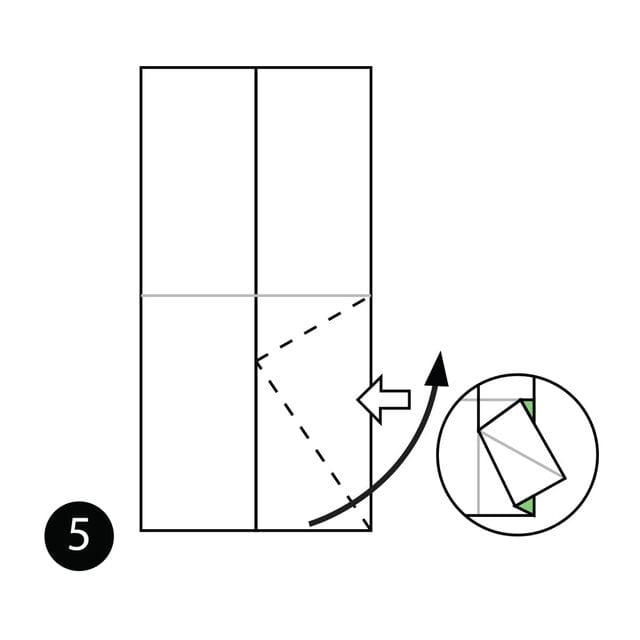
STEP 5. Open the paper out along the dotted lines. One of these lines is the crease from the last step; the next diagram shows how the paper should look now.
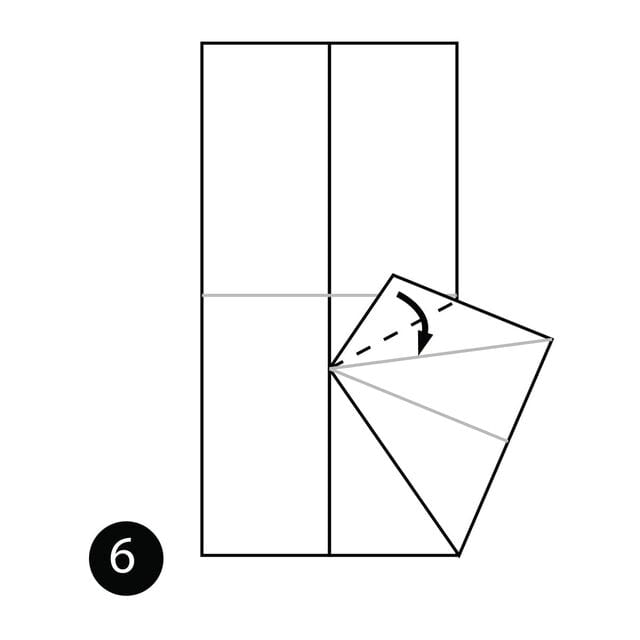
STEP 6. Fold the paper down along the dotted line.
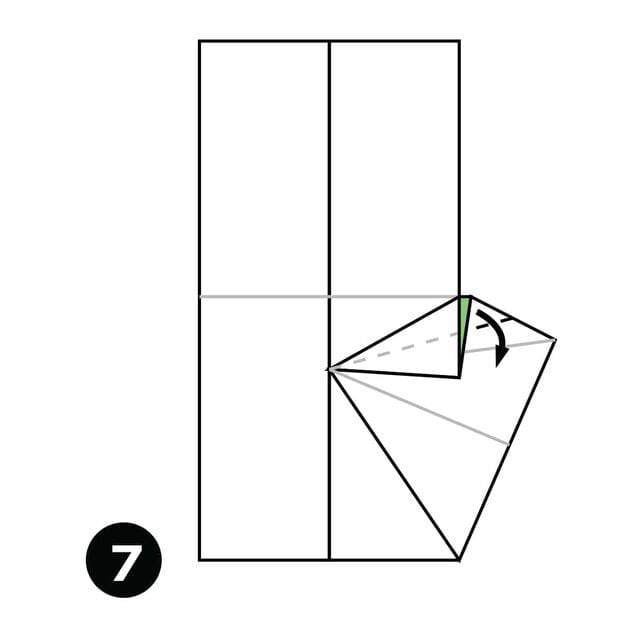
STEP 7. Fold the back layer of paper down along the dotted line.
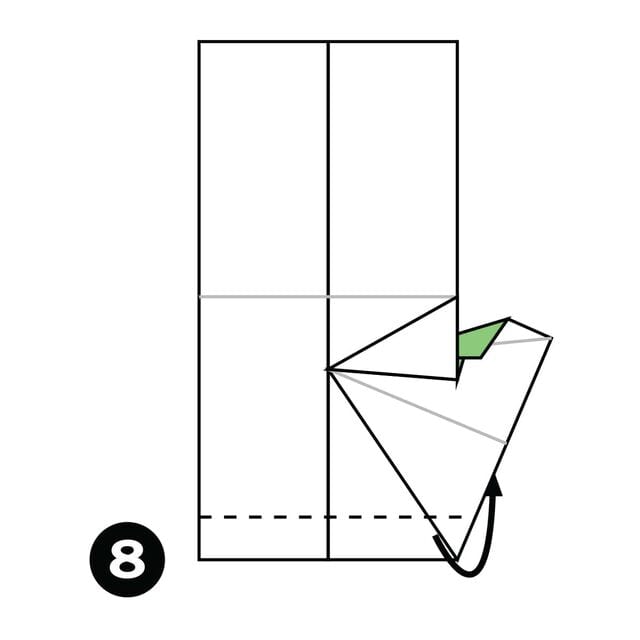
STEP 8. Fold the bottom of the paper up along the dotted line and behind the model.
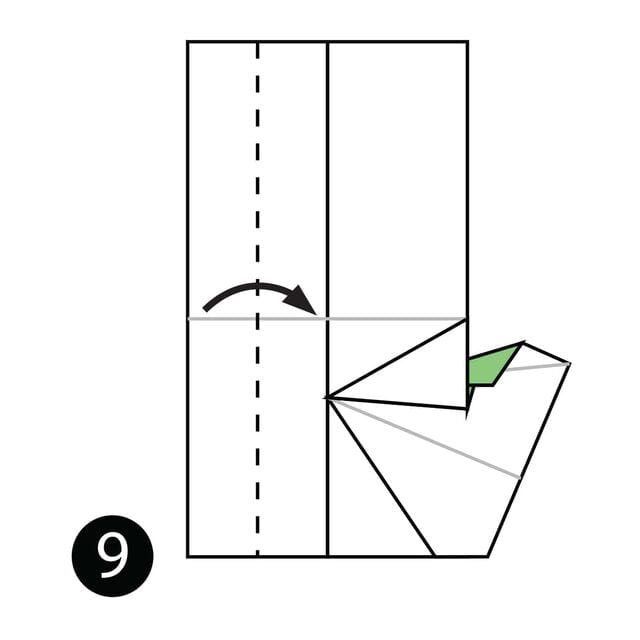
STEP 9. Fold the side of the paper in along the dotted line.
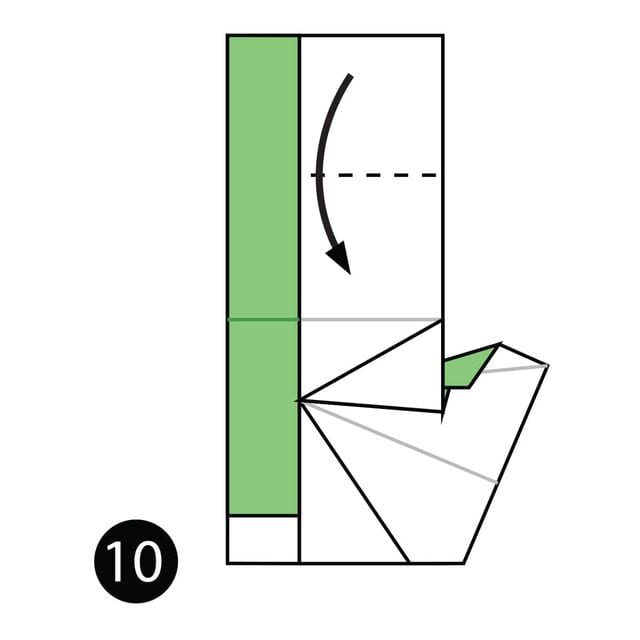
STEP 10. Fold the top of the paper down along the dotted line.
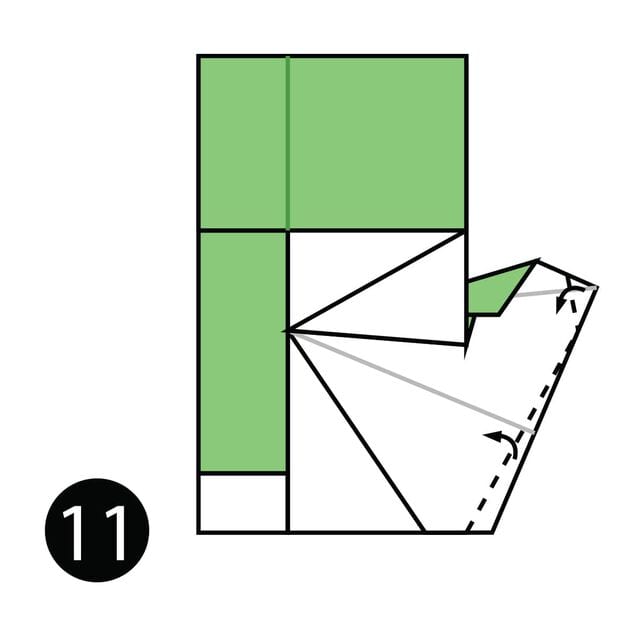
STEP 11. Fold the sides of the paper in along the dotted lines to give the thumb of the mitten a bit of shape.
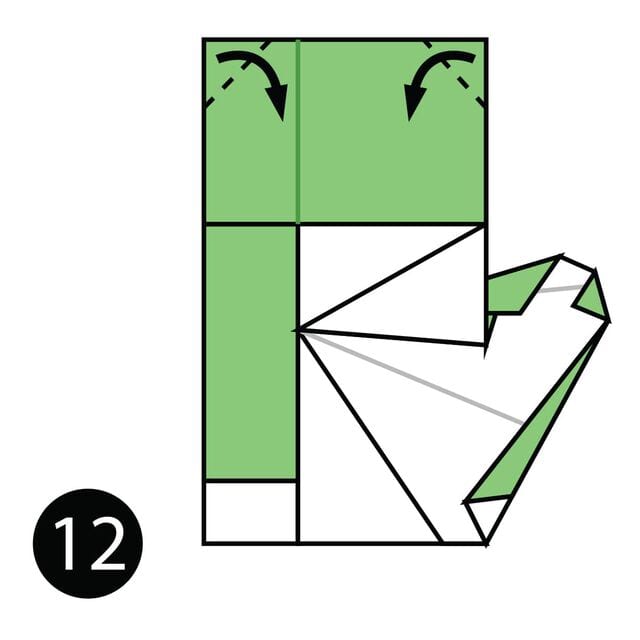
STEP 12. Fold the top corners down along the dotted lines.
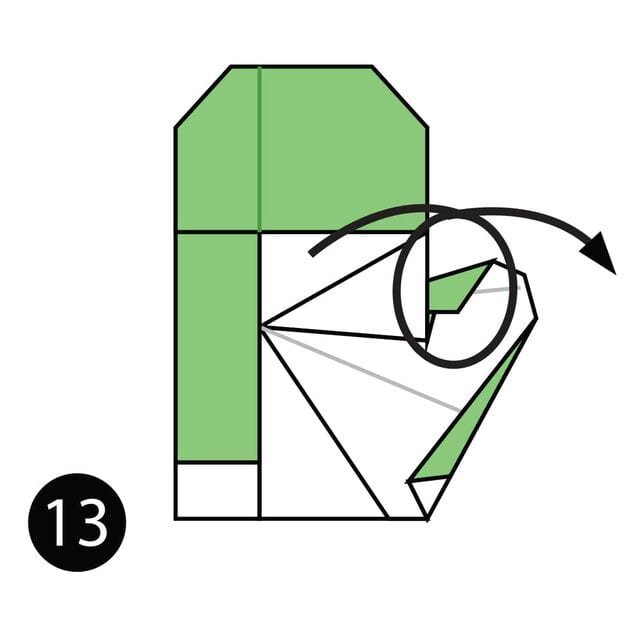
STEP 13. Turn the paper over.
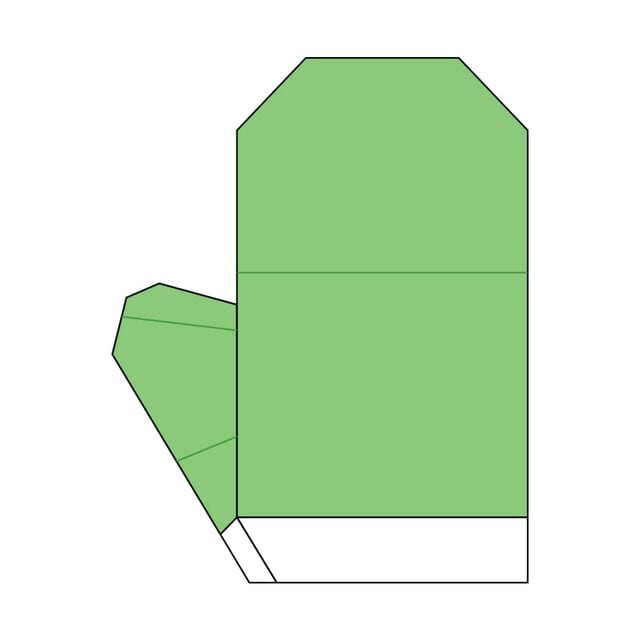
Your origami mitten is complete.




