
Plum blossom
Plum blossoms are one of the first signs of spring, and this little paper version captures their charm beautifully. What makes this model unusual is that it does not start with a square you simply fold — it starts with you making a pentagon from scratch, using careful halving folds and a couple of scissor cuts. That opening stage is oddly satisfying, and once the pentagon exists, the flower almost folds itself.
You will need scissors for this one, so it is a nice change of pace from pure no-cut models. The last few steps are the reward: the folded packet opens into five soft petals that look lovely in three dimensions, or pressed flat for cards and gift tags. Better still, small changes to how you cut give you cherry blossoms, tulips, or even a star, so one tutorial really teaches you a whole family of flowers.
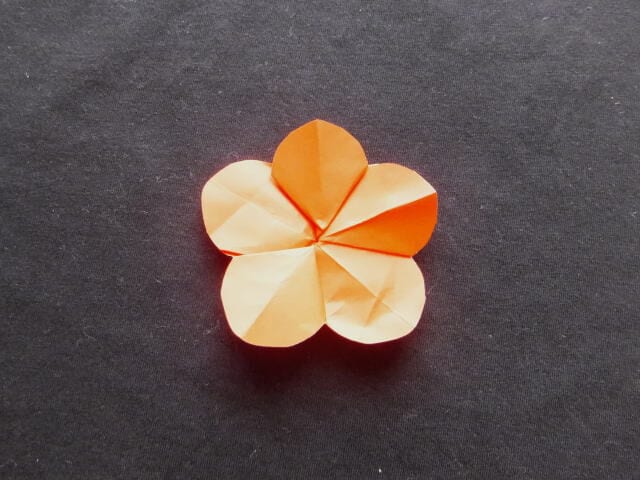
Way of folding
STEP 1
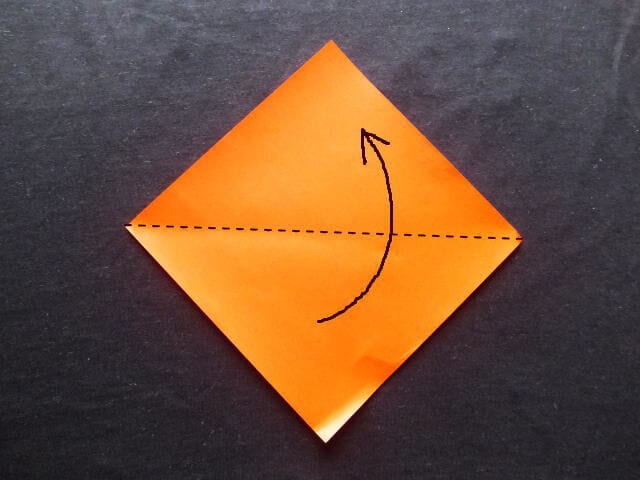
First, let's make pentagonal paper. Fold it in half into a triangle with the colored side facing up.
STEP 2
Fold it in half again.
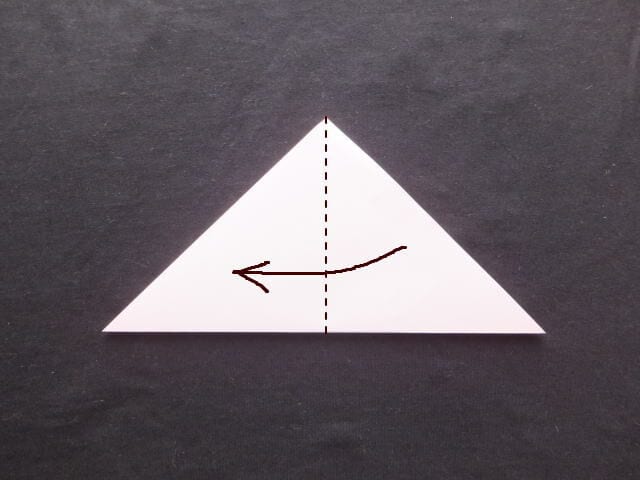
STEP 3
After folding it down to a quarter of the original size, open it back up one step.
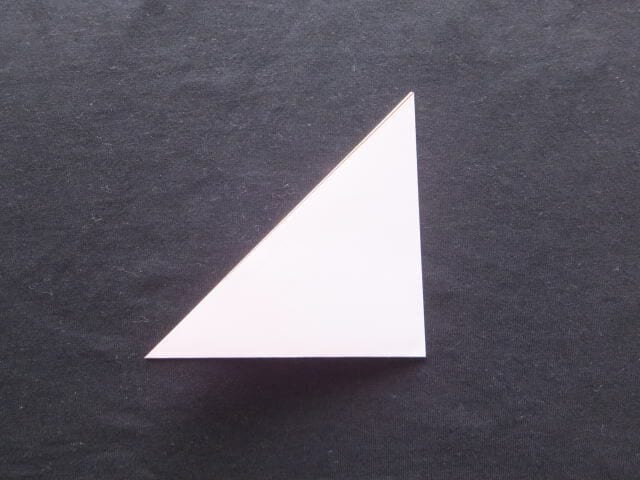
STEP 4
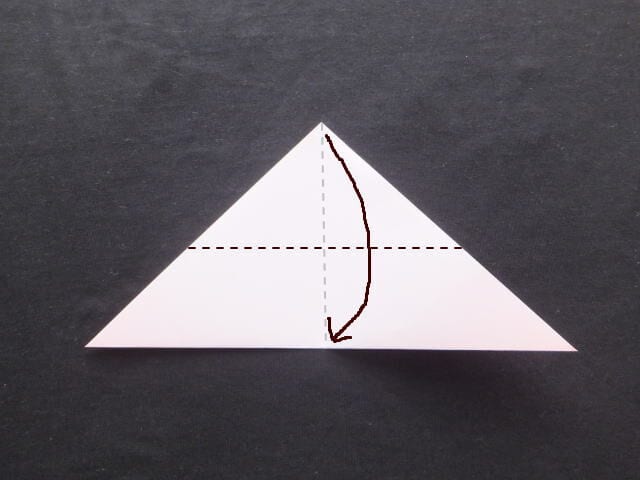
Fold it in half lengthwise, aligning the center.
STEP 5
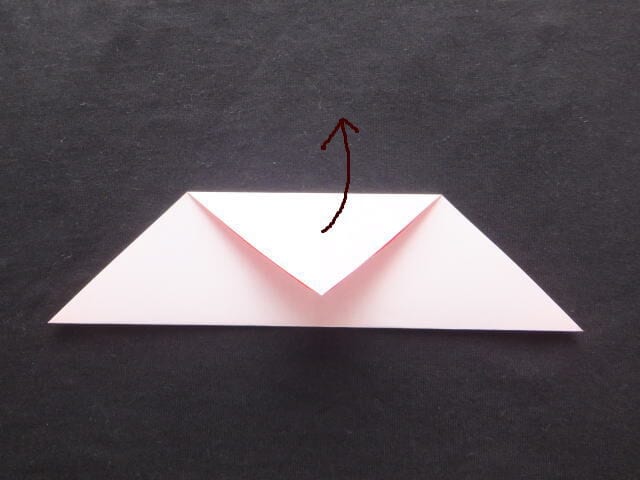
Once folded in half, open the folded part back up temporarily.
STEP 6
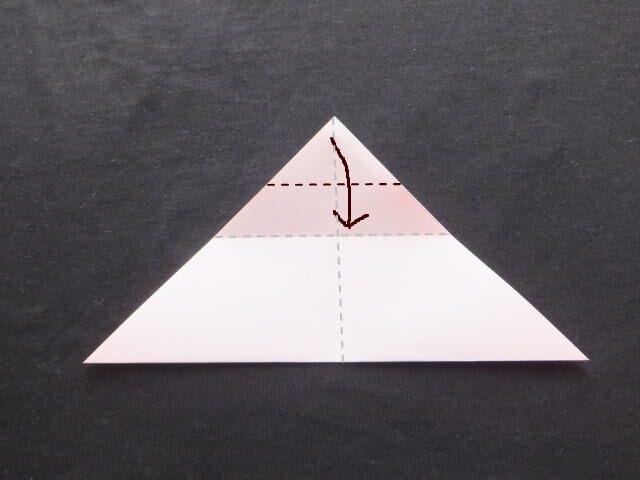
Fold it in half.
STEP 7
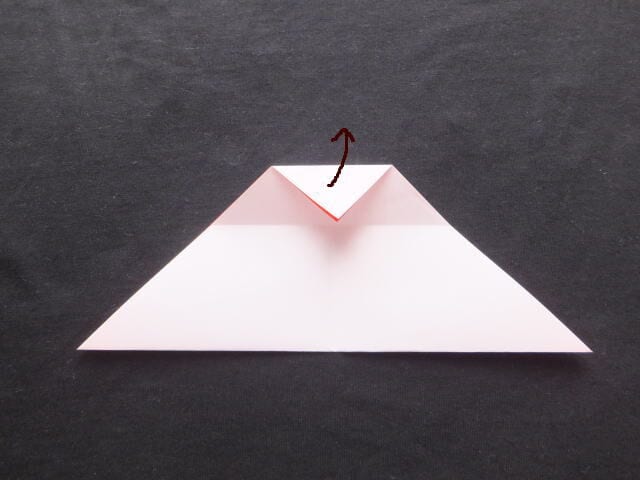
After folding it, open the folded part back up temporarily.
STEP 8
Align the right edge of the top line with the center of the bottom and fold it.
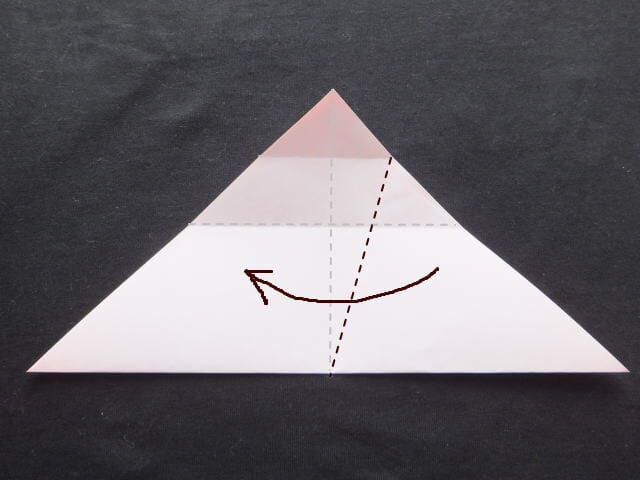
STEP 9
At this point, place a ruler along the edge of the line and the center below, then lightly score a line with the tip of the scissors. This makes folding much easier.
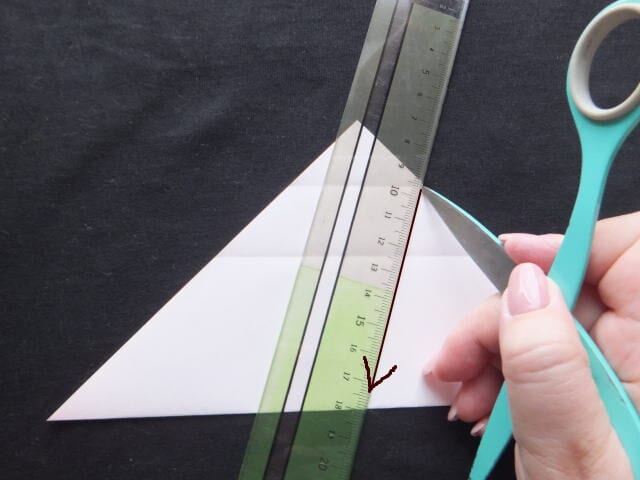
STEP 10
Fold it in half, aligning it with the right side.
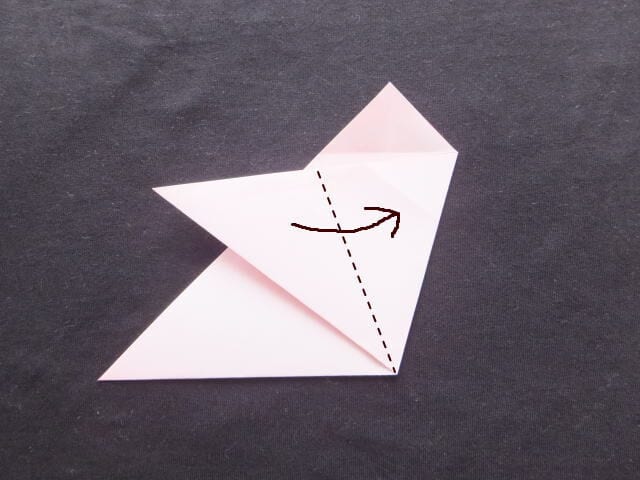
STEP 11
Fold the creased section over to the left.
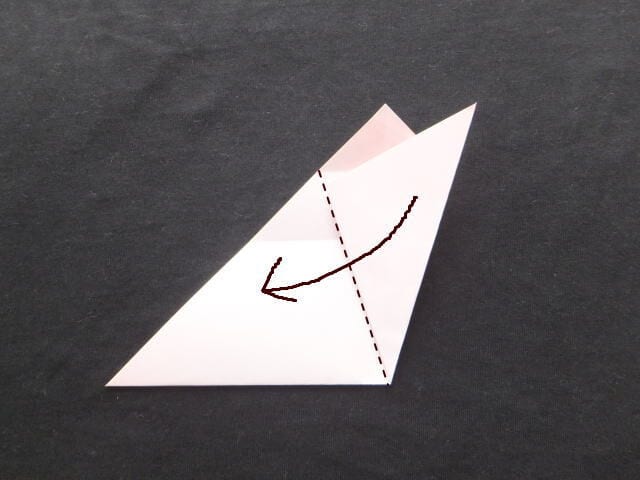
STEP 12
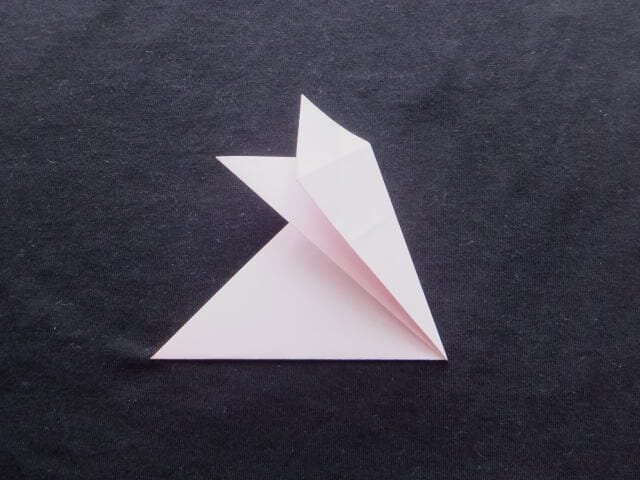
Fold in sequence from the right side. Once you reach this point, turn the paper over.
STEP 13
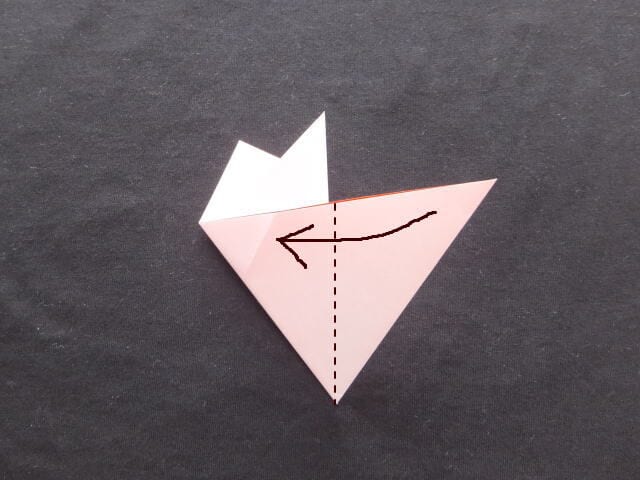
Turn it over and fold it in half, aligning it with the left side.
STEP 14
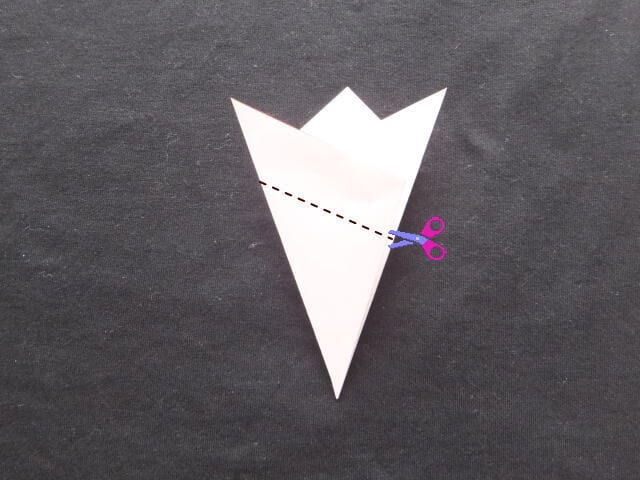
Cut along the dotted line with scissors so the cut is parallel to the top edge.
STEP 15
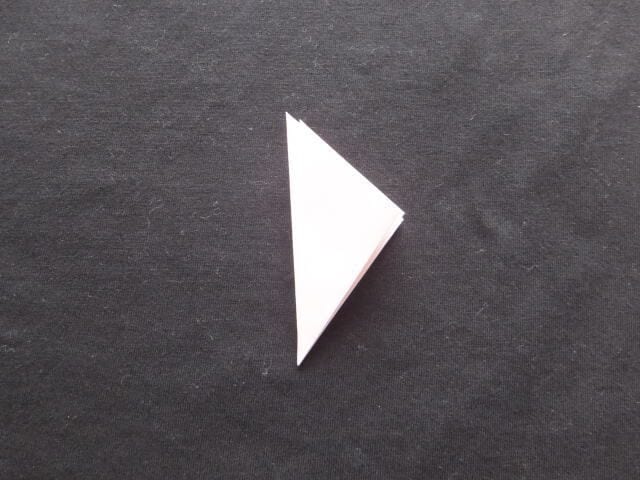
It is now cut on a diagonal. Even if the inner corners of the paper get cut a little at this stage, that is fine, because the paper will be cut into petal shapes later.
STEP 16
The paper is now almost pentagonal. It is fine if it looks a little like a starfish. Pinch the lines at the corners of the pentagon and crease them as mountain folds.
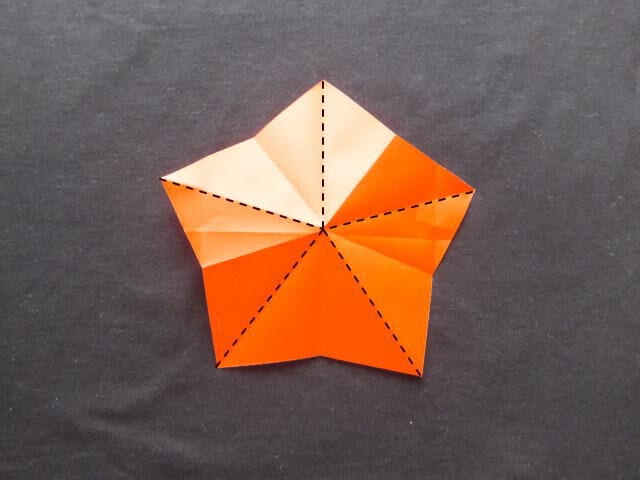
STEP 17
Pinching to make a crease.
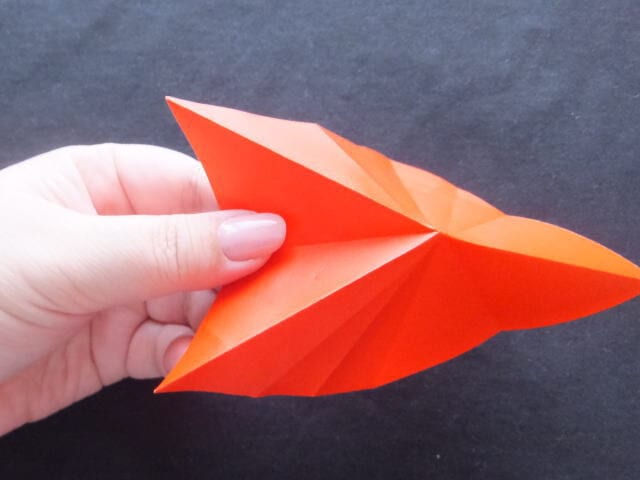
STEP 18
With the creases in place, tuck the center inside and fold the edges alternately to form a square.
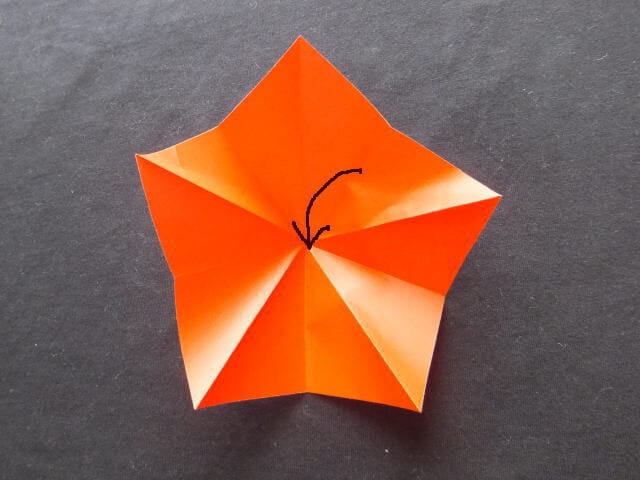
STEP 19
Pinch and fold the sections alternately as shown.
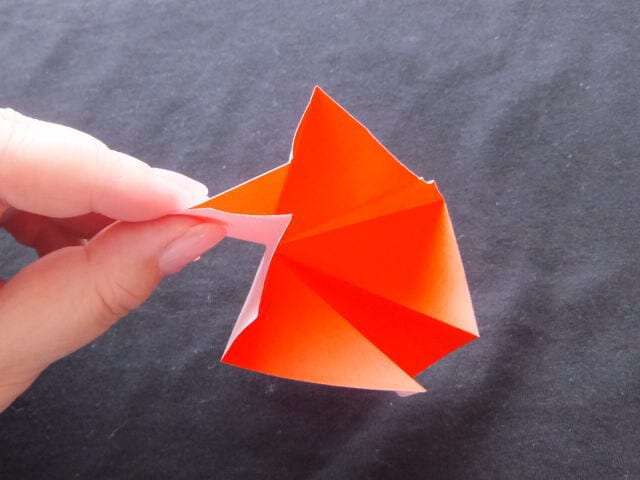
STEP 20
Once it is folded into a square, turn the open side upward. Fold only the right side of the top layer toward the center.
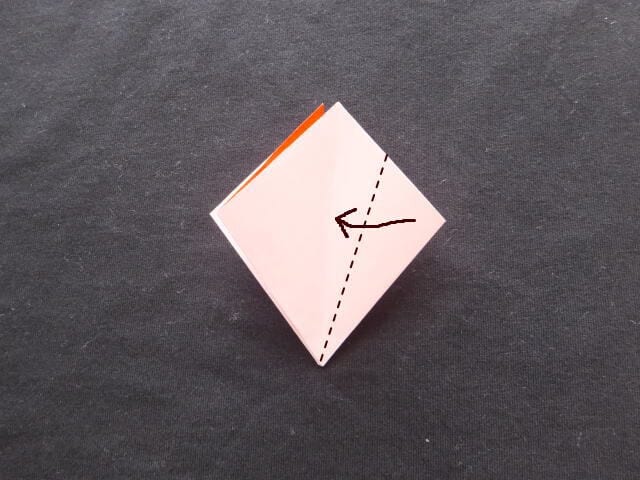
STEP 21
Opening the other sides as you go, fold only the right side at all five positions.
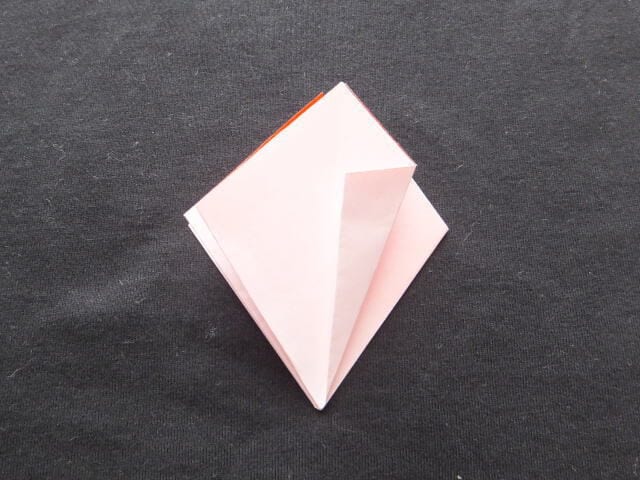
STEP 22
Cut the top section with scissors along the dotted line.
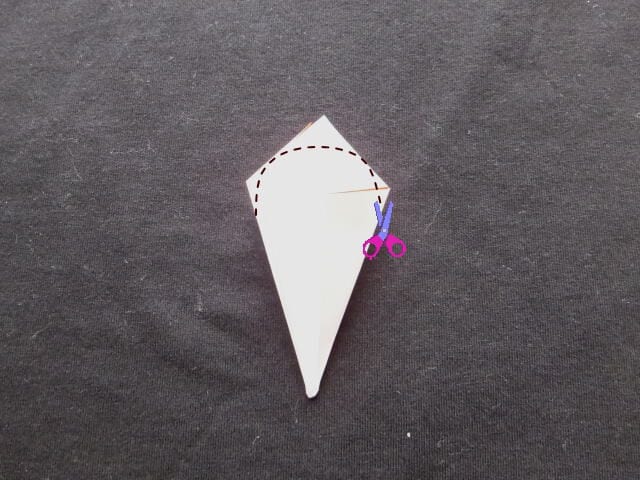
STEP 23
Fold the lower section upward from a little below the halfway point.
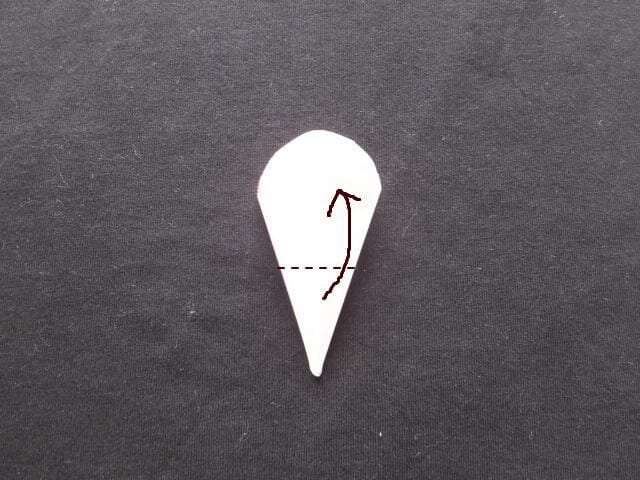
STEP 24
Open out the petals along the creases.
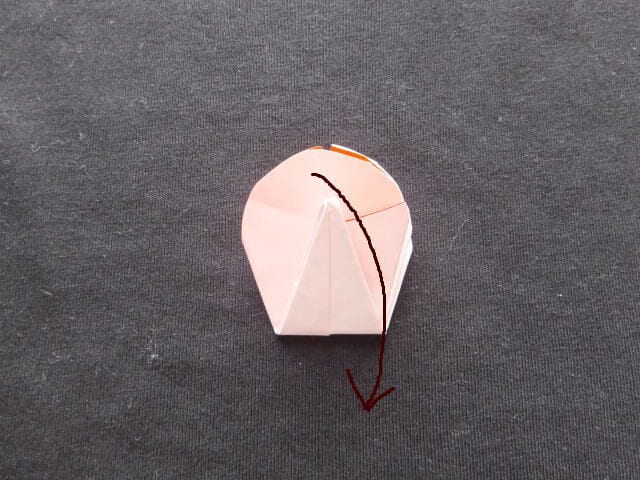
STEP 25
The petals are opening.
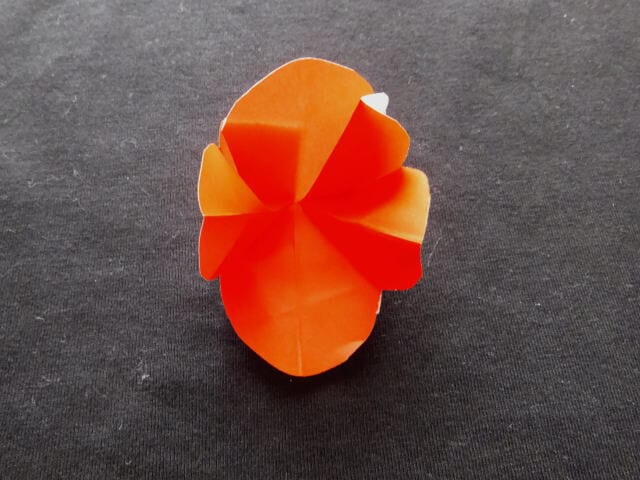
STEP 26
It has opened gently into a three-dimensional shape.
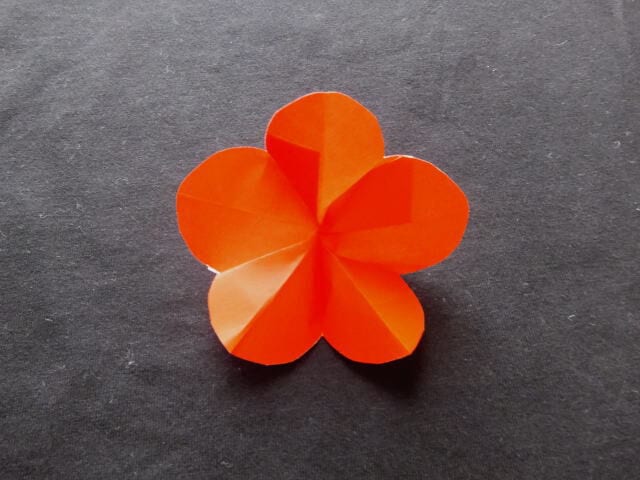
STEP 27
Press the creases as you open it out, and it becomes flat.
Points when folding
If you make a pentagon exactly, you will get 5 beautiful petals.
By changing the way you cut in step 22, you can also make cherry blossoms, tulips, and more.
In addition, if you cut at an angle in step 14, you can make a star shape.
Try changing the shape and size of the petals, and fold all kinds of variations.




