
3D Origami Snowflake (Snow Crystal)
A crisp white snowflake is one of the simplest winter decorations to make, and this one goes the extra mile: it is three-dimensional, built from six small folded pieces that lock together into a six-pointed star. Working with the tiny squares and peeling off inner corners to glue them into a curl is oddly soothing - like a miniature craft project you can finish in a single afternoon.
Do not be put off by the idea of making six pieces; once the first one clicks, the rest repeat the exact same steps, and the tips at the end show you how to do all six at once. Use two contrasting colors - a blue and a white side work beautifully - and you will have a snowflake with depth and sparkle, perfect for a window, a wreath, or a gift tag.
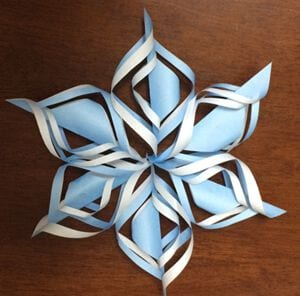
This tutorial shows you how to fold a three-dimensional origami snowflake - the kind of crystal that makes a lovely winter decoration.
It is simple enough for anyone to make, so feel free to follow along.
How to make a snowflake
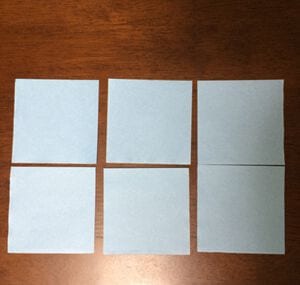
You will need 6 sheets of normal 1/4-size origami paper (7.5 cm on each side).
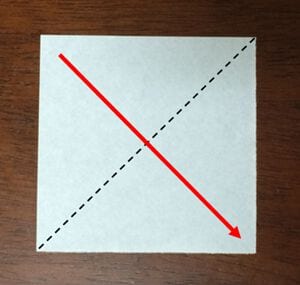
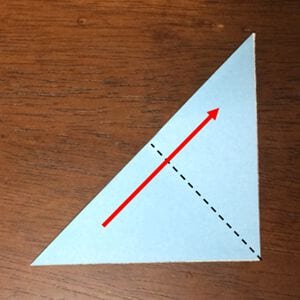
STEP 1. Fold the paper in half to make a triangle.
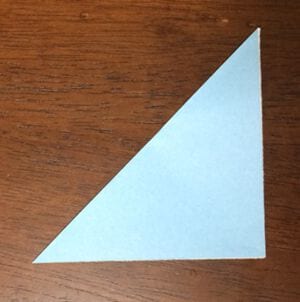
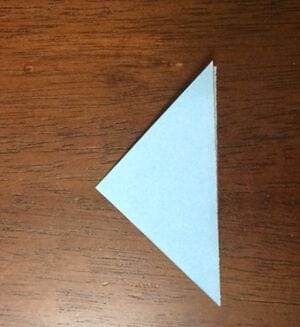
STEP 2. Fold it in half again.
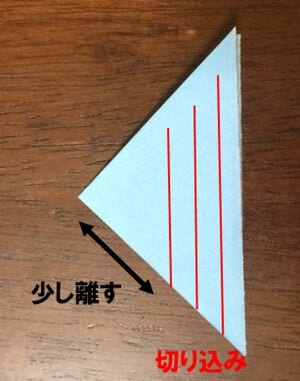
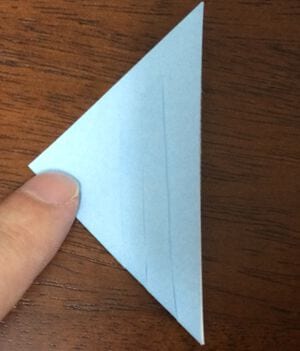
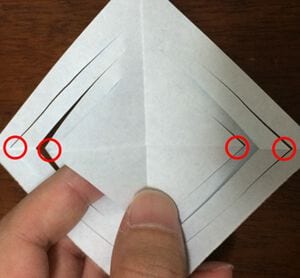
STEP 3. Make three slits with scissors a little way from the tip, then open the paper out.
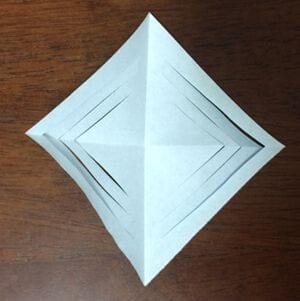
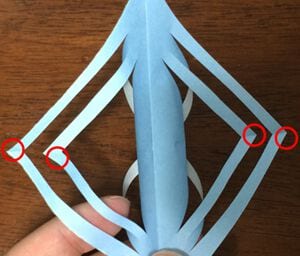
STEP 4. Glue the inner corners together as shown.
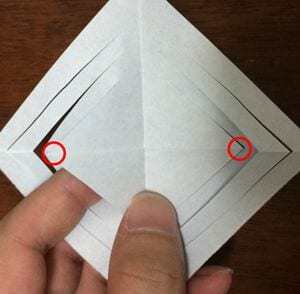
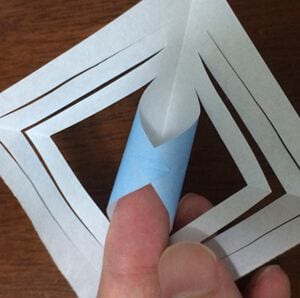
STEP 5. Turn it over and glue the inner corners together in the same way.
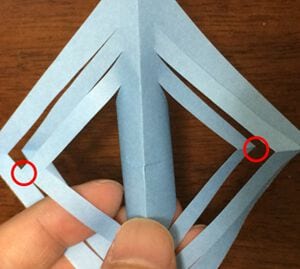

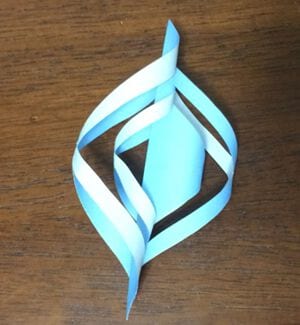
STEP 6. Turn it over again and glue the inner corners together two more times.
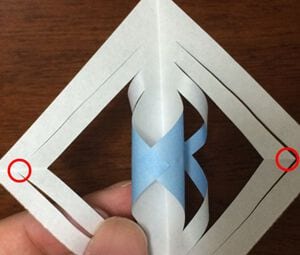
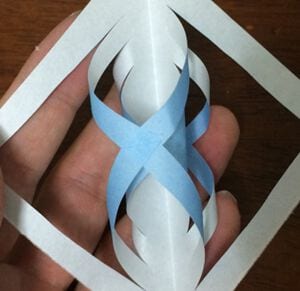
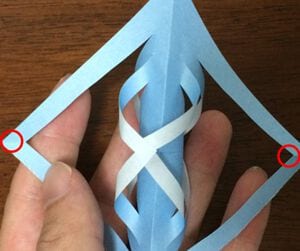
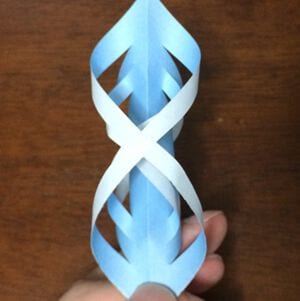
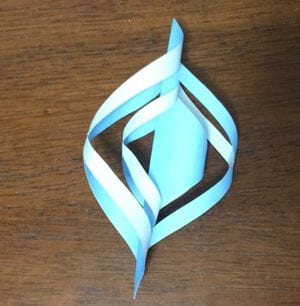
That finishes one piece of the snowflake.
STEP 7. Make five more identical pieces so you have six in total.
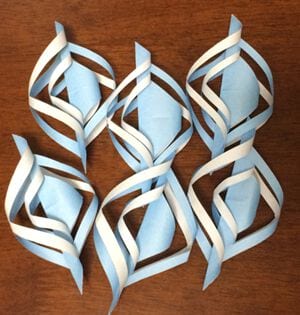
STEP 8. Glue the pieces together as shown.
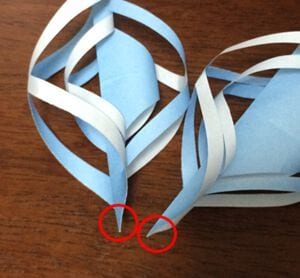
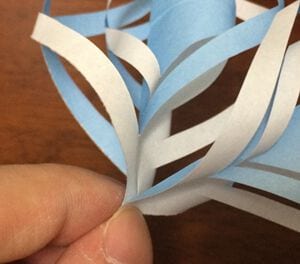
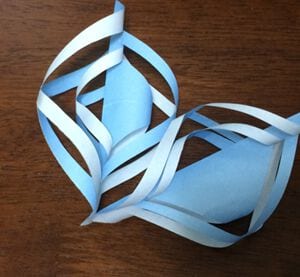
STEP 9. Repeat this until all six pieces are joined - your snowflake is complete.
Tips for making it faster
This snowflake needs six identical pieces, so it can take a while and feel a little fiddly.
Here is how to speed things up.
The first trick is not to finish each piece one at a time, but to work on all six at once. Complete step 2’s folds for the whole set, then move on to step 3’s cutting and opening for every piece, and finally continue through the remaining steps together.
Repeating the same action across all the pieces keeps the work simple and saves time.
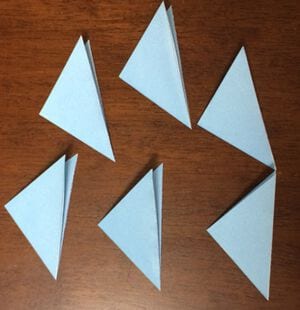
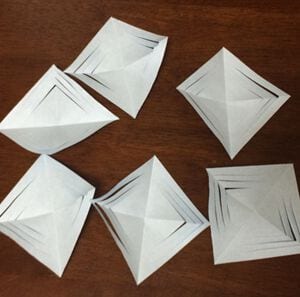
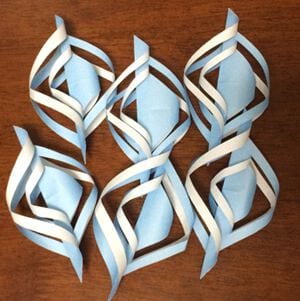
The second tip concerns the gluing. The instructions repeat “glue, then turn over” to make it easy to follow, but you only really need to flip the paper once.
On the white side, first glue the innermost corner of each piece to the third corner, then turn the piece over and glue the second corner to the fourth.

This should trim a little time off the whole process.




