
How to Fold an Origami Album (Six-Page Long Origami Book)
A book folded from a single sheet, with no glue and no cuts, is one of those origami ideas that feels like a small miracle. This one gives you six little pages that open out in a concertina, and it is genuinely practical: a tiny album for a handful of messages, a set of thumbnail drawings, or the sort of handmade card people keep on a shelf. The sequence is long — seventeen steps — but almost every step is a simple fold-and-unfold, so what you are really doing is building a crease pattern. Take the early steps slowly and crease each one precisely, because the whole thing collapses into shape in one satisfying move near the end. Start with a 15 cm square to learn it; once you know where the creases go, scale up to a bigger sheet and the pages become large enough for real photos.
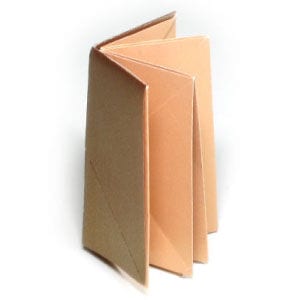
This six-page origami album is folded from a single square of ordinary origami paper (15 cm x 15 cm). Each finished page measures about 2.5 cm x 5 cm, so if you want pages big enough to hold photos, start with a much larger square. The model begins with horizontal and vertical Z-folds, and the only techniques you need are the valley fold and the mountain fold — if you are happy with those two, you will have no trouble with the album.
Any paper will do as long as it is a true square: four equal sides and four right angles. A 15 cm square is comfortable while you are learning the sequence; once it feels familiar, try a smaller sheet.
This is the front side of the paper.

This is the back side of the paper, in a different colour from the front.

STEP 1
Start with the back side of the paper facing up. Prepare to make a horizontal "Z-fold", then unfold.

STEP 2
Make the horizontal Z-fold from step 1 and unfold again. Prepare to make a vertical "Z-fold", then unfold.

STEP 3
Make the vertical Z-fold from step 2, then unfold. Prepare to make a diagonal valley fold, then unfold.

STEP 4
Make the diagonal valley fold from step 3, then unfold. Prepare to make another diagonal valley fold, then unfold.

STEP 5
Make the diagonal valley fold from step 4, then unfold. Prepare to make four valley folds, then unfold.

STEP 6
Make the four valley folds from step 5, then unfold. Prepare to valley-fold the paper in half horizontally, then unfold.

STEP 7
Valley-fold the paper in half horizontally, then unfold. Prepare to valley-fold it in half vertically, then unfold.

STEP 8
Valley-fold the paper in half vertically, then unfold. Prepare to make a horizontal valley fold.

STEP 9
Make the horizontal valley fold from step 8. Prepare to follow the crease pattern (CP) shown on the left.

STEP 10
Follow the crease pattern from step 9. Prepare to make the open sink fold in the centre.

STEP 11
Make the open sink fold in the centre. Prepare to make a valley fold.

STEP 12
Make the valley fold from step 11. Prepare to flatten and compress the album.

STEP 13
Start compressing the album by flattening it.

STEP 14
Finish compressing the album by flattening it. Prepare to make a vertical valley fold that closes the album.

STEP 15
Make the vertical valley fold from step 14 to close the album.

STEP 16
Stand the finished album up on its pages.

STEP 17
Congratulations — your origami album is complete.




