
How to Fold an Origami Fairy (Cute Paper Doll)
There is something lovely about a fold that turns into a little character — and this fairy manages it with nothing more than ordinary valley folds. You start with a triangle, and by the middle of the sequence a pointed hood, a narrow white face and a pair of folded wings have quietly appeared. The one thing to watch is the white area that becomes the face: try to keep it clean and uncreased, because it is the part everyone looks at first. Fold it in one colour for a calm little figure, or use patterned paper for the skirt and plain paper for the top — the contrast is charming. Fold a whole handful and link their wings, and you have a garland or a wreath that looks far more complicated than it actually was.
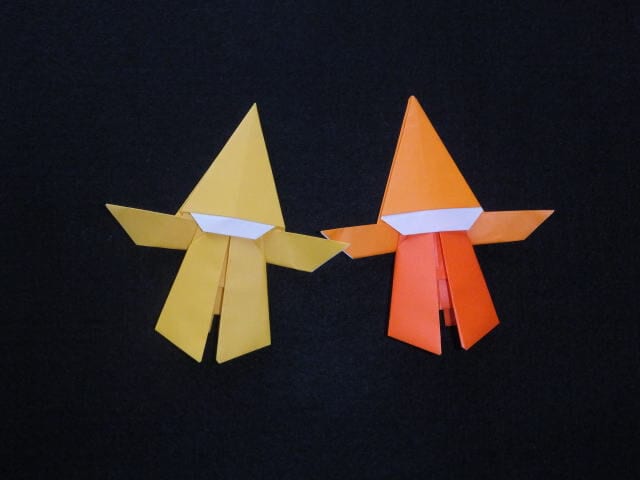
How to fold
STEP 1
With the white side facing up, fold the top part down and make vertical and horizontal creases so the piece forms a triangle.

STEP 2
Fold the top and bottom corners in toward the centre.

STEP 3
Fold the bottom folded section up along the dotted line.

STEP 4
Fold the tip backwards along the dotted line.

STEP 5
Fold the top part down along the crease.

STEP 6
Fold both corners in toward the centre.

STEP 7
Fold both sides in along the outer creases.

STEP 8
Fold both sides back along the dotted lines.

STEP 9
Fold the lower sections on both sides outwards along the dotted lines. The white area becomes the face, so keep it smooth and uncreased. (The grey dotted line marks the lower side.)

STEP 10
Fold the bottom corner backwards along the dotted line.

STEP 11
Now fold the lower part. With the white side facing up, crease it down the centre, then fold both sides in toward that centre line.

STEP 12
Fold the bottom corner up to the middle of the white section, then fold it in half once more.

STEP 13
Fold the bottom corners in toward the centre.

STEP 14
Turn the model over, taking care not to tear the paper.

STEP 15
Fold the bottom section so it lines up with both corners. Leave the overlapping layer unfolded and bring it around from the back to the front.

STEP 16
Once it looks like the photo, fold it backwards along the dotted line.

STEP 17
Fold the top slightly backwards so the piece becomes slim.

STEP 18
Tuck the lower part into the upper part.

STEP 19
Shape the model, then add a little glue or tape at the back so it holds together neatly.

Finally
I folded mine in a single colour, but using different colours or patterns for the top and the bottom looks just as sweet.
Fold a whole row of them and join their hands (the wings) together to make wall decorations or a wreath.
Have fun making all sorts of versions with the kids.




