
Lid For An Origami Open Cube
An open cube is a lovely little box right up until you want to put something inside it and carry it anywhere. That is what this lid is for, and the clever part is that it comes from exactly the same square of paper as the cube itself - no glue, no tape, no second sheet.
Be warned that the first nine steps are all creasing and unfolding, with nothing that looks like a box yet. That is not busywork: those fourteen creases are the entire structure, and one of them is adjustable. The tutorial calls it delta, a small offset you tune to the thickness of your paper so the lid slips over the cube instead of fighting it. Once the grid is in place the model collapses in a handful of moves, and from there it is mostly your fingers walking the paper into shape.
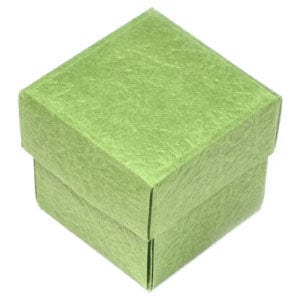
This page is for those who want instructions for folding the lid of an origami open cube.
This box lid is used to cover the top of an origami open cube.
Before working on this model, you need to know what a valley-fold and a mountain-fold are. If you know these two folding techniques, then you will have no problem making the origami lid.
If you are ready, then let's get started.
You may use any kind of paper to fold the origami cube. Make sure the paper you use is a square (all sides are equal and all the angles equal 90 degrees). The paper I am using here is a 15cm x 15cm square paper. It is a good size for those who are not experienced in paper folding. Once you are familiar with the model, you can try a smaller sheet of paper.
This is the front side of paper which will become the interior of the box lid.
This is the back side of paper which will become the exterior of the box lid.
STEP 1.
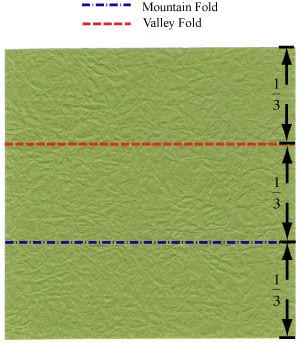
Let's start with the back side of the paper facing up. Prepare to apply a horizontal “Z-fold” and then unfold.
STEP 2.
Apply the horizontal “Z-fold” of step #1 and then unfold. Prepare to apply a vertical “Z-fold” and then unfold.
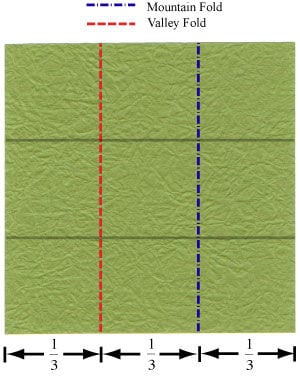
STEP 3.
Apply the vertical “Z-fold” of the step #2 and then unfold. Prepare to apply a diagonal valley-fold and then unfold.
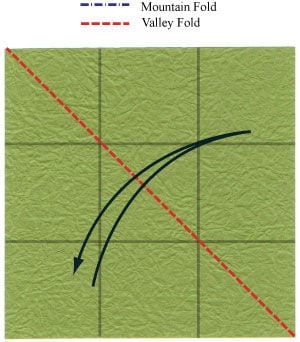
STEP 4.
Apply the diagonal valley-fold of the step #3 and then unfold. Prepare to apply another diagonal valley-fold and then unfold.

STEP 5.
Apply the diagonal valley-fold of the step #4 and then unfold. Prepare to apply two valley-folds and then unfold. You will need to experiment to decide how large delta should be, since it depends on the thickness of the paper you are using.
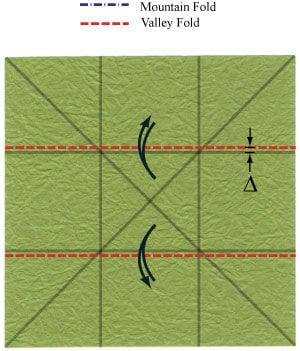
STEP 6.
Apply two valley-folds of the step #5 and then unfold. Prepare to apply two horizontal valley-folds and then unfold.
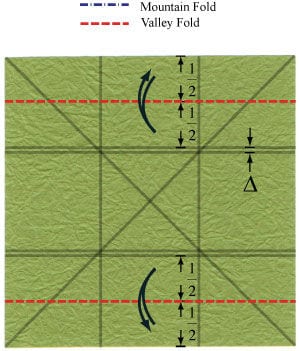
STEP 7.
Apply two horizontal valley-folds of the step #6 and then unfold. Prepare to apply two vertical valley-folds and then unfold.
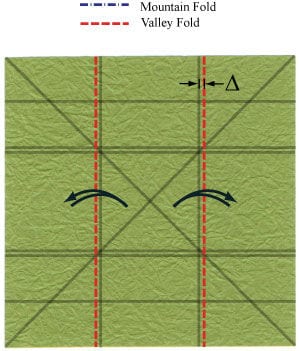
STEP 8.
Apply two vertical valley-folds of the step #7 and then unfold. Prepare to apply two vertical valley-folds and then unfold.
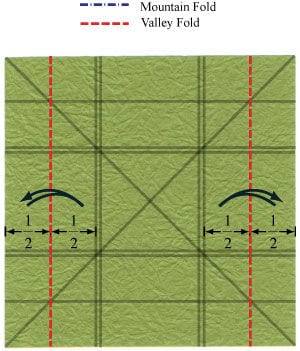
STEP 9.
Apply two vertical valley-folds of the step #8 and then unfold. Make sure that there are 14 crease lines.
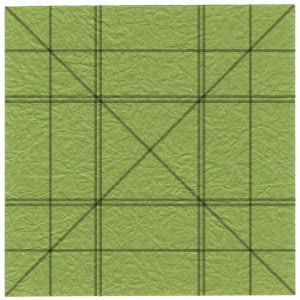
STEP 10.
Prepare to apply the crease pattern (CP) shown on the left.
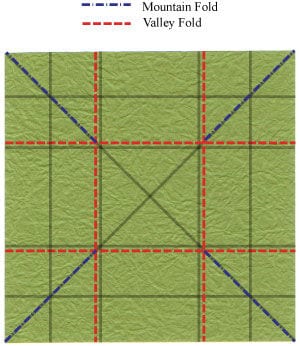
STEP 11.
Apply the valley-fold of the step #10.
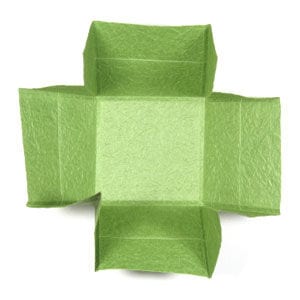
STEP 12.
Apply the mountain-fold of the step #11 to sharpen the edge. Prepare to move two fingers following the arrow directions.
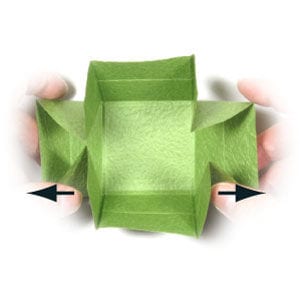
STEP 13.
Move two fingers following the arrow directions of the step #12. Prepare to move two fingers following the arrow directions.
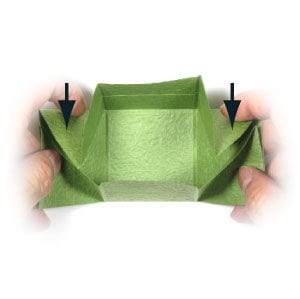
STEP 14.
Move two fingers following the arrow directions of the step #13. Prepare to move two thumbs following the arrow directions.
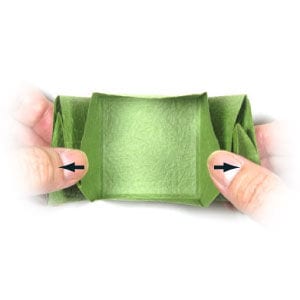
STEP 15.
Move two thumbs following the arrow directions of the step #14. Prepare to apply two valley-folds.
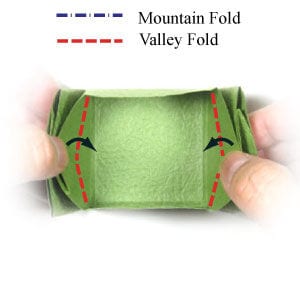
STEP 16.
Start applying the two valley-folds of step #15.
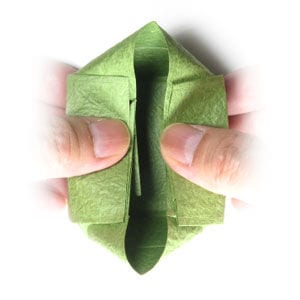
STEP 17.
Continue applying the two valley-folds of step #15.
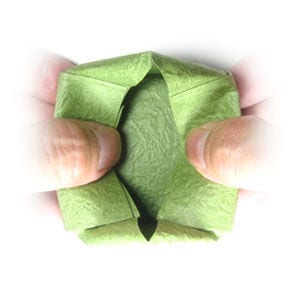
STEP 18.
Keep applying the two valley-folds of step #15.
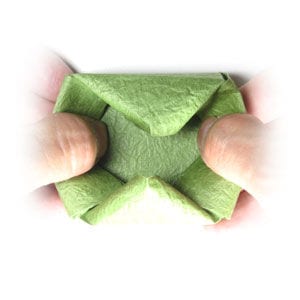
STEP 19.
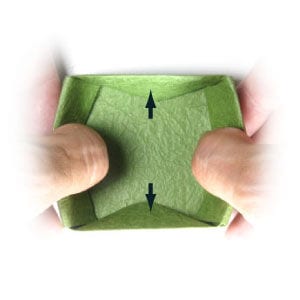
Finish applying the two valley-folds of step #15. Prepare to press the inside of the origami box lid flat.
STEP 20.
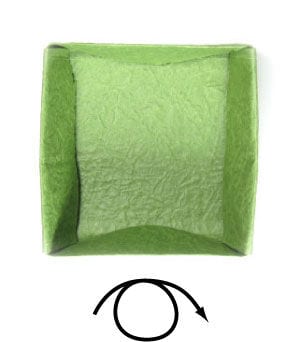
Press the inside of the origami box lid flat. This is the bottom view of the lid for the origami open cube. Prepare to turn the lid over.
STEP 21.
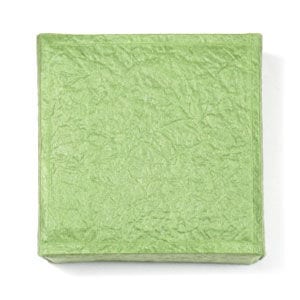
Turn the lid over.
STEP 22.
Now make an origami open cube to go with it.
STEP 23.
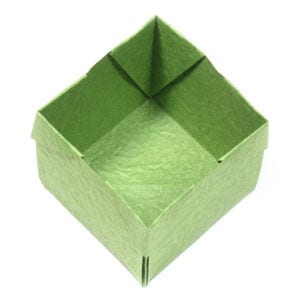
Put the box lid on top of the origami open cube. Congratulations! You have completed making a lid for an origami open cube.




