
Easy Origami Cow
Some of the best models in origami are the friendliest ones, and few are friendlier than a little paper cow. This one is easy enough for a first-timer, yet it sneaks in a genuinely useful move: the inside reverse-fold, the same technique that later unlocks countless other animals, from cats to dinosaurs. Fold it once and you will probably find yourself making a whole herd, because the cows take minutes, cost nothing, and look adorable lined up on a shelf or tucked into a lunchbox.
We begin from the familiar square base, so the early steps will feel calm and familiar. Then, one by one, four little legs appear, a few clever creases give the body its rounded shape, and the face is finished with simple drawn eyes. Grab any square sheet, patterned paper makes a wonderfully characterful cow, and follow along.
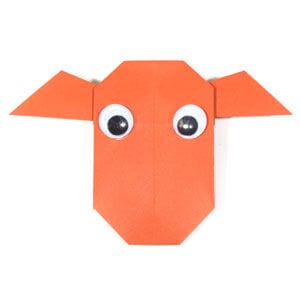
This page is for anyone who wants to fold an easy origami cow.
You need to follow 20 steps to complete this easy origami cow, and the essential technique you will learn along the way is the inside reverse-fold.
Before you start, make sure you know what valley-folds and mountain-folds are. If you know these two folds, you will have no problem making this origami cow.
If you are ready, let's get started.
You may use any kind of paper to fold this origami cow. It is a little easier if the front and the back of the paper are slightly different, whether in texture or color.
Make sure your paper is square (all sides equal and every corner 90 degrees). The paper used here is a 15cm x 15cm square, a good size if you are not experienced in paper folding. Once you are familiar with the model, you can try a smaller sheet.
This is the front side of the paper.
This is the back side of the paper.
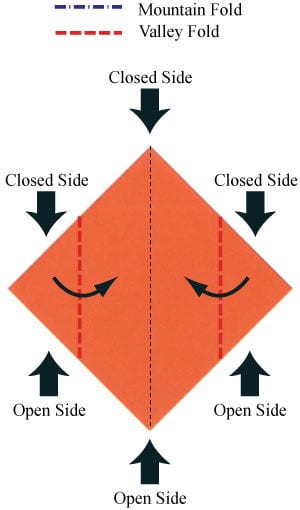
STEP 1.
Start with a "square base" and prepare to apply two vertical valley-folds.
STEP 2.
Apply the two vertical valley-folds from step 1, then unfold them.
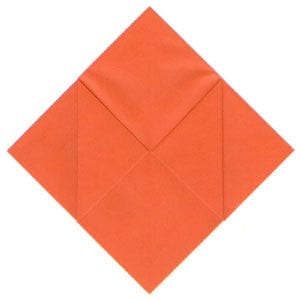
STEP 3.
Unfold the previous two valley-folds and prepare to apply two "inside reverse-folds".
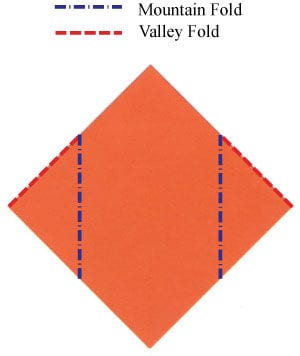
STEP 4.
Apply the two valley-folds from step 3, then open the front-most layer following the arrows.
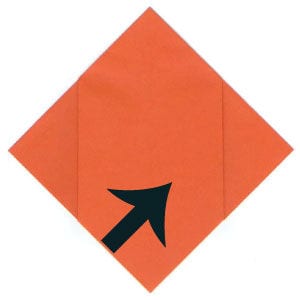
STEP 5.
Open the front-most layer and prepare to apply an "inside reverse-fold".
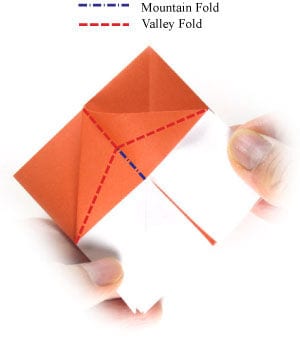
STEP 6.
Apply the "inside reverse-fold" from step 5, then close it.
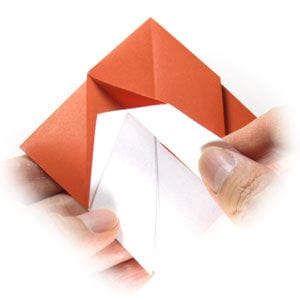
STEP 7.
Close the front-most layer, then open it again following the arrows.
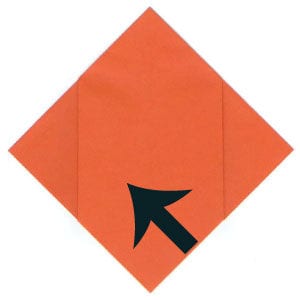
STEP 8.
Open the front-most layer and prepare to apply an "inside reverse-fold".
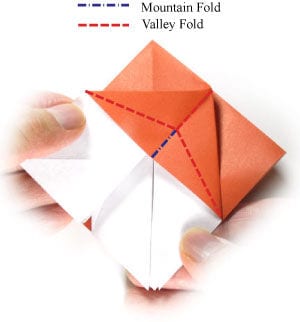
STEP 9.
Apply the "inside reverse-fold" from step 8, then close it.

STEP 10.
Close the flap and turn the model over.
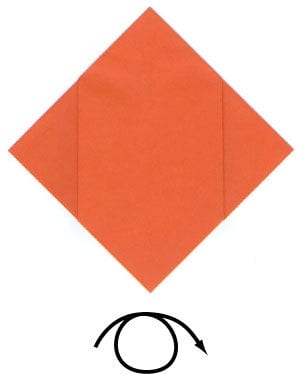
STEP 11.
Turn the model over and prepare to repeat steps 1-10.
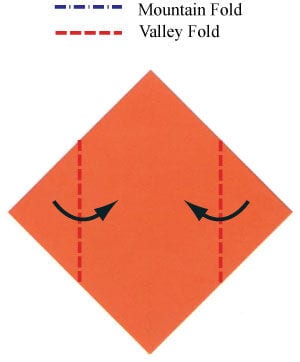
STEP 12.
Repeat steps 1-10, then prepare to apply a horizontal valley-fold.
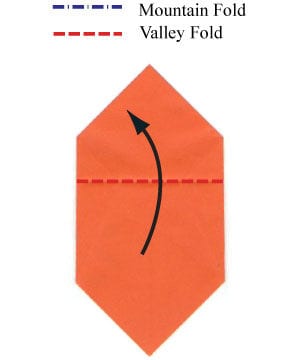
STEP 13.
Apply the horizontal valley-fold from step 12, then prepare to apply a vertical valley-fold.
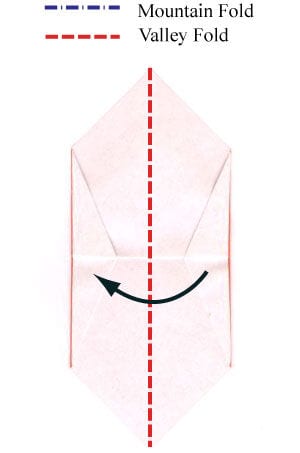
STEP 14.
Apply the vertical valley-fold from step 13, then turn the model over.
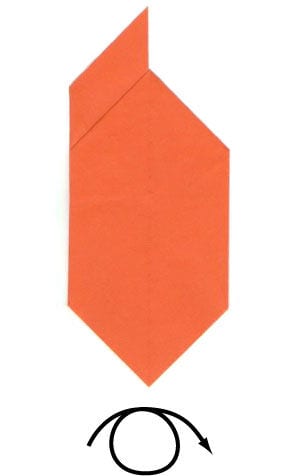
STEP 15.
Turn the model over and prepare to apply a horizontal valley-fold.
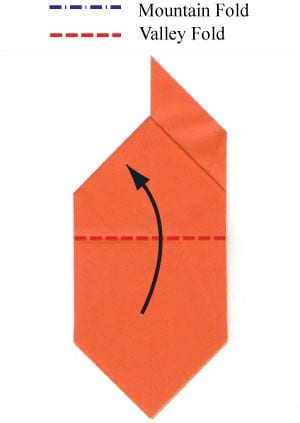
STEP 16.
Apply the horizontal valley-fold from step 15, then prepare to apply a vertical valley-fold.
STEP 17.
Apply the vertical valley-fold from step 16, then prepare to apply two valley-folds at 45 degrees, made just below the front-most layer.
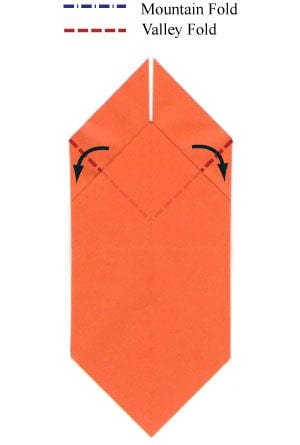
STEP 18.
Apply the two valley-folds from step 17, then prepare to apply four mountain-folds.
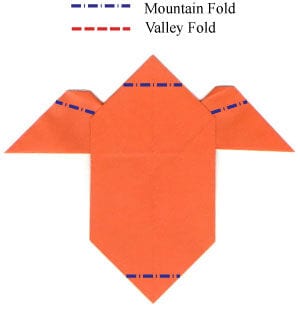
STEP 19.
Apply the four mountain-folds from step 18, then prepare to draw two eyes or add googly eyes.
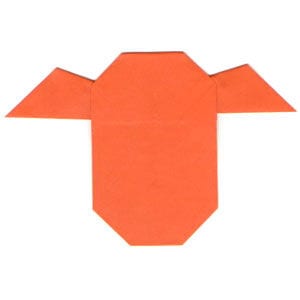
STEP 20.
Draw the eyes or add the googly eyes. Congratulations! You have just completed an easy origami cow.




