Simple Origami Bowl
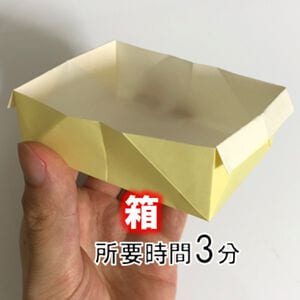
There's a special kind of satisfaction in folding something that isn't just flat — and this little bowl actually holds its shape like the real thing.
Don't be put off by the step count. The whole model is built on one short sequence that you simply repeat on each of the four sides, turning the paper as you go. Once you've done one side, the other three feel like muscle memory. Grab a square and let's build a bowl.
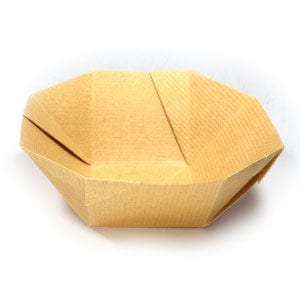
This page is for those who want the instructions to fold a Simple Origami bowl.
This simple origami bowl starts from 3x3 matrix base. One special folding technique that you need to learn for this model is reverse swivel-fold.
While you are working on this model, if you find any bugs on this instruction, please don't hesitate to send an email to .
Are you ready?
Let's get started.
You may use any kind of paper to fold this origami bowl. Here I am using a paper with the same color and texture for both front and back sides. But you can use different color and/or texture. The size of the paper is 20cm x 20cm. It is easy to start with a larger sheet and move to a smaller one once you become familiar with the model.
This is the front side of paper.
This is the back side of paper which is the same color as the front side.
STEP 1.
Let us start with a square paper. Prepare to apply a horizontal “Z-fold” and then unfold.
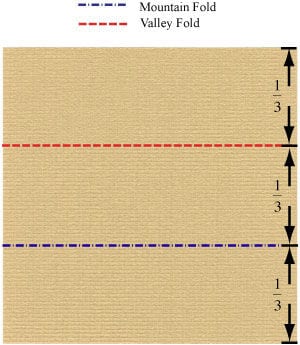
STEP 2.
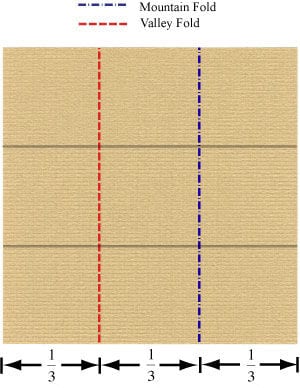
Apply the horizontal “Z-fold” of the step #1 and then unfold. Prepare to apply the vertical “Z-fold” and then unfold.
STEP 3.
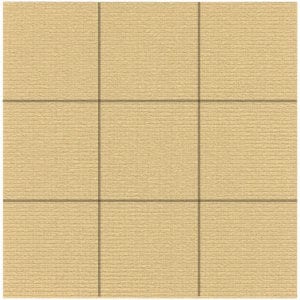
Apply the vertical “Z-fold” of the step #2 and then unfold. You have completed making a “3x3 matrix base”.
STEP 4.
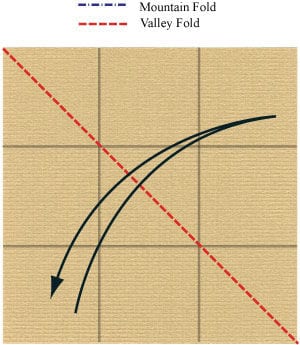
Prepare to apply a diagonal “valley-fold” and then unfold.
STEP 5.
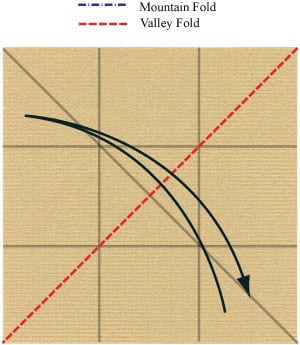
Apply the diagonal “valley-fold” of the step #4 and then unfold. Prepare to apply another diagonal “valley-fold” and then unfold.
STEP 6.
Apply the diagonal “valley-fold” of the step #5 and then unfold. Prepare to rotate the paper by 45 degrees.
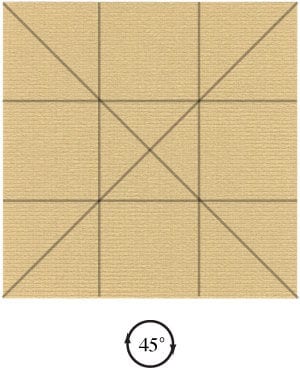
STEP 7.
Rotate the paper by 45 degrees. Prepare to apply a “pleat-fold” (a “valley-fold” followed by a “mountain-fold” ).
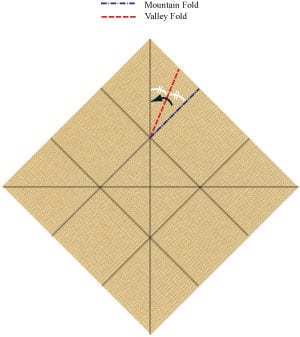
STEP 8.
Apply the “pleat-fold” of the step #7. Prepare to apply a horizontal “valley-fold”.
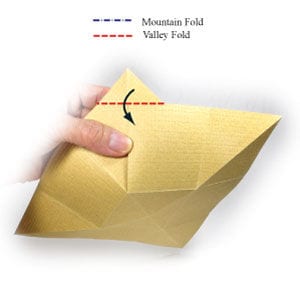
STEP 9.
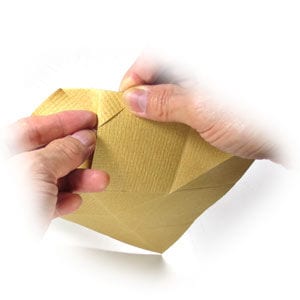
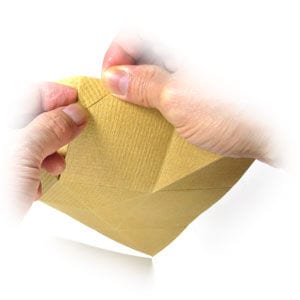
Apply the horizontal “valley-fold” of the step #8. Prepare to apply a “reverse swivel-fold”.
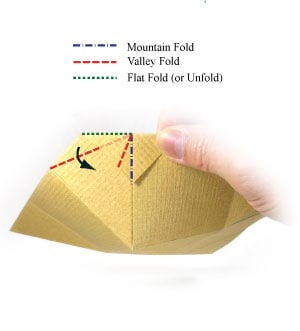
STEP 10.
Start applying the “reverse swivel-fold” of the step #9.
STEP 11.
Continue applying the “reverse swivel-fold” of the step #9.
STEP 12.
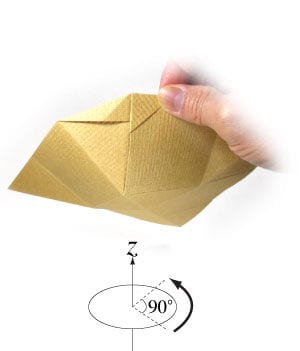
Complete applying the “reverse swivel-fold” of the step #9. Prepare to rotate the origami bowl by 90 degrees.
STEP 13.
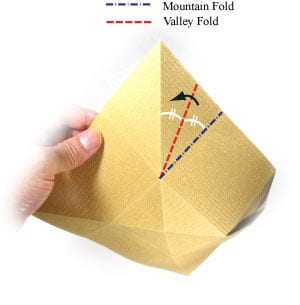
Rotate the origami bowl by 90 degrees. Prepare to repeat the steps #7-12.
STEP 14.
Repeat the steps #7-12. Prepare to rotate the origami bowl by 90 degrees.
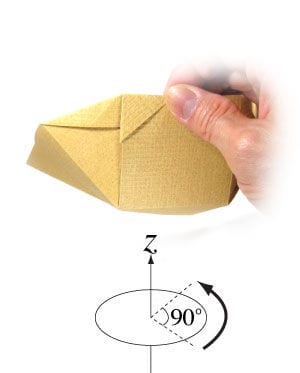
STEP 15.
Rotate the origami bowl by 90 degrees. Prepare to repeat the steps #7-12.
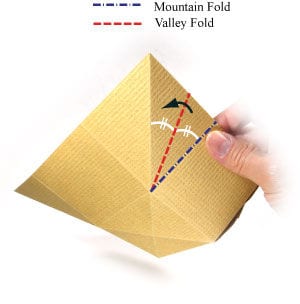
STEP 16.
Repeat the steps #7-12. Prepare to rotate the origami bowl by 90 degrees.
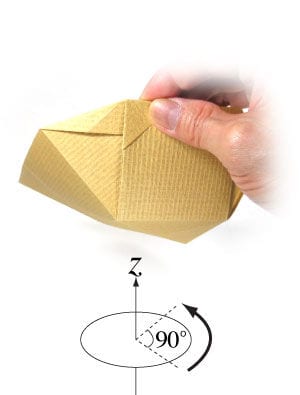
STEP 17.
Rotate the origami bowl by 90 degrees. Prepare to repeat the steps #7-12.
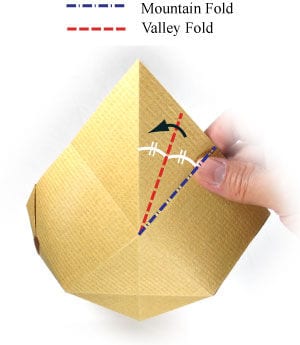
STEP 18.
Repeat the steps #7-12. Prepare to rotate the origami bowl by 90 degrees.
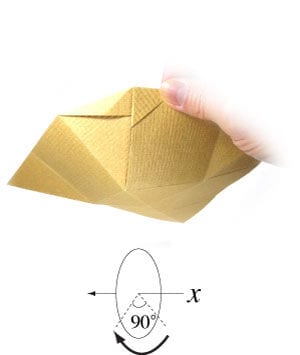
STEP 19.
Rotate the origami bowl by 90 degrees. This is the bottom view of the origami bowl model. Prepare to turn the origami bowl model over.
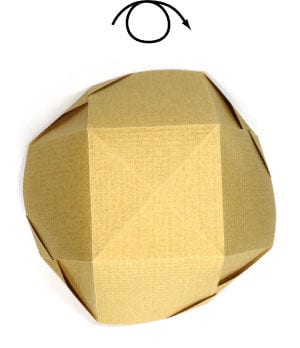
STEP 20.
Turn the origami bowl model over. This is the bottom view of the origami bowl model.
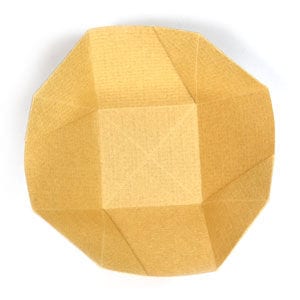
STEP 21.
Congratulations! You have completed making a simple origami bowl.