
Rabbit Ear Fold
The rabbit ear fold is one of those sneaky little moves: it looks plain on its own, but it hides inside more models than you would think. That pointy little flap you see on fish fins, bird beaks, fox ears, and even some geometric stars? Chances are a rabbit ear fold made it. It takes only seven steps and one square of paper, and once you know what to look for, you will start recognising the fold everywhere.
This tutorial keeps things simple: white side up, a couple of guide creases, and one satisfying bunch-and-tip motion that creates the ear. Grab a square of paper and give it a try - it takes less than a minute.
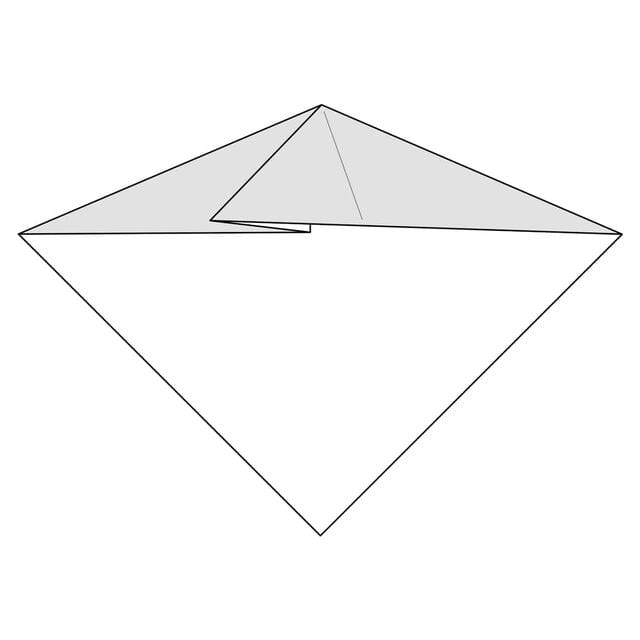
The rabbit ear fold creates a flap of paper that looks just like a rabbit’s ear - and that is exactly where the fold gets its name. It is a small but essential move: once you learn it, you will spot it hiding inside all kinds of models.
STEP 1. Start with a square of paper with the white side up. Fold the paper in half along the dotted line, then unfold it. You will use this line as a guide in later steps.
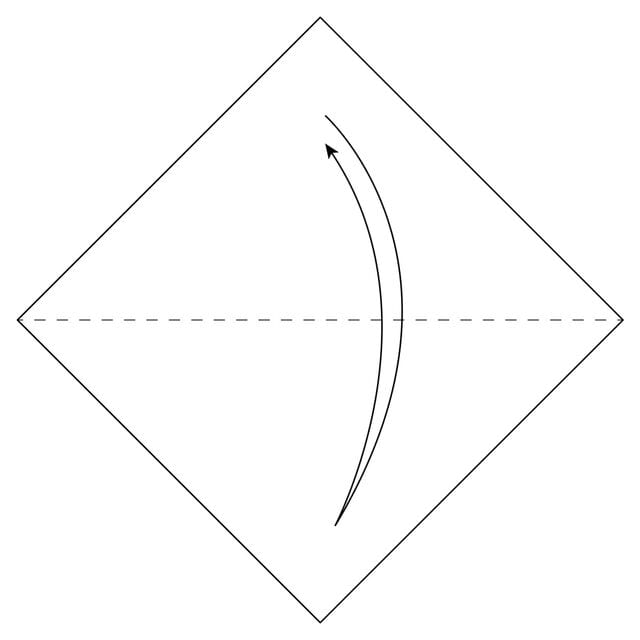
STEP 2. Fold the paper along the dotted line. It should line up with the crease you made in step 1.
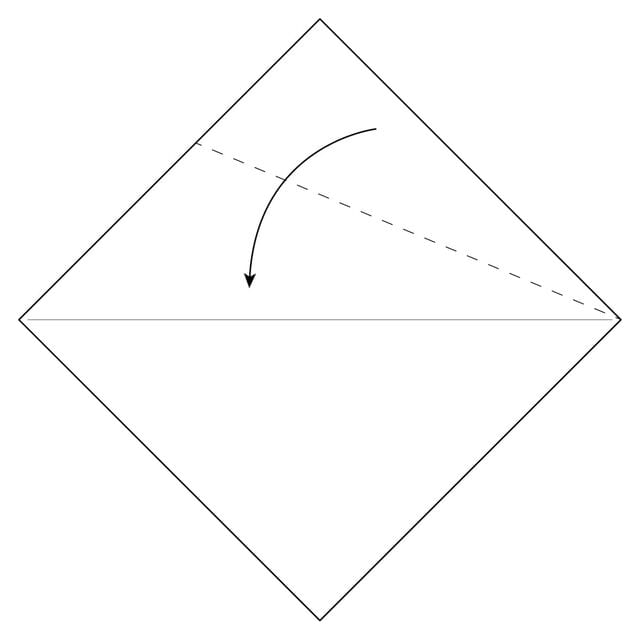
STEP 3. Crease this well, then unfold.
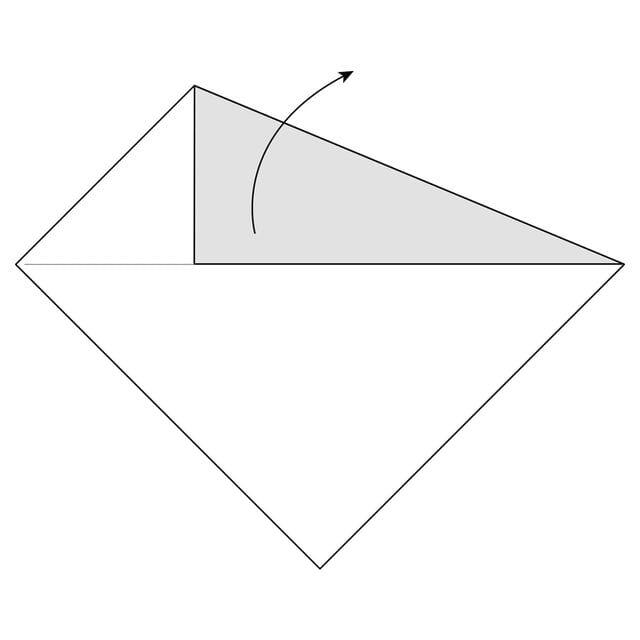
STEP 4. Fold the paper on the other side along the dotted line. It should also line up with the crease you made in step 1.
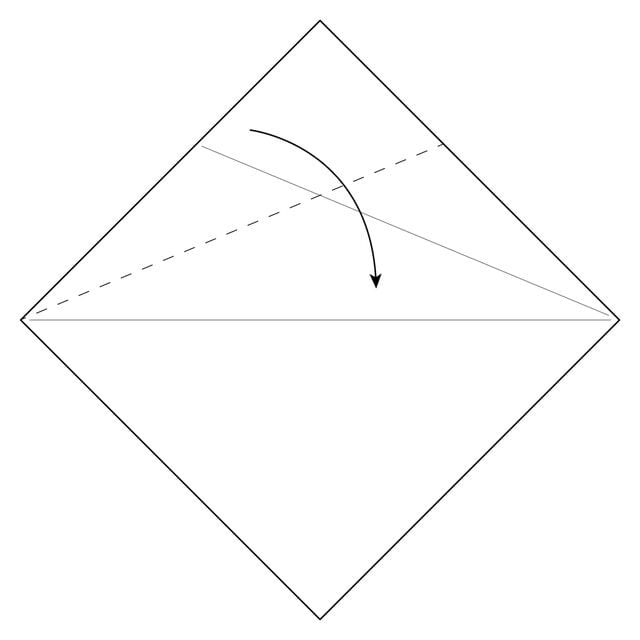
STEP 5. Crease this well, then unfold it.
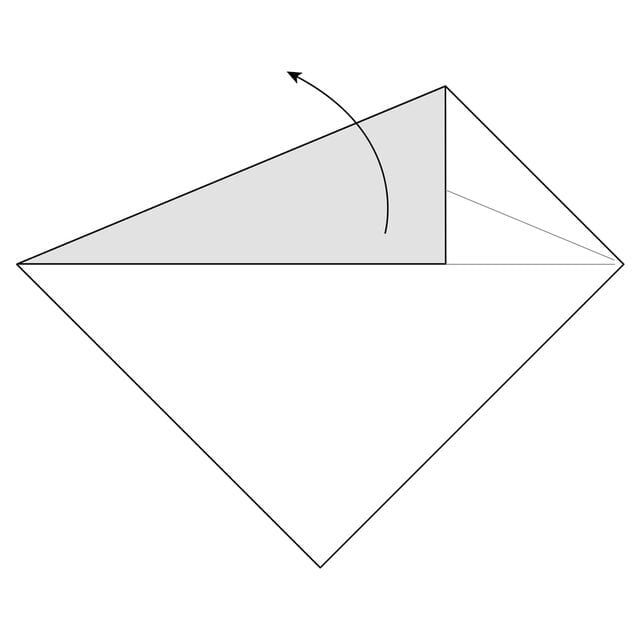
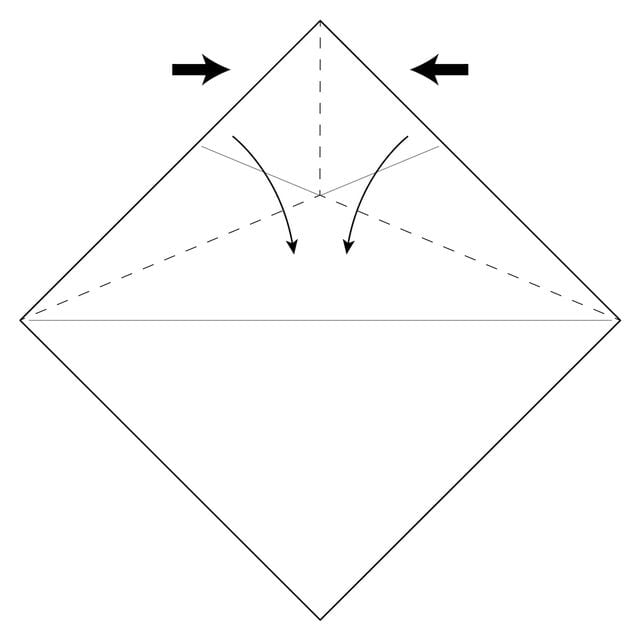
STEP 6. Fold both sides of the paper along the dotted lines back to the centre, following the two creases you just made. The paper will bunch up in the middle, and you will make a new crease along that small vertical dotted line.
STEP 7. After step 6, you should have a triangle-shaped flap of paper. Fold this down to one side. In general it doesn’t matter which side you fold the flap down to - different models will have their own instructions for which side to fold it to.
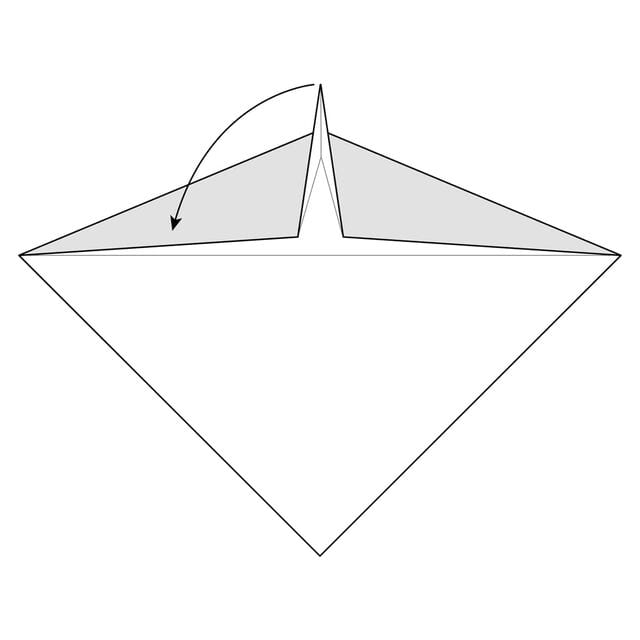
The completed Rabbit Ear Fold.




