
Persimmon
There is something cheerful about a paper persimmon—bright orange, round, and just the thing for an autumn display. This version builds the fruit and its leafy calyx as two separate folds, then slips one into the other for a surprisingly realistic little fruit. The creases look busy, but each move follows a clear photo, and the trick is how the thirds and quarters collapse into a smooth, shiny-looking skin. Grab orange paper for the fruit and a smaller green sheet for the leaves, and in about twenty steps you will have a persimmon worth showing off.
How to fold
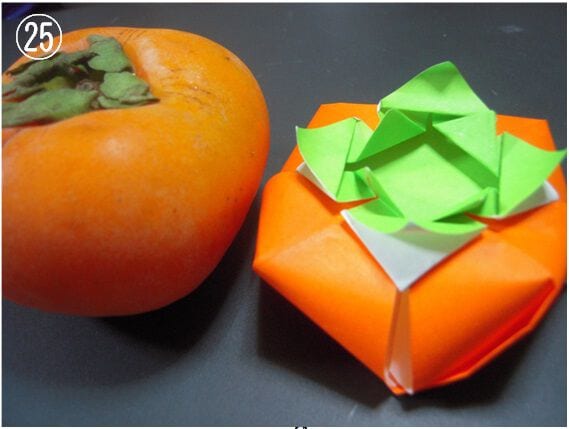
The origami persimmon is a lovely little fruit model: a rounded, glossy body tucked into a four-leaf calyx, folded from orange paper with a few clever creases.
STEP 1. Prepare orange origami paper. Crease it into thirds in both directions (horizontally and vertically). Pinching the sheet into a rounded clump as shown makes the one-third divisions easy to see.
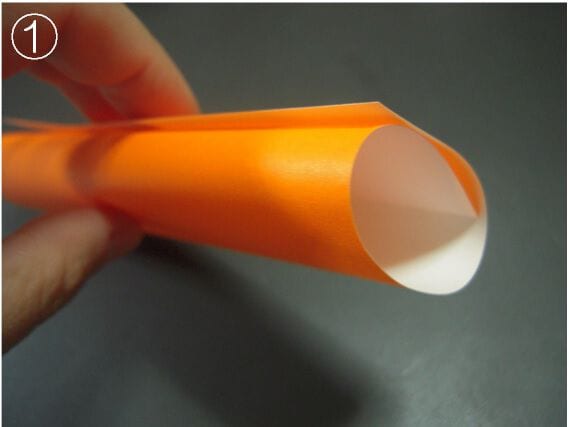
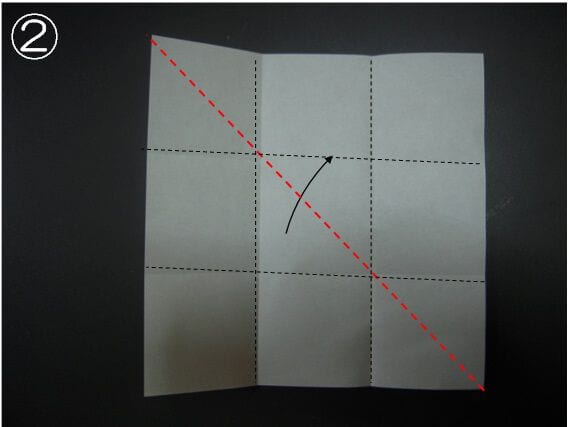
STEP 2. After making the creases, unfold once and fold into a triangle.
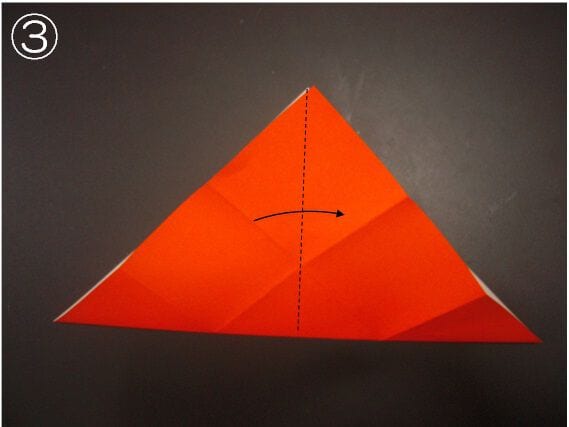
STEP 3. Fold it in half again into a smaller triangle.
STEP 4. Fold the tip upward.
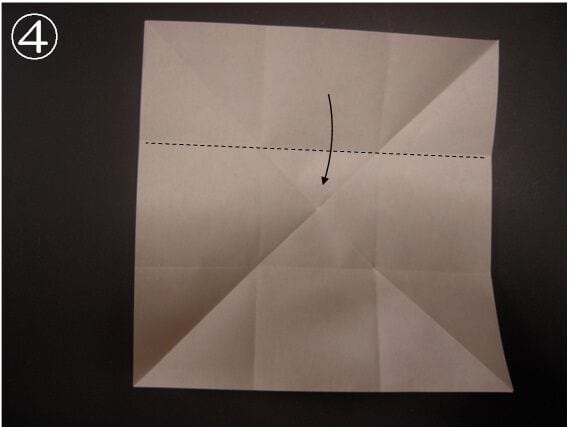
STEP 5. Align the red line with the blue line. Lift the ★ section upward.
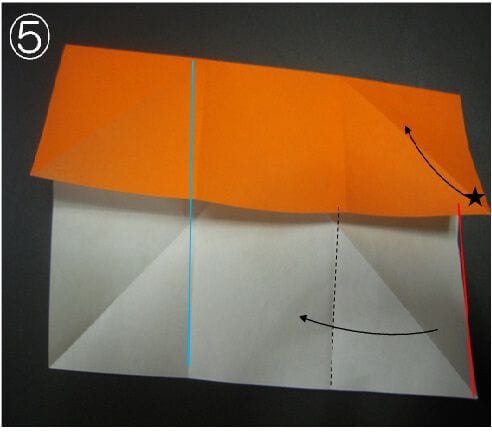
STEP 6. Align the red line with the blue line the same way. Move the ★ section to the right.
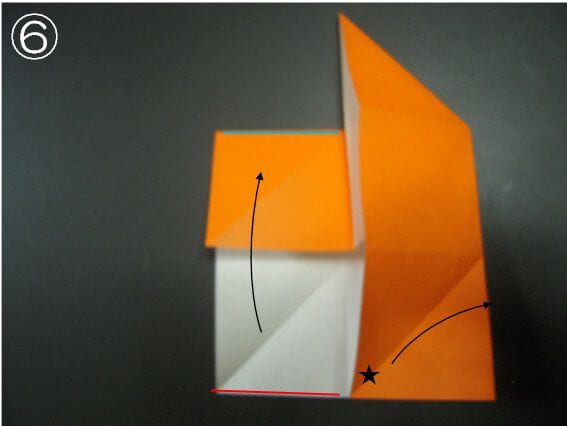
STEP 7. Align the blue line with the white line.
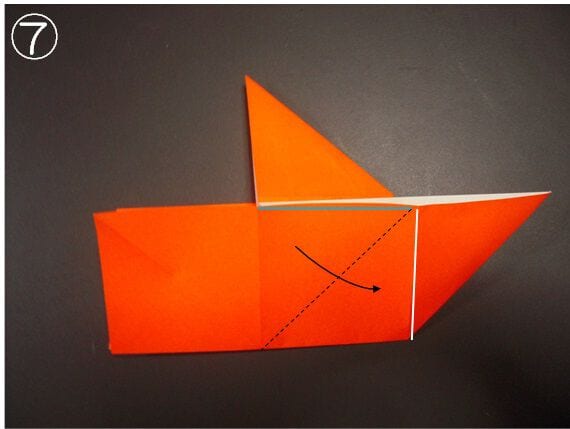
STEP 8. While aligning the blue line with the red line, bring the ★ upward.
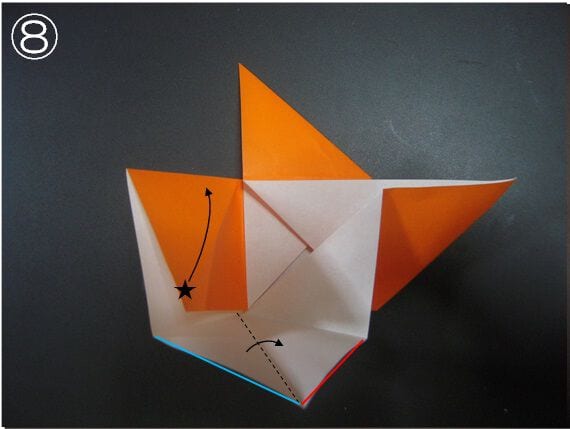
STEP 9. It will look like this.
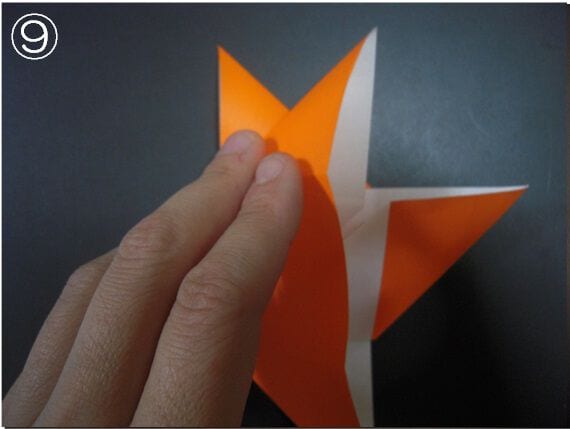
STEP 10. Fold it down toward the left.
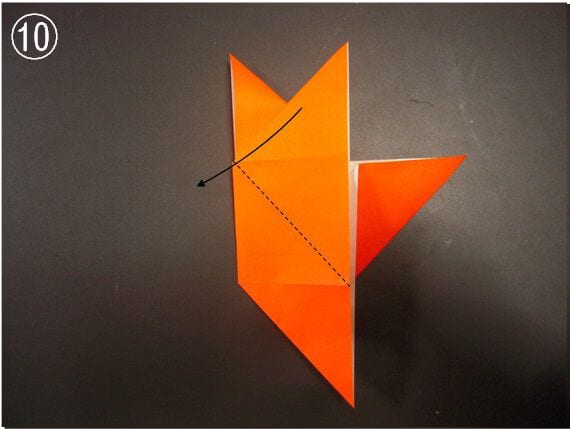
STEP 11. Fold by aligning the blue line with the red line.
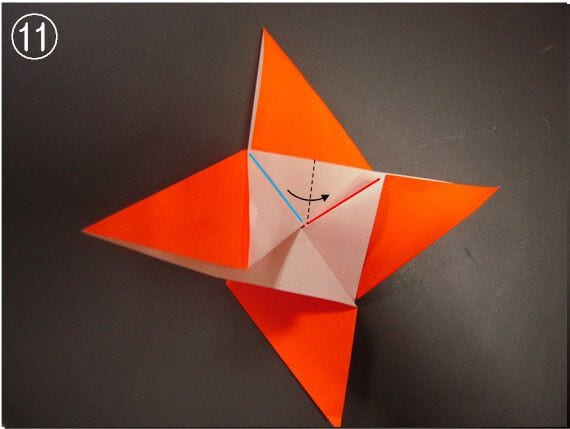
STEP 12. Fold the remaining three spots the same way.
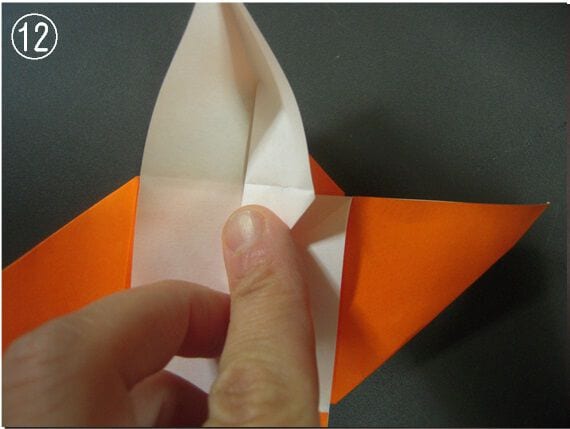
The persimmon fruit is now complete.
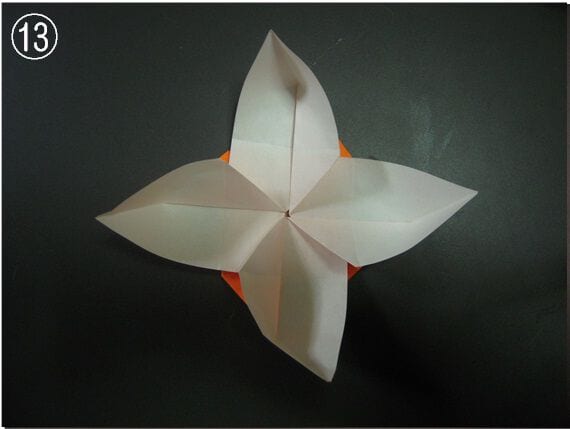
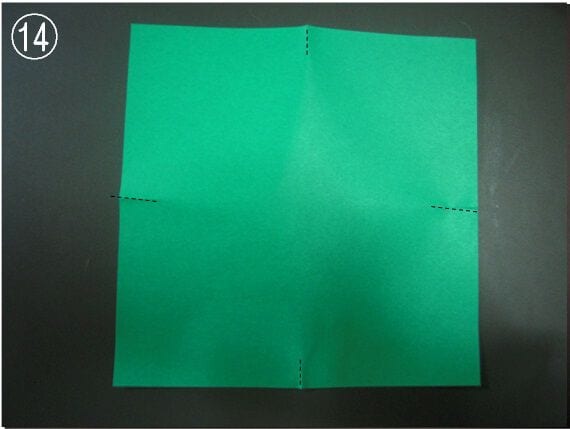
STEP 14. Make the leaves. Prepare origami paper at one-quarter the size. Crease lightly at the half marks in both directions and along the edges.
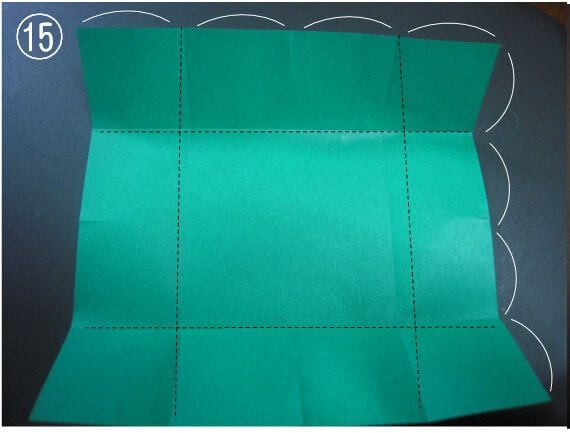
STEP 15. Using the marks as a guide, fold the quarter sections on the top, bottom, left, and right to form creases.
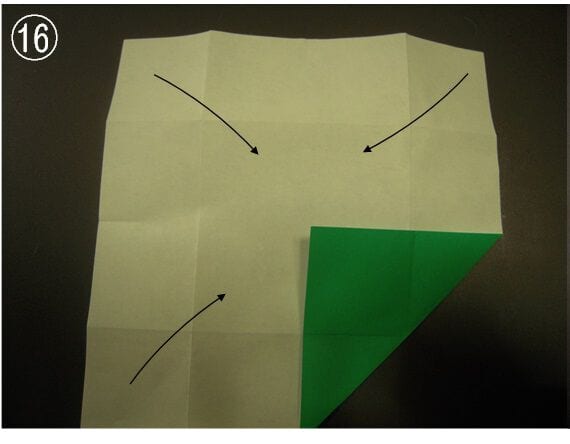
STEP 16. Unfold once, then align the four corners at the center and fold.
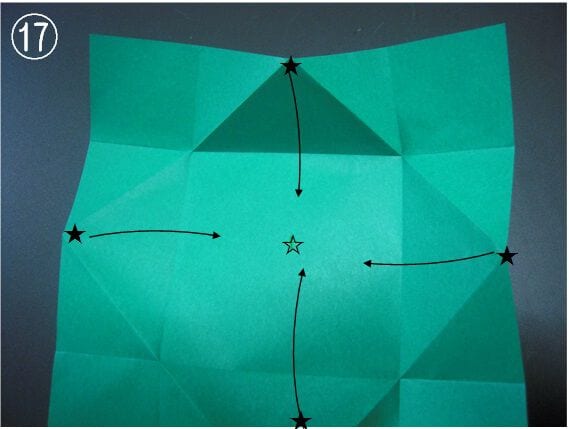
STEP 17. Unfold once more. Gather the ★ marks onto the center ☆.
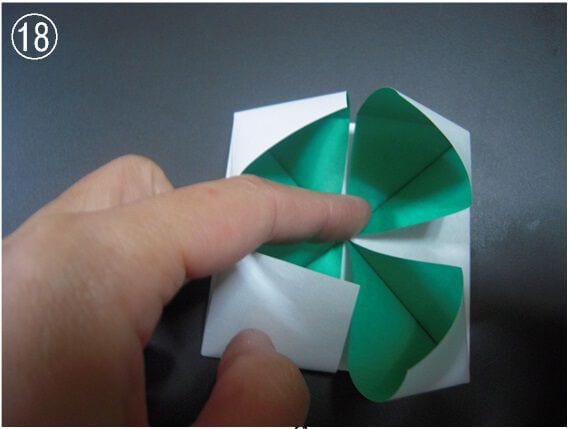
STEP 18. It will look like this.
STEP 19. Fold along the dotted line.
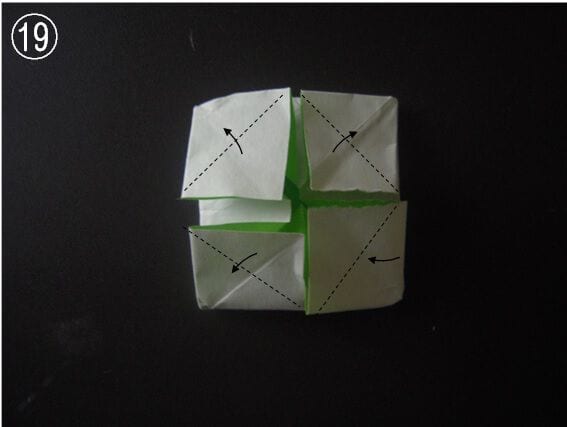
STEP 20. Fold along the dotted line.
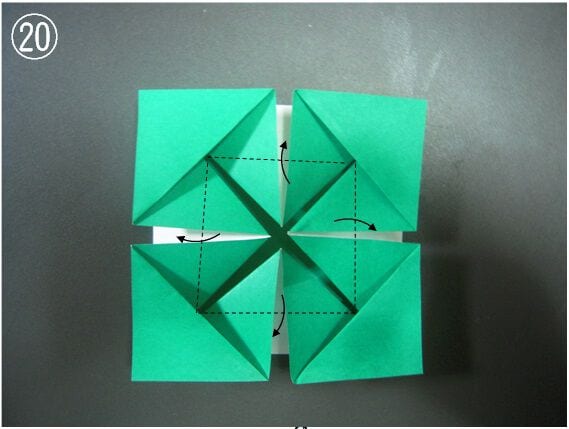
STEP 21. That is it. Insert the persimmon fruit into the leaves.
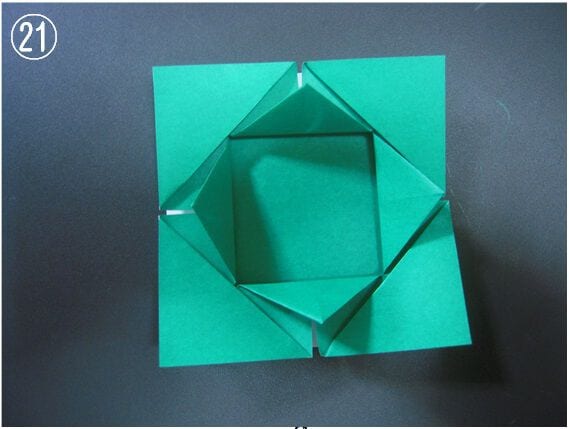
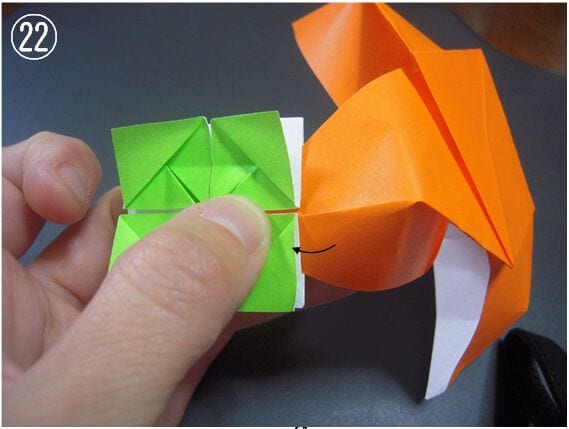
STEP 22. Push it in firmly all the way. Insert the remaining three spots as well.
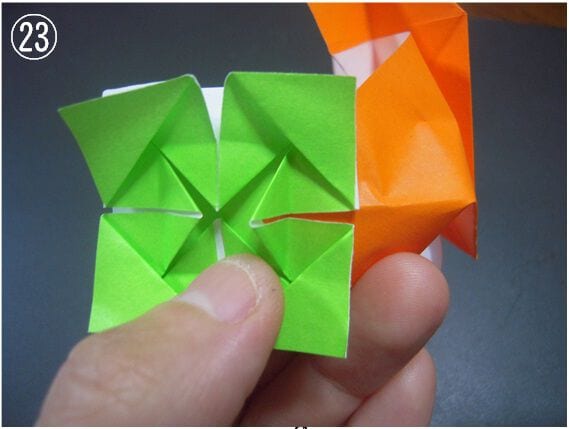
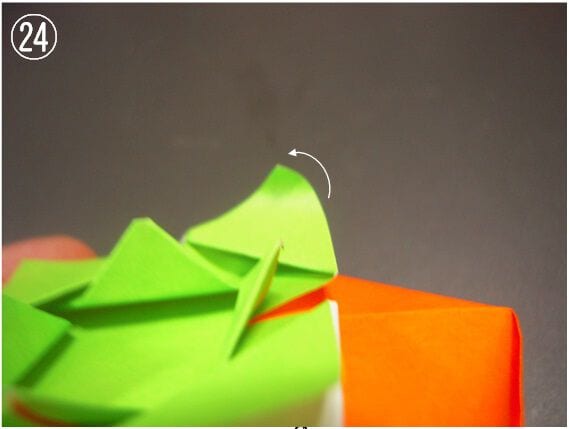
STEP 23. Curling the leaf tips makes it look realistic.
Tips when folding
Many creases will appear, but take care not to form unnecessary wrinkles so the persimmon keeps its smooth, glossy look.




