
Regular Octagon out of Square Paper
There is a quiet moment when a square, folded just right, turns into something rounder. A regular octagon sits right at that edge — square enough to stay tidy, round enough to feel soft — which is why it keeps showing up behind eight-pointed stars, eight-petal flowers, and a surprising amount of geometric decoration.
This tutorial gives you two paths. The first is almost embarrassingly quick: start from a square base, two folds on each side, one snip, done. The second is a slower, more precise fold-and-cut affair that needs no base at all. Whichever route you take, every crease is photographed and the cut is marked — all that's left is the satisfying click of scissors. Let's fold the octagon.
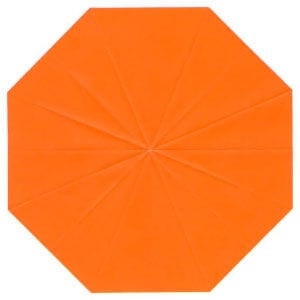
If you want to make an eight-pointed star or a flower with eight petals, you need paper in a regular octagon shape instead of a square. This page shows how to make an origami regular octagon from a square sheet.
In this instruction, I used 15cm x 15cm origami paper. Of course, the folding method is independent of paper size.
This is the front side of an origami paper.
This is the back side of an origami paper.
STEP 1.
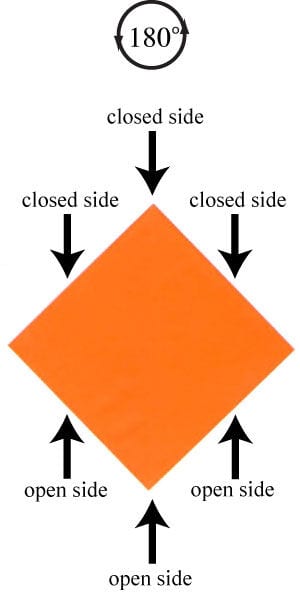
Start with a “square base”. Prepare to rotate the base by 180 degrees so that the top becomes the open side.
STEP 2.
Rotate the base by 180 degrees so that the top becomes the open side. Prepare to apply two valley-folds.
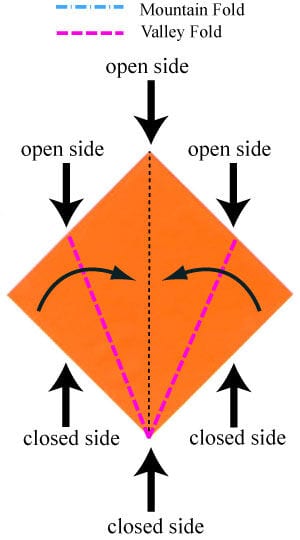
STEP 3.
Apply the two valley-folds of step 2. Prepare to turn the model over.
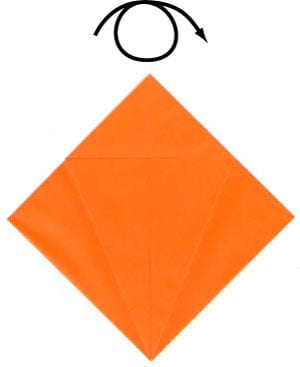
STEP 4.
Turn the model over. Prepare to apply two valley-folds.
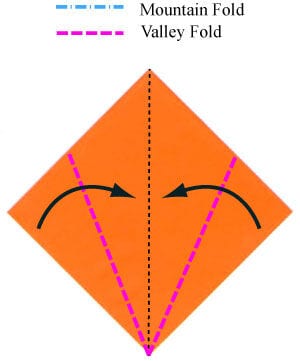
STEP 5.
Apply the two valley-folds of step 4.
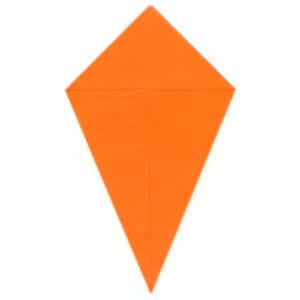
STEP 6.
Prepare to cut the paper off along the dotted line.
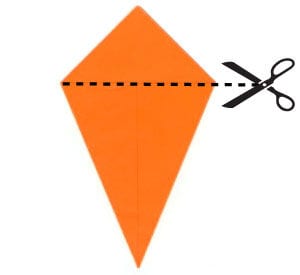
STEP 7.
Cut the paper off along the dotted line of step 6.
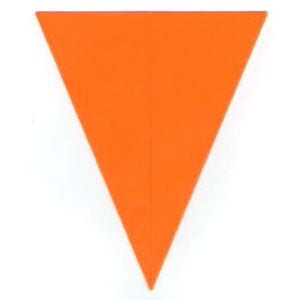
STEP 8.
Open the paper. Congratulations! You have completed making a regular octagon.
STEP 9.
Here is another method of making a regular octagon, which is more complicated. Start with the front side of the paper facing up. Prepare to valley-fold in half vertically and then unfold.
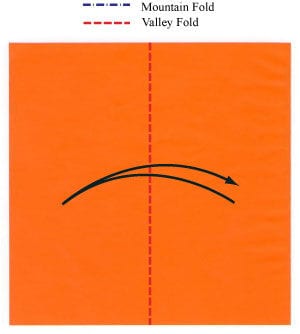
STEP 10.
Valley-fold the paper in half vertically and then unfold. Prepare to valley-fold in half horizontally and then unfold.
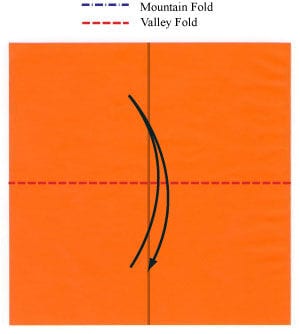
STEP 11.
Valley-fold the paper in half horizontally and then unfold. Prepare to valley-fold diagonally and then unfold.
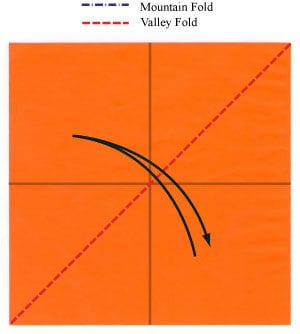
STEP 12.
Apply the diagonal valley-fold of step 11 and then unfold. Prepare to apply another diagonal valley-fold and then unfold.
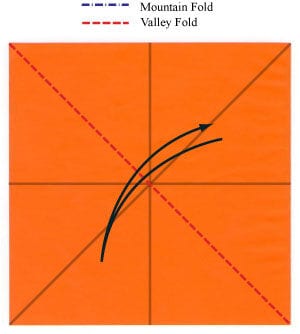
STEP 13.
Apply the diagonal valley-fold of step 12 and then unfold. Prepare to turn the paper over.
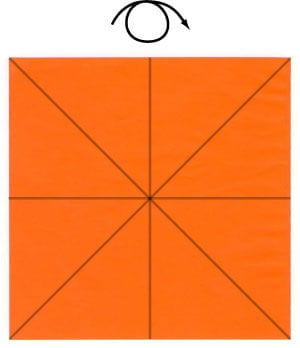
STEP 14.
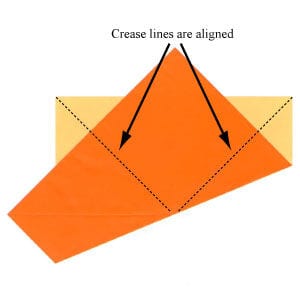
Turn the paper over. Prepare to apply a slanted valley-fold which lies halfway between the diagonal and horizontal lines.
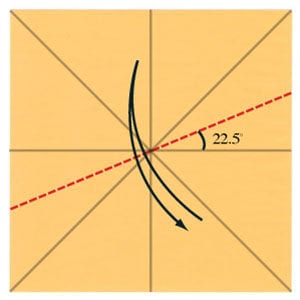
STEP 15.
Apply the slanted valley-fold of step 14. Make sure the crease lines align with the dotted lines. Prepare to unfold.
STEP 16.
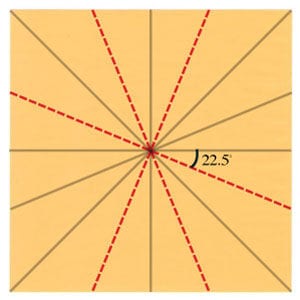
Unfold the previous valley-fold. Prepare to apply three valley-folds and then unfold.
STEP 17.
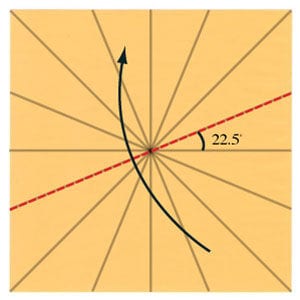
Apply the three valley-folds of step 16 and then unfold. Prepare to re-apply the valley-fold of step 14.
STEP 18.
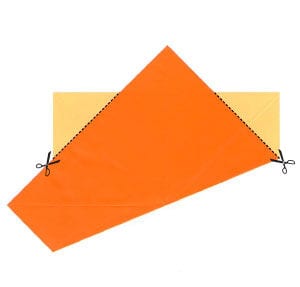
Apply the valley-fold of step 17. Prepare to cut the paper off along two dotted lines.
STEP 19.
Cut the paper off as in step 18. Prepare to turn the paper over.
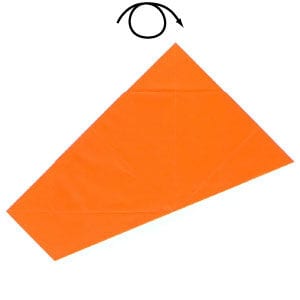
STEP 20.
Turn the paper over. Prepare to cut the paper off along two dotted lines.
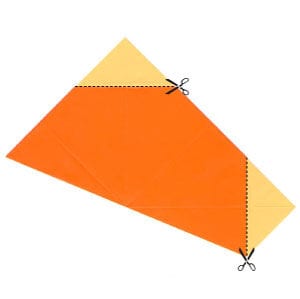
STEP 21.
Cut the paper off along the two dotted lines of step 20. Prepare to open the paper.
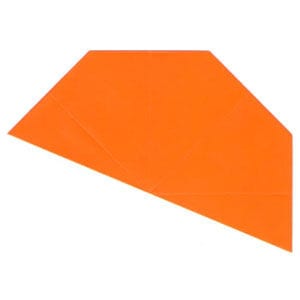
STEP 22.
Open the paper. Congratulations! You have completed making a regular octagon.





