
Frog Base
Every traditional origami frog begins with the same quiet ritual: a square of paper folded twice, squashed into a diamond, and then patiently coaxed into a shape that already knows how to jump. The Frog Base is the foundation behind that jump, and it is often called the most demanding of the traditional bases, not because of any single hard fold, but because of all the careful repetition. The tutorial builds the base from a simple Square Base: four flaps, each squash-folded flat and symmetrical, and then each one finished with a petal fold variation. It is fifty-three steps of precise, meditative folding, and by the end your paper will hold four identical sections, one for each side of the frog that is yet to come. Take a square of paper, keep the white side up, and let us work through the classic, step by step.
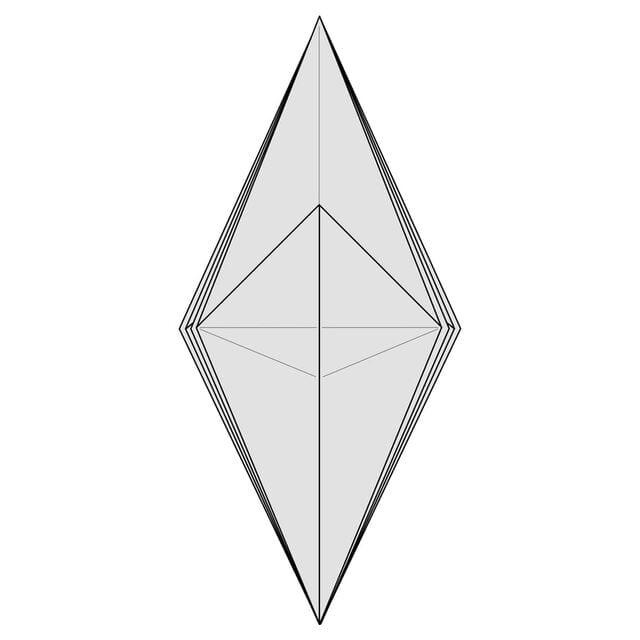
This is the start of a traditional origami frog, which is where this base gets its name. This is probably the most complicated one of the traditional origami bases.
Step 1
Start with a square sheet of paper with the white side up. Fold it in half along the dotted line.
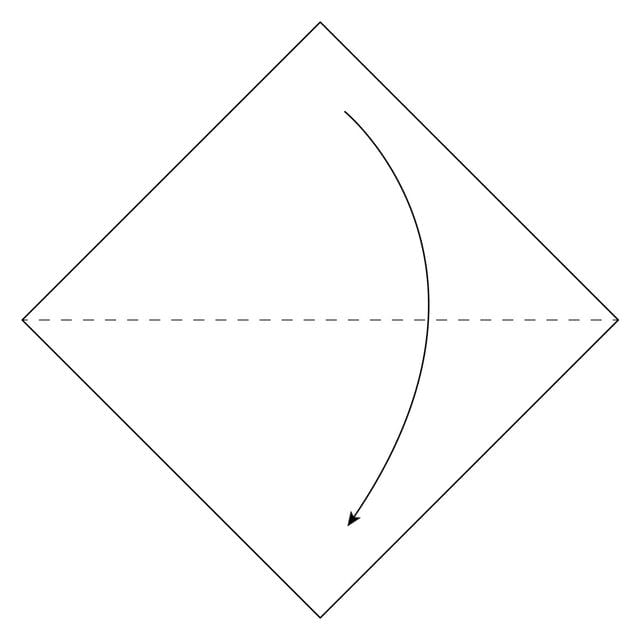
Step 2
Fold the paper in half again along the dotted line.
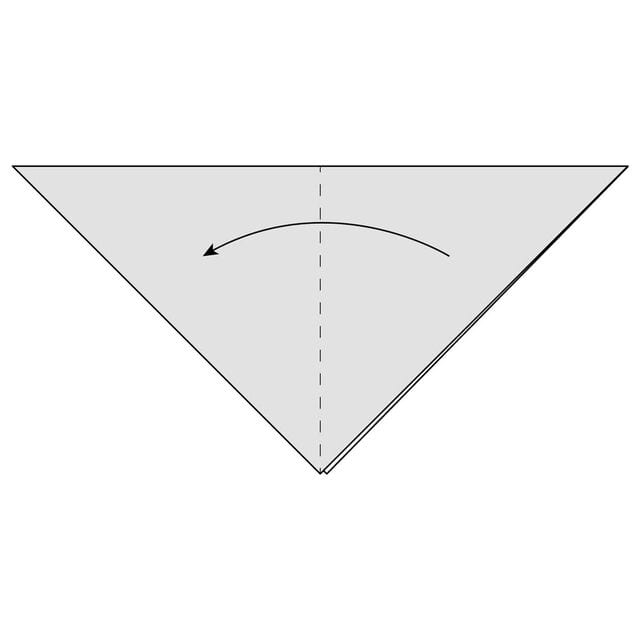
Step 3
Bring the top flap of paper up.
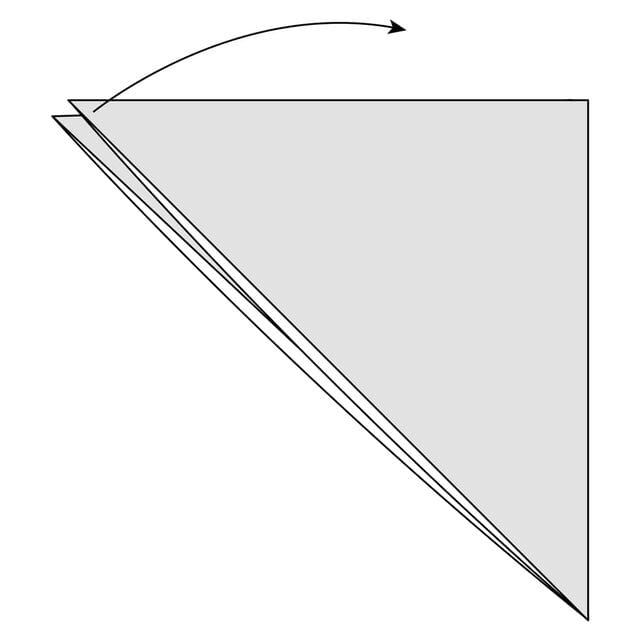
Step 4
Squash-fold this flap of paper down. Make sure you keep both sides symmetrical. You should end up with a diamond shape.
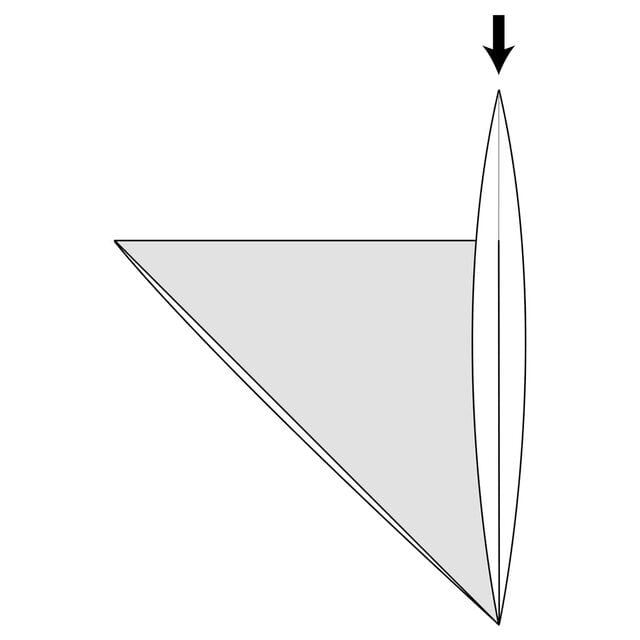
Step 5
Turn the model over.
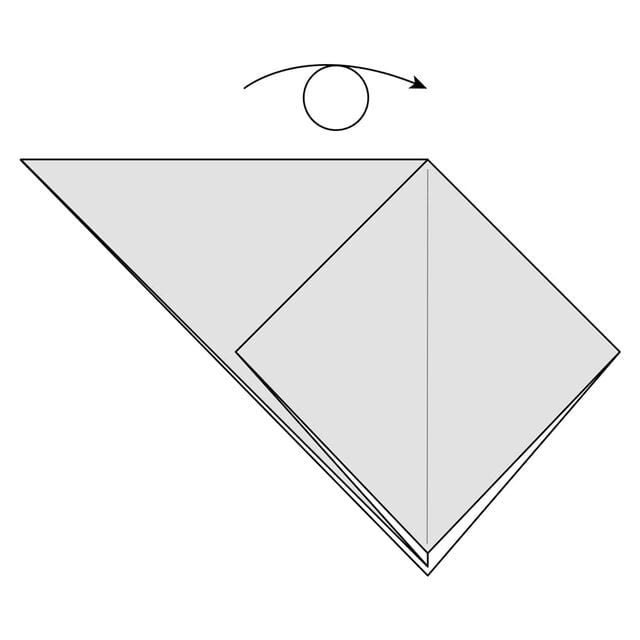
Step 6
Lift up the top left flap of paper to the middle.
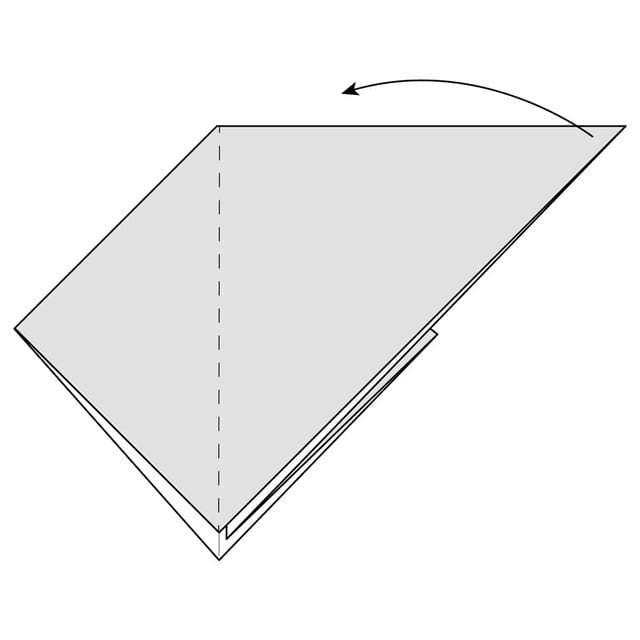
Step 7
Squash-fold this flap of paper down. Make sure you keep both sides symmetrical. You should end up with a diamond shape matching the one on the other side. You now have a Square Base.
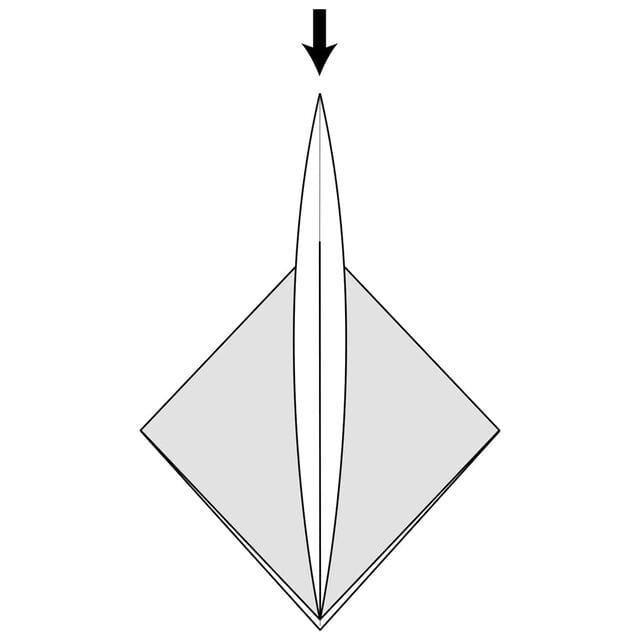
Step 8
Bring the top left flap of paper up and towards the middle.
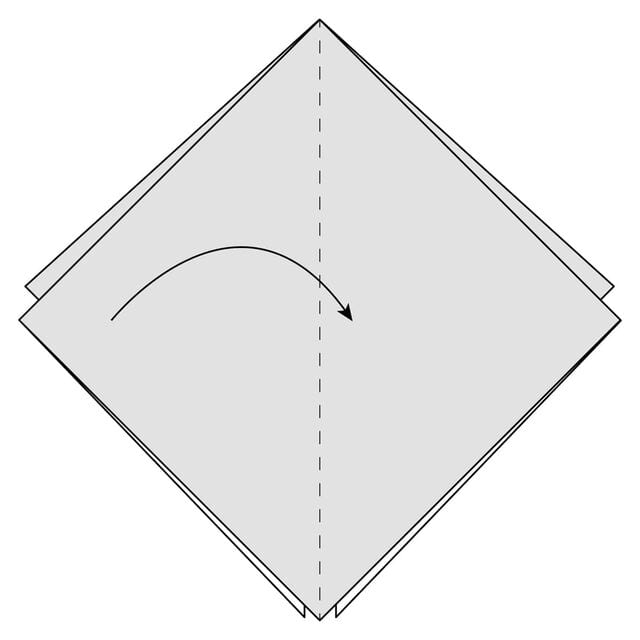
Step 9
Squash-fold this flap down.
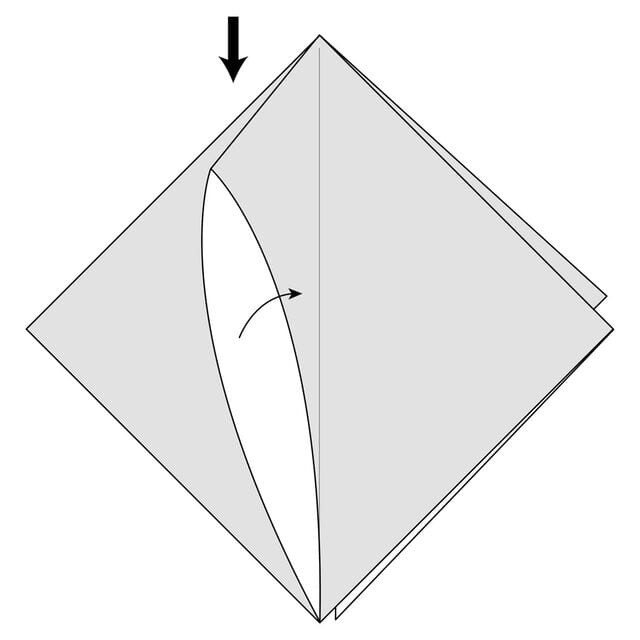
Step 10
Push everything flat and make sure everything is squashed symmetrically.
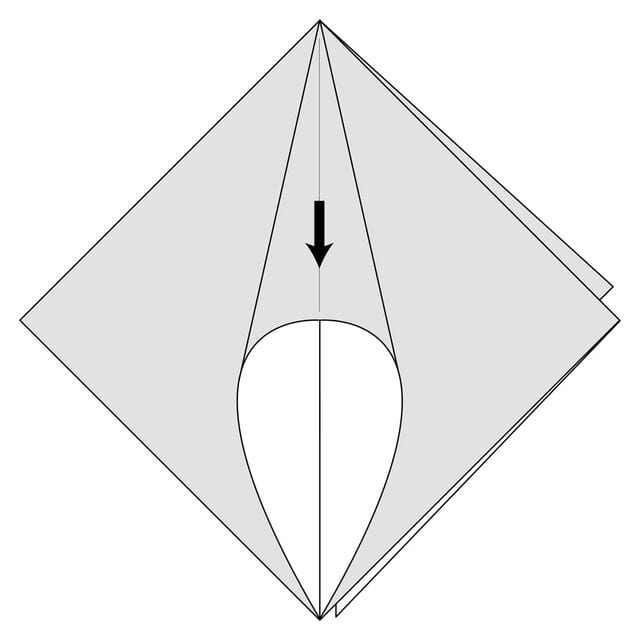
Step 11
Fold the top right flap of paper over to the left.
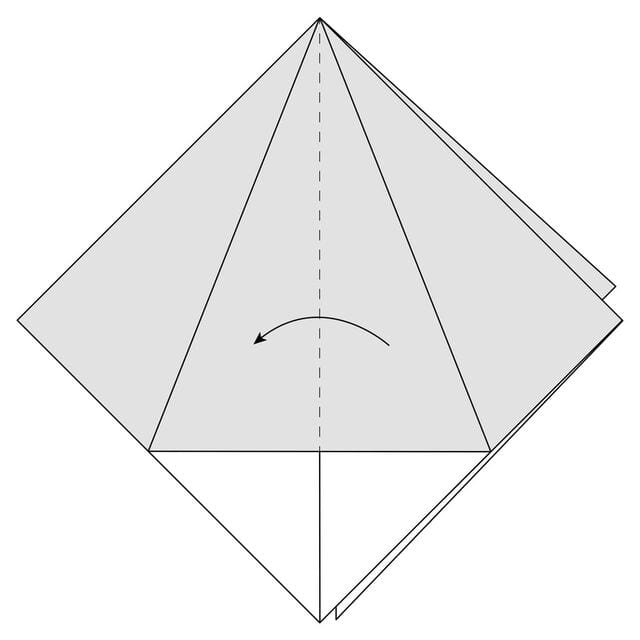
Step 12
Bring the top right flap of paper up and towards the middle.
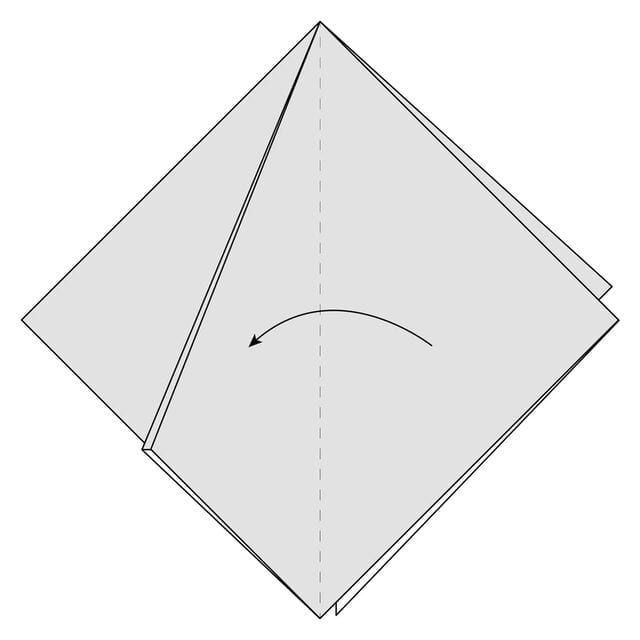
Step 13
Squash-fold this flap down.
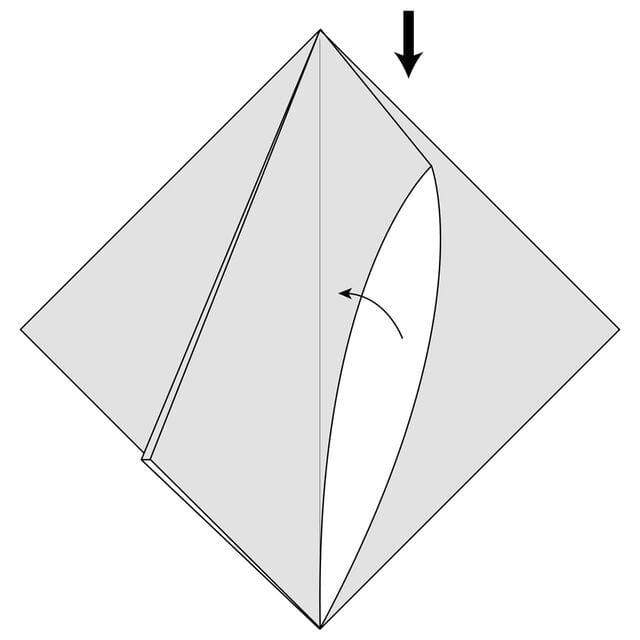
Step 14
Push everything flat and make sure everything is squashed symmetrically.
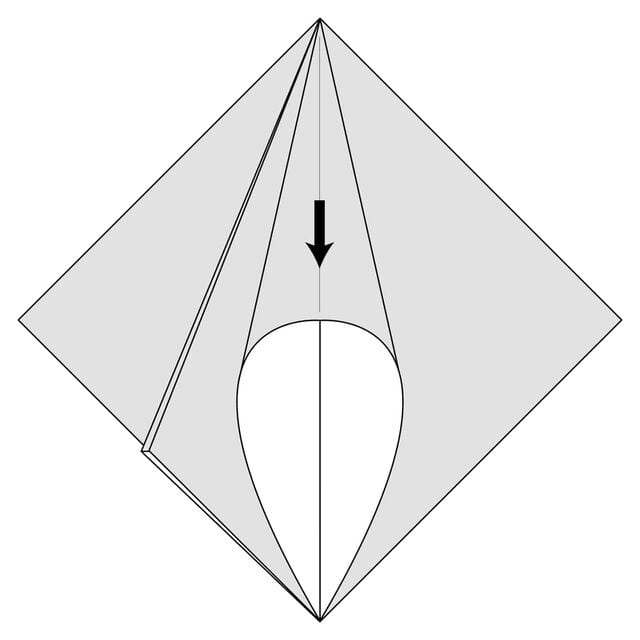
Step 15
Turn the model over.
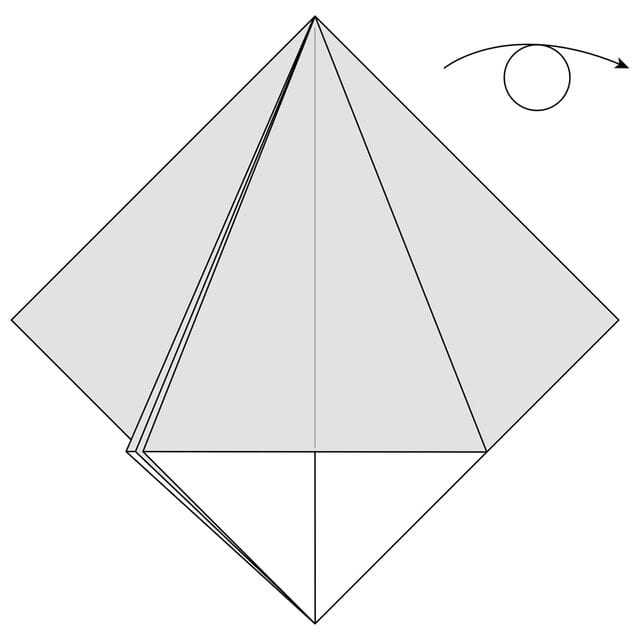
Step 16
Bring the top left flap of paper up and towards the middle.
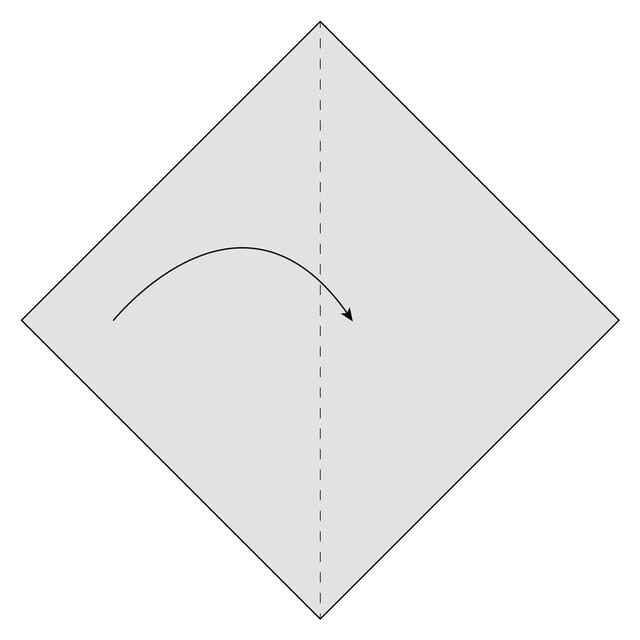
Step 17
Squash-fold this flap down.
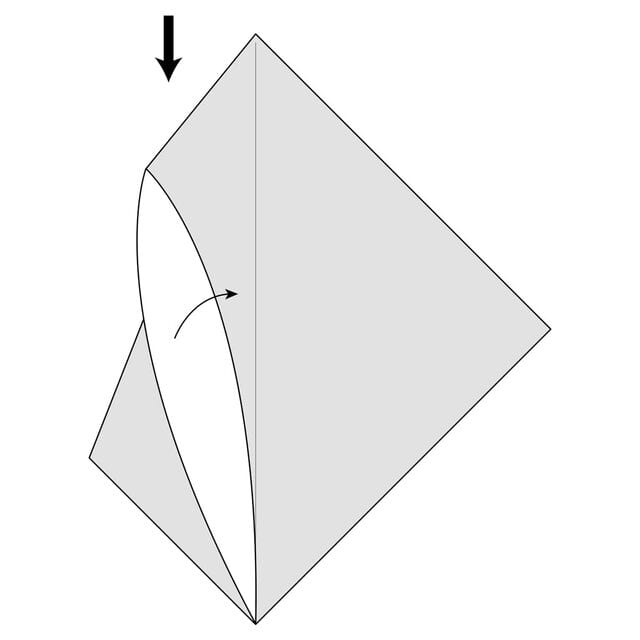
Step 18
Push everything flat and make sure everything is squashed symmetrically.
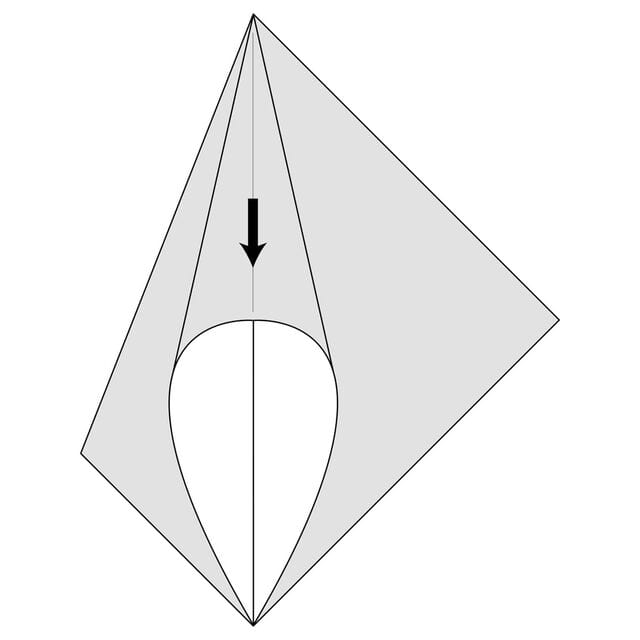
Step 19
Fold the top right flap over to the left.
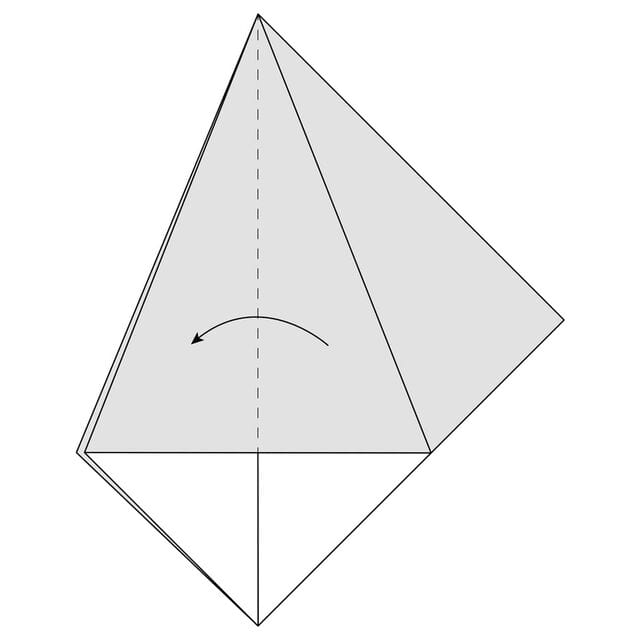
Step 20
Bring the top right flap of paper up and towards the middle.
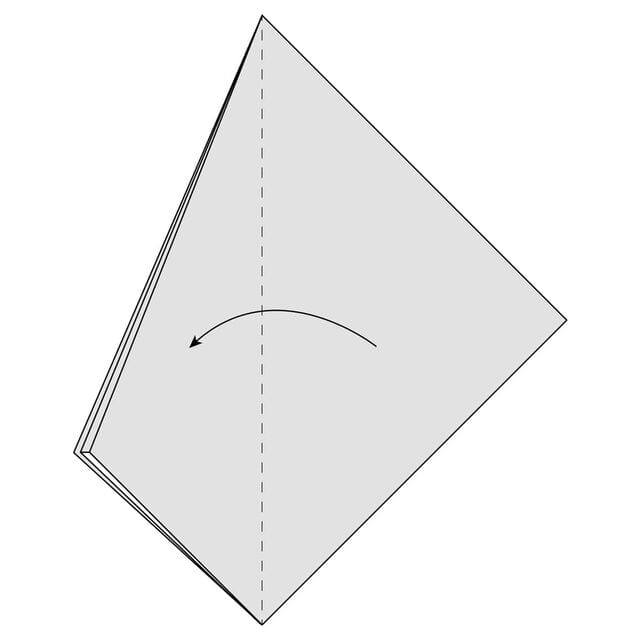
Step 21
Squash-fold this flap down.
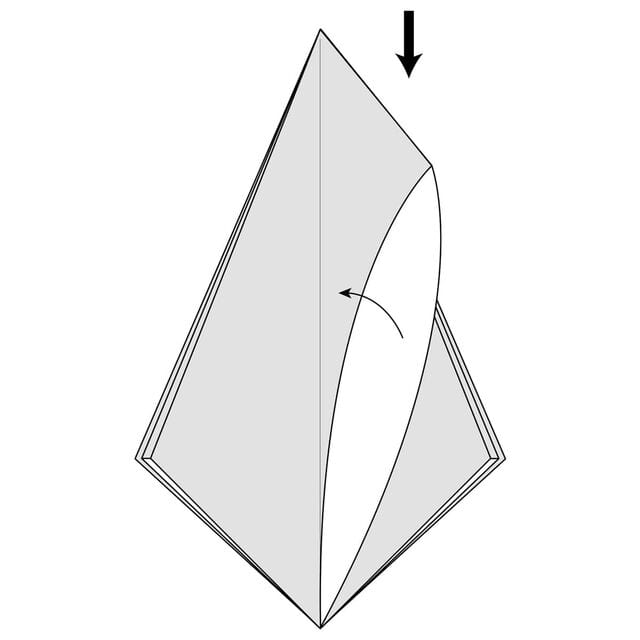
Step 22
Push everything flat and make sure everything is squashed symmetrically.
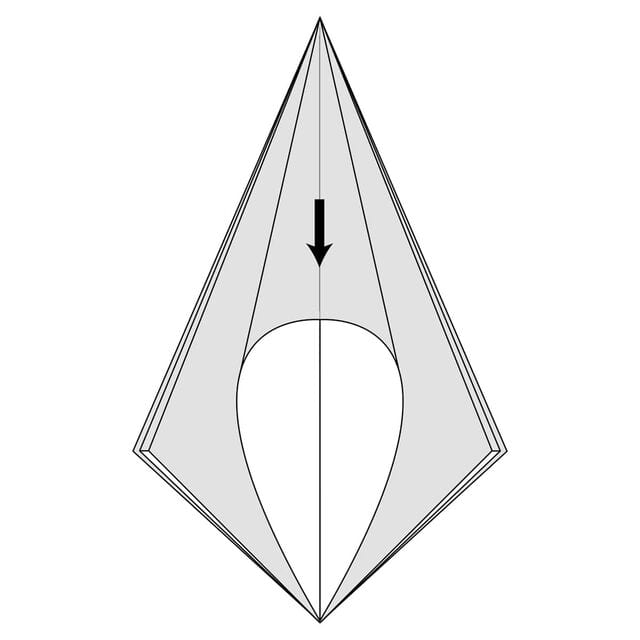
Step 23
Take a moment to make sure your model looks like the diagram above. There should be 4 flaps of paper on each side.
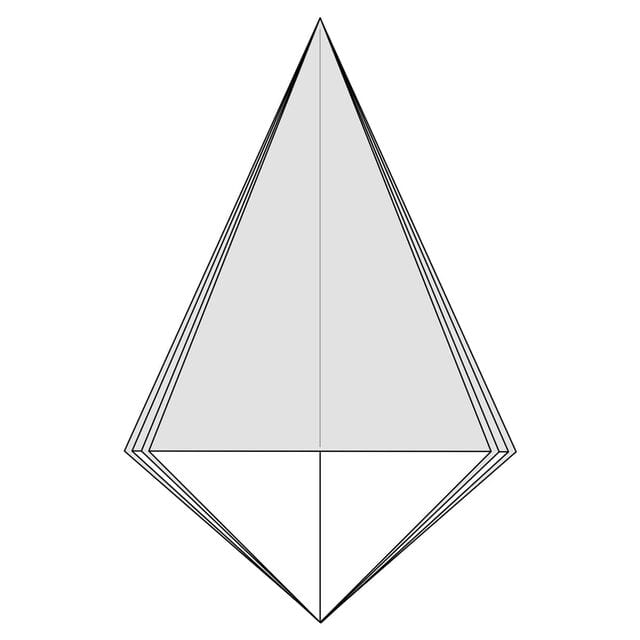
Step 24
Fold the top right flap of paper to the middle along the dotted line.
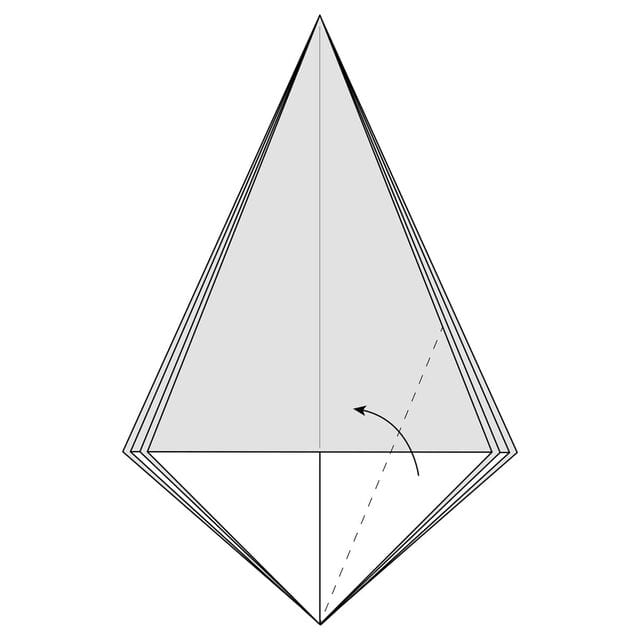
Step 25
Crease this fold well and then unfold it.
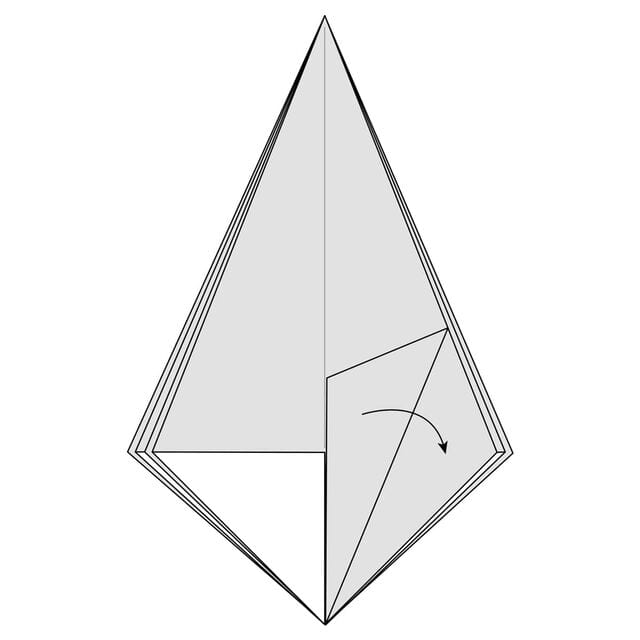
Step 26
Fold the top left flap of paper to the middle along the dotted line.
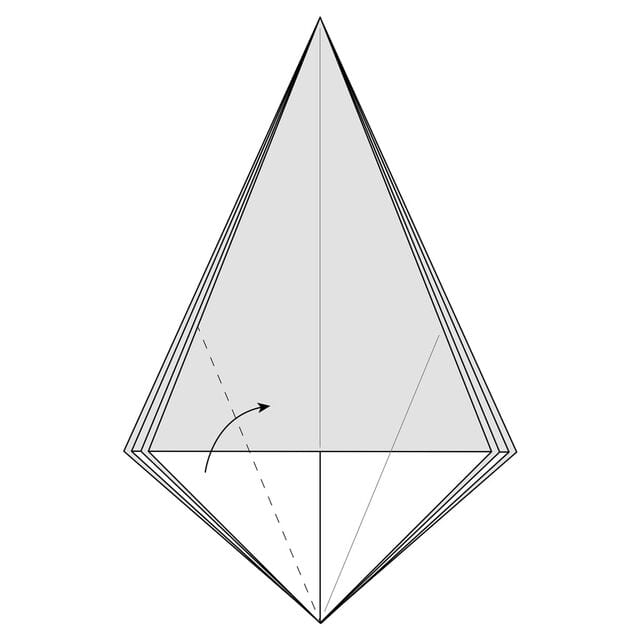
Step 27
Crease this fold well and then unfold it.
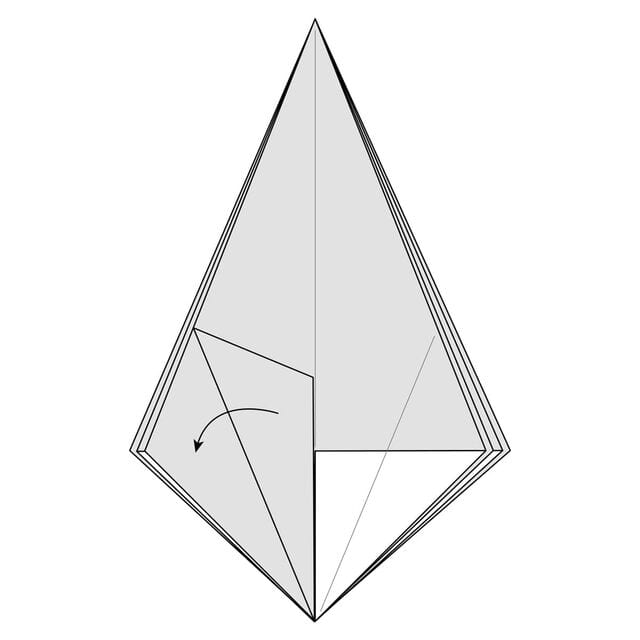
Step 28
Fold a Petal Fold Variation along the horizontal dotted line and the creases you made earlier.
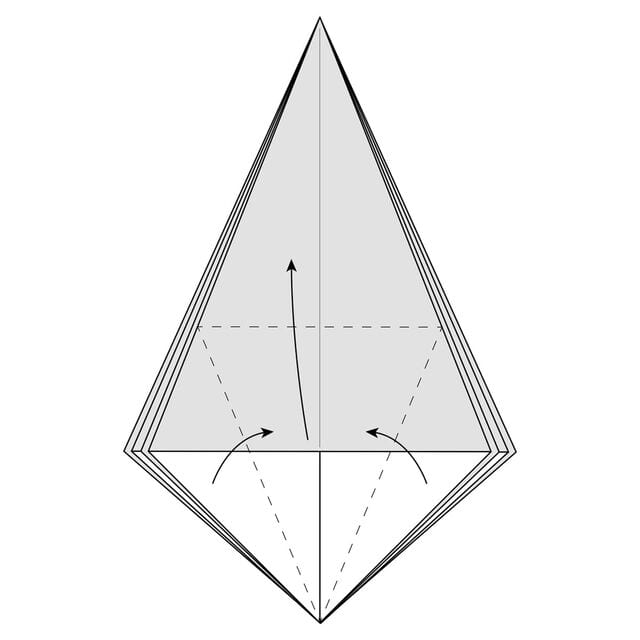
Step 29
Lift up along the dotted line in the previous step and fold everything flat along the existing creases.
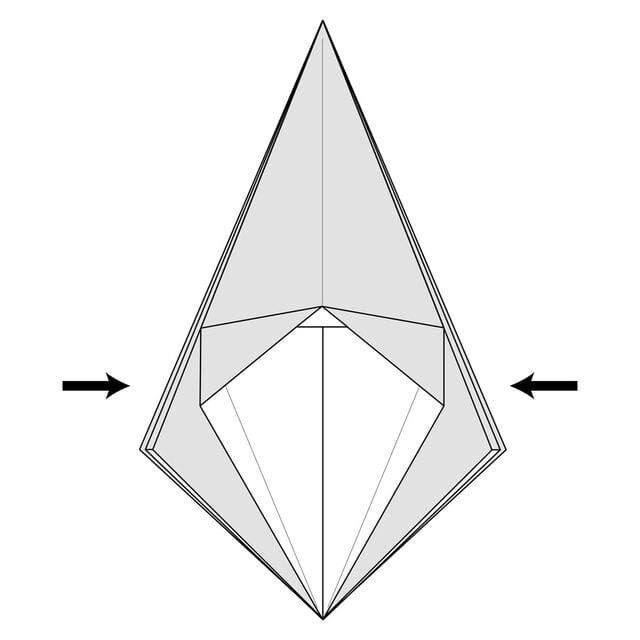
Step 30
The completed Petal Fold Variation. You’re going to do this three more times.

Step 31
Fold the top left flap of paper along the dotted line in the centre over to the right.
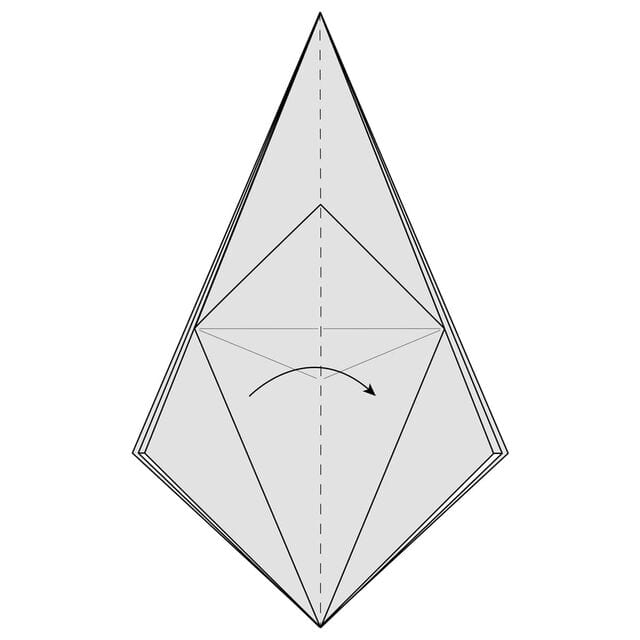
Step 32
Fold the new top left flap of paper along the dotted line in the centre over the right.
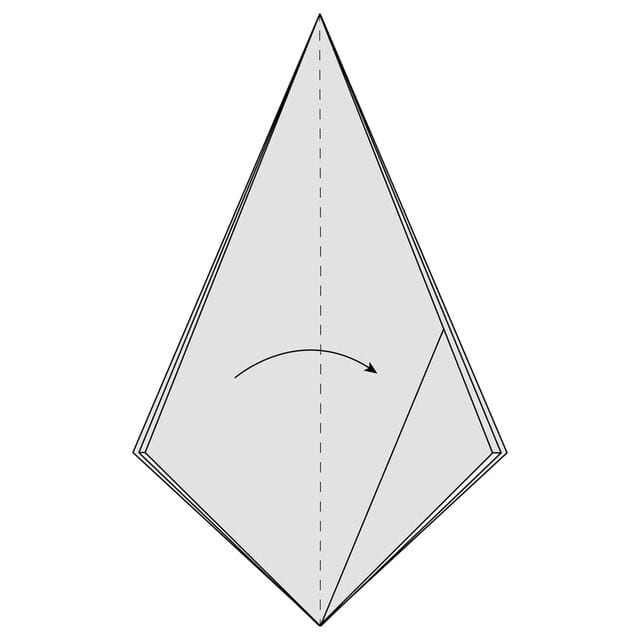
Step 33
Fold the top right flap of paper to the centre along the dotted line.
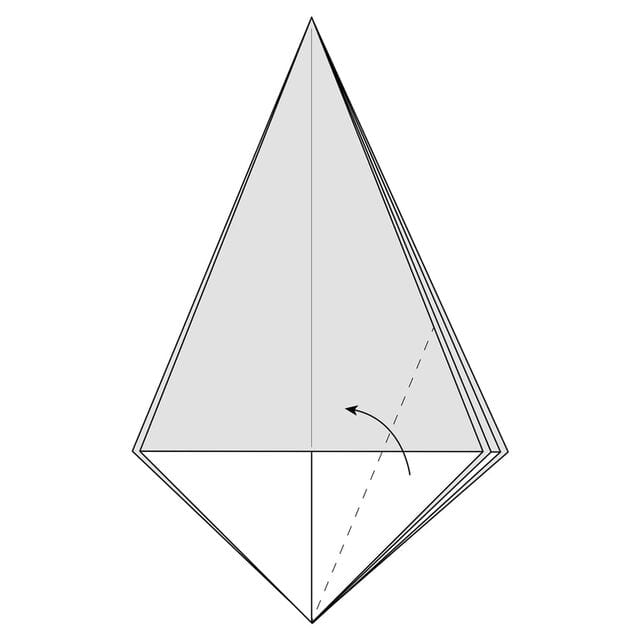
Step 34
Crease this fold well and then unfold it.
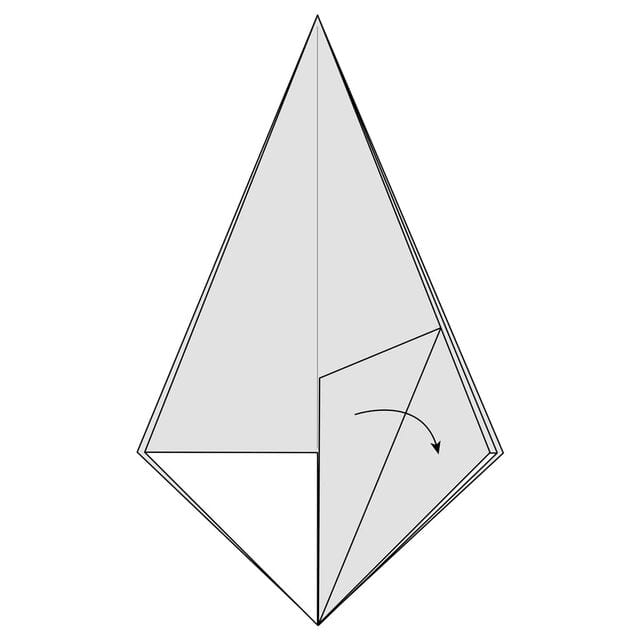
Step 35
Fold the top left flap of paper to the centre along the dotted line.
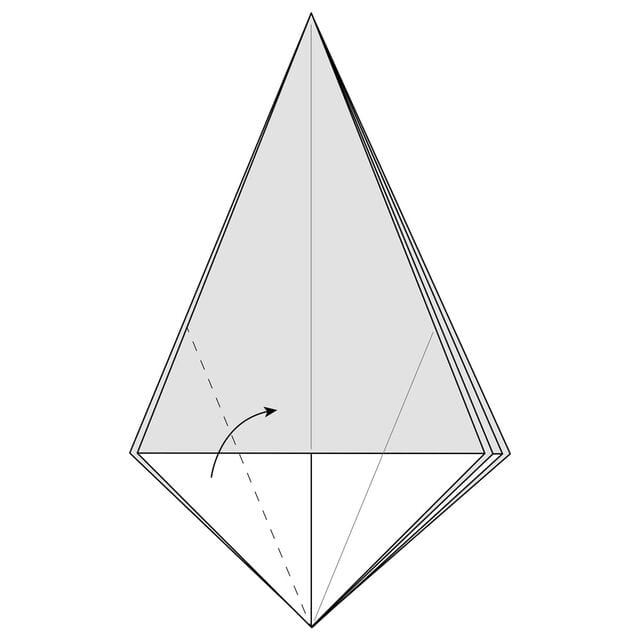
Step 36
Crease this fold well and then unfold it.
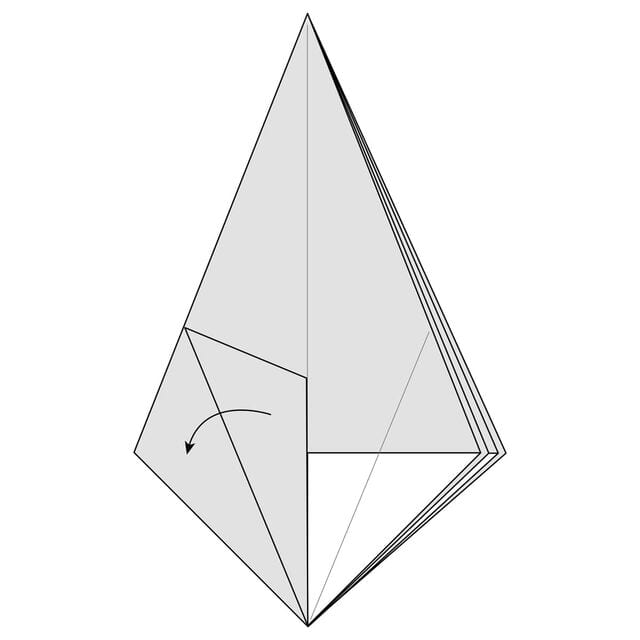
Step 37
Fold a Petal Fold Variation along the horizontal dotted line and the creases you made earlier.
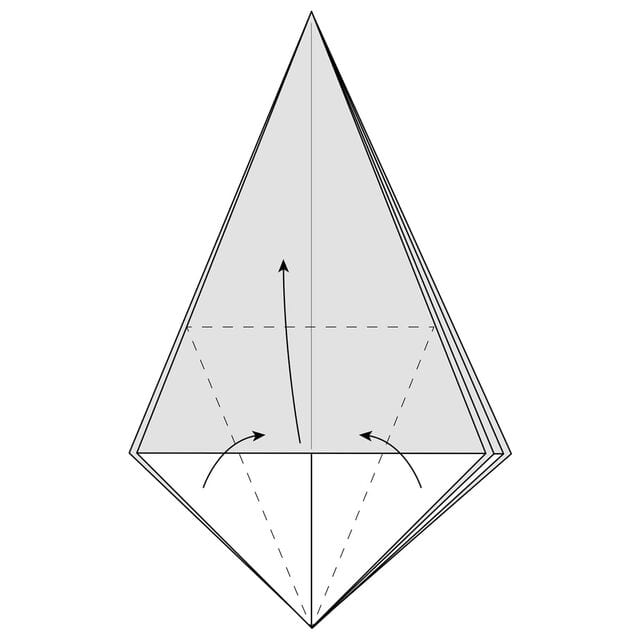
Step 38
Lift up along the dotted line in the previous step and fold everything flat along the existing creases.
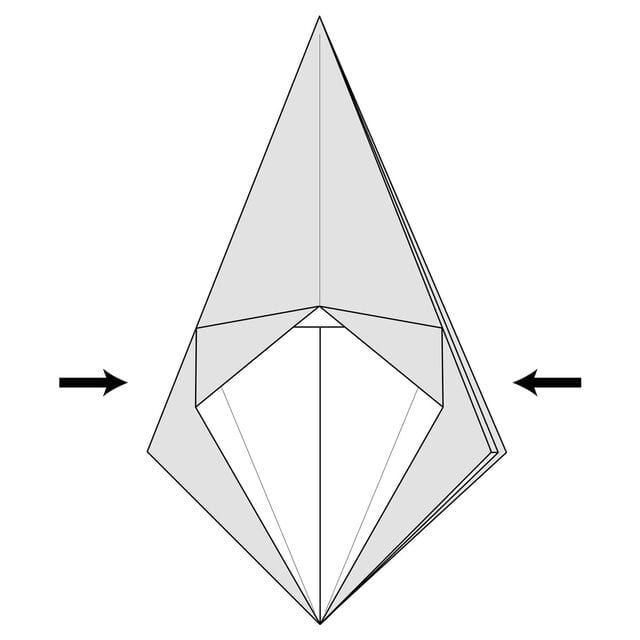
Step 39
Turn the model over.
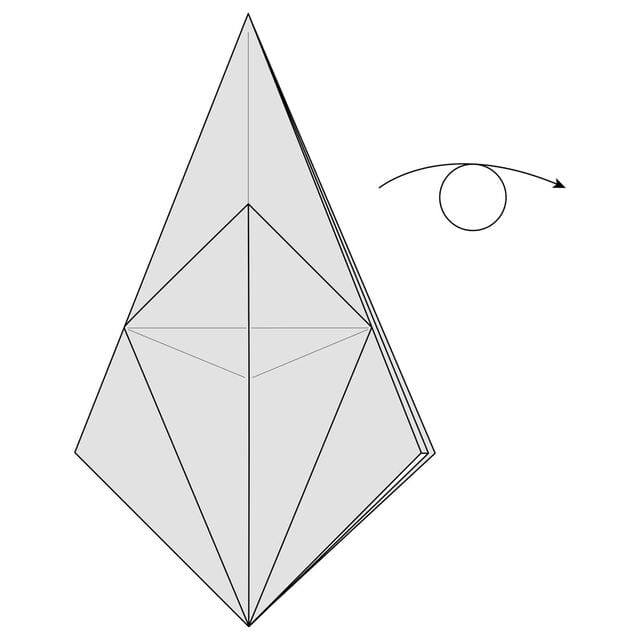
Step 40
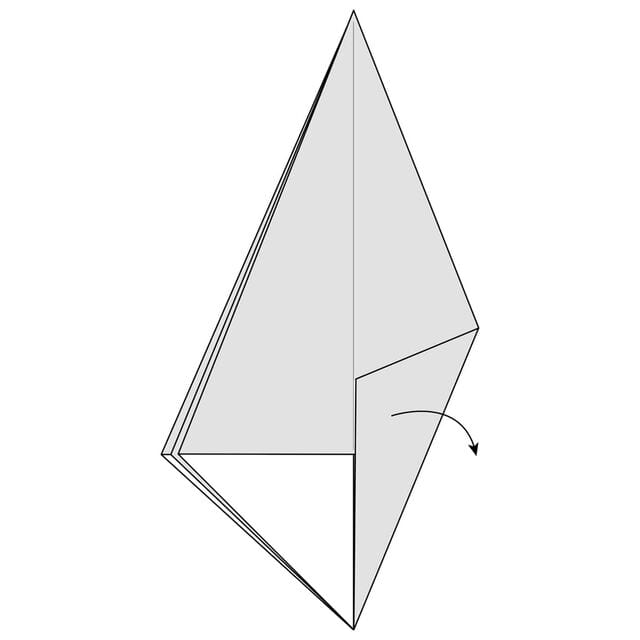
Fold the top right flap of paper to the centre along the dotted line.
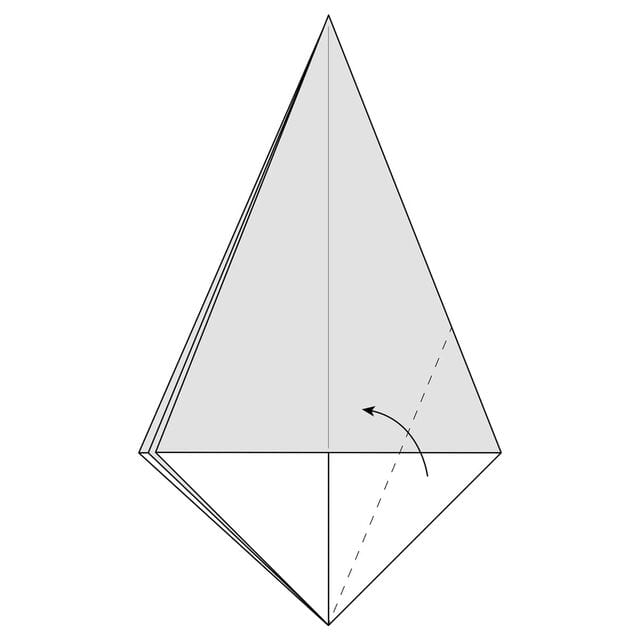
Step 41
Crease this fold well and then unfold it.
Step 42
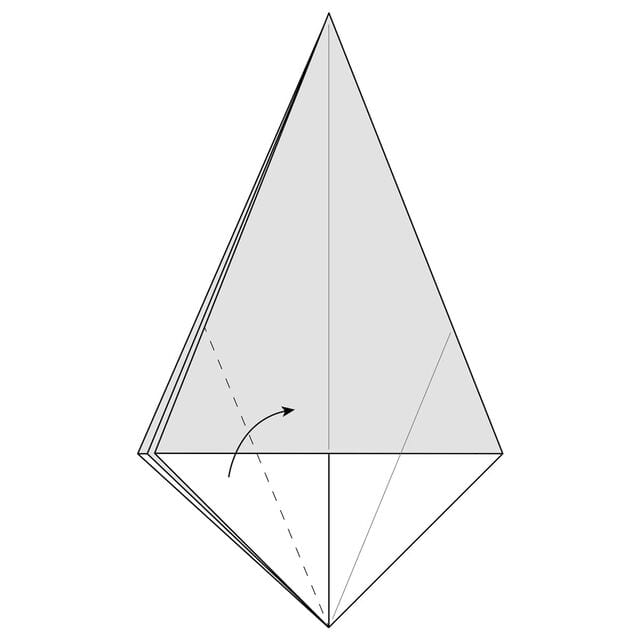
Fold the top left flap of paper to the centre along the dotted line.
Step 43
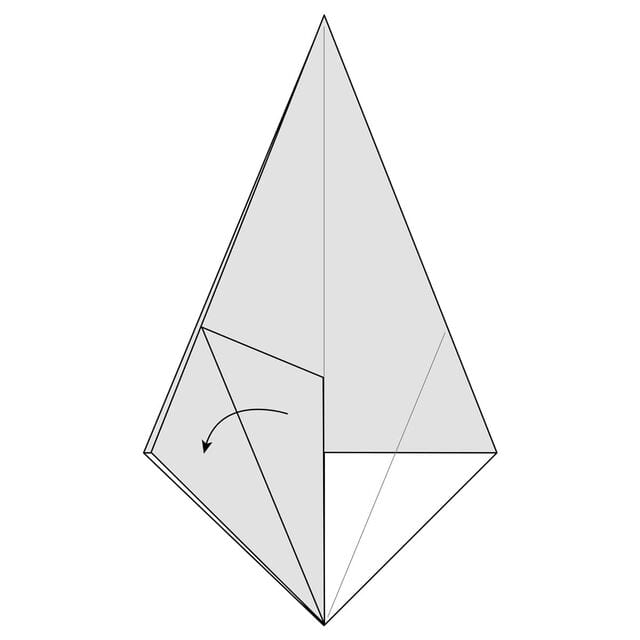
Crease this fold well and then unfold it.
Step 44
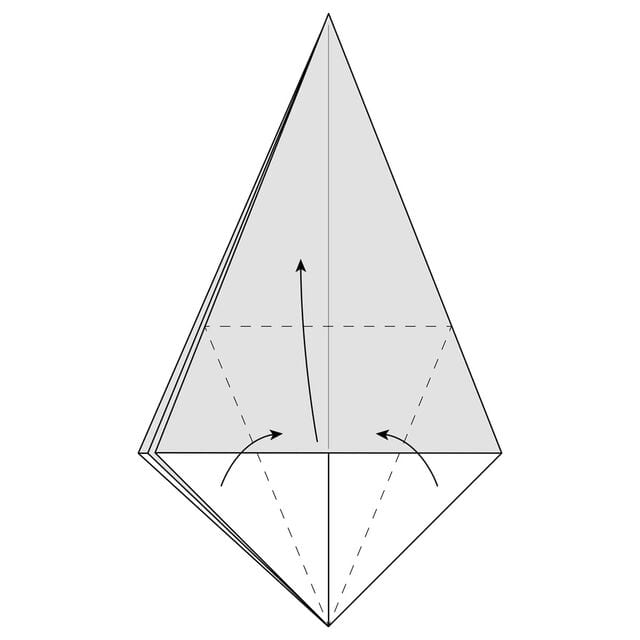
Fold a Petal Fold Variation along the horizontal dotted line and the creases you made earlier.
Step 45
Lift up along the dotted line in the previous step and fold everything flat along the existing creases.
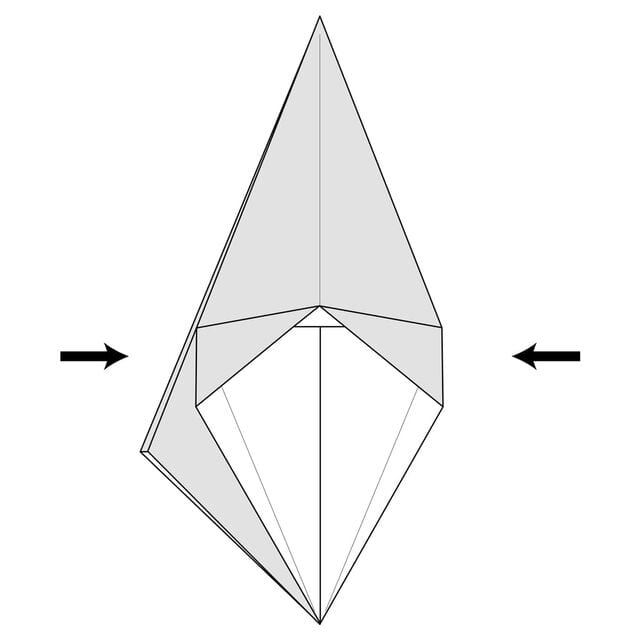
Step 46
Fold the top left flap of paper along the dotted line in the centre over to the right.
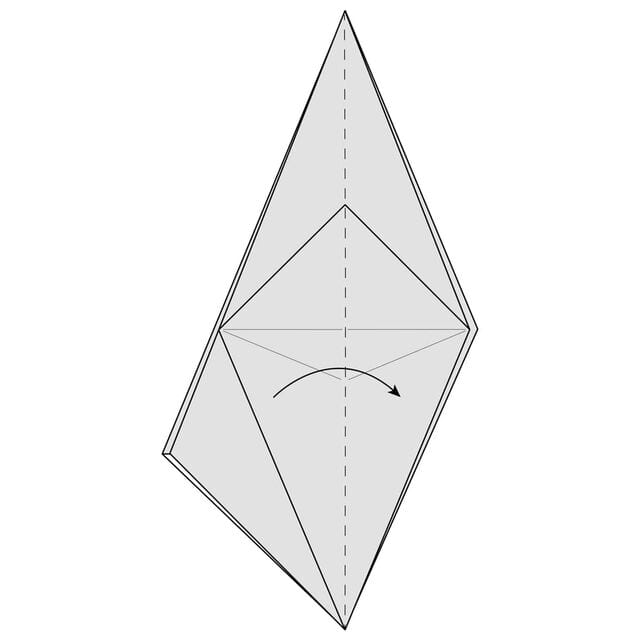
Step 47
Fold the new top left flap of paper along the dotted line in the centre over the right.
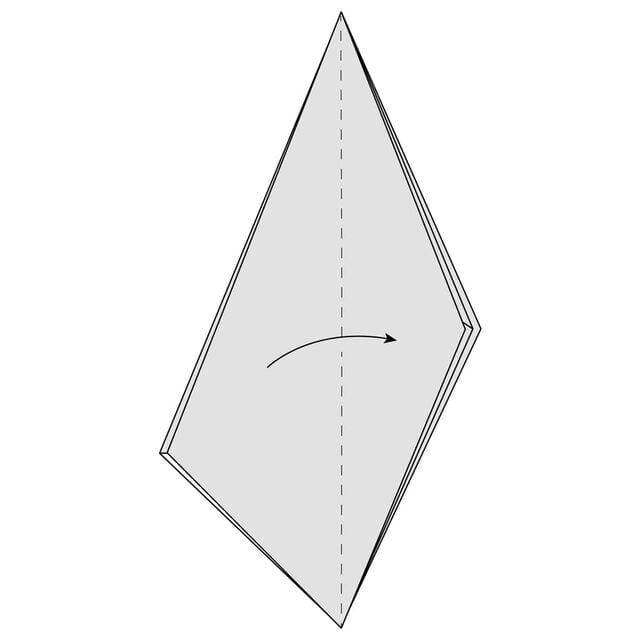
Step 48
Fold the top right flap of paper to the centre along the dotted line.
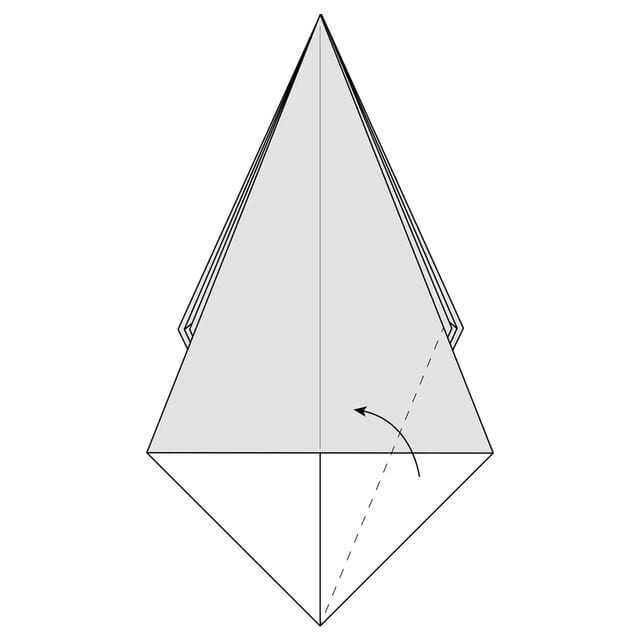
Step 49
Crease this fold well and then unfold it.
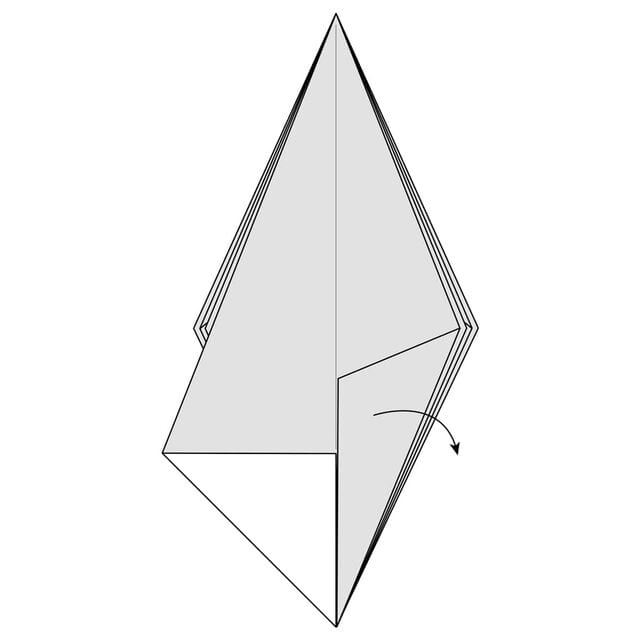
Step 50
Fold the top left flap of paper to the centre along the dotted line.
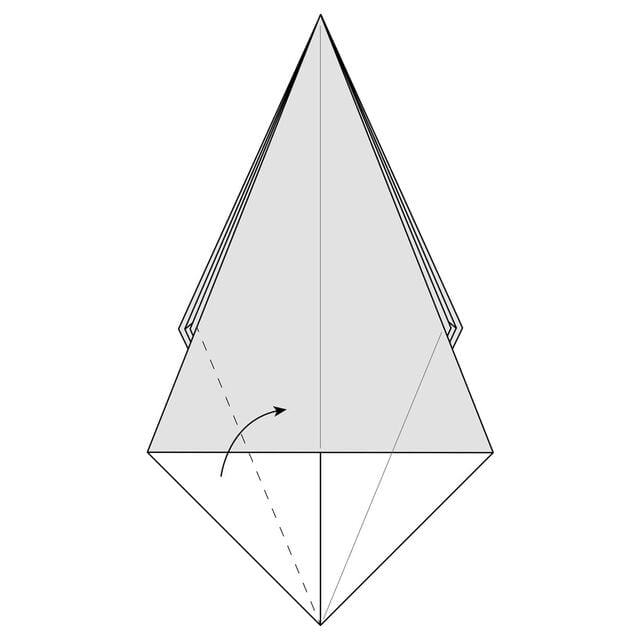
Step 51
Crease this fold well and then unfold it.
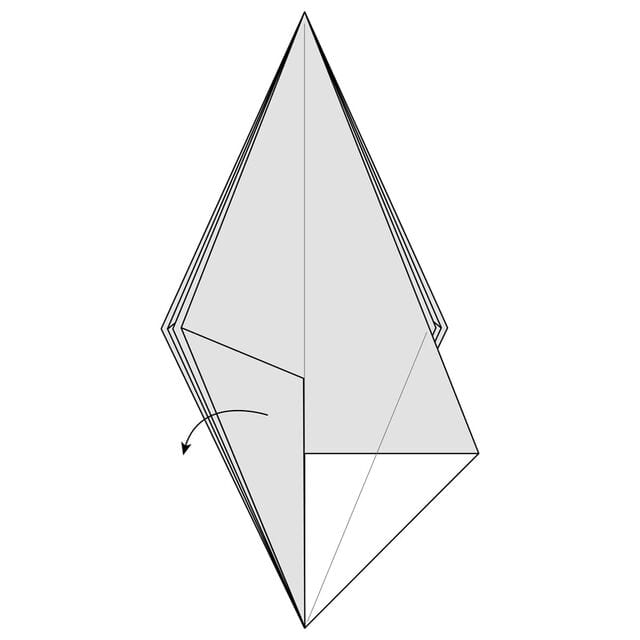
Step 52
Fold a Petal Fold Variation along the horizontal dotted line and the creases you made earlier.
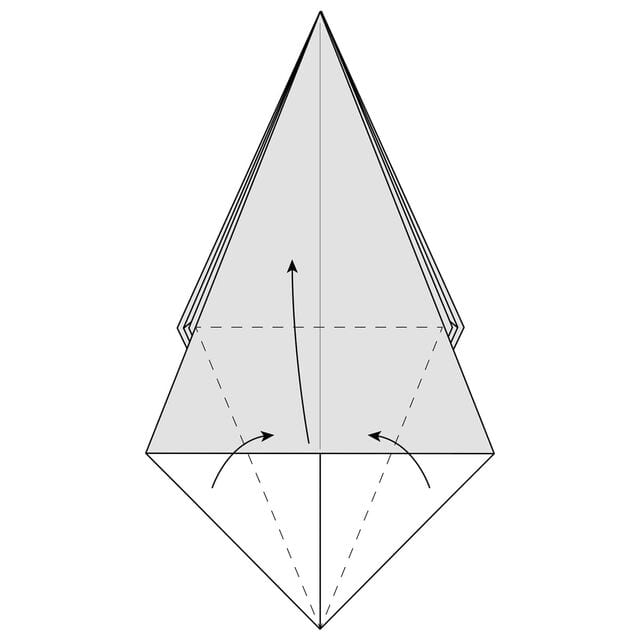
Step 53
Lift up along the dotted line in the previous step and fold everything flat along the existing creases.
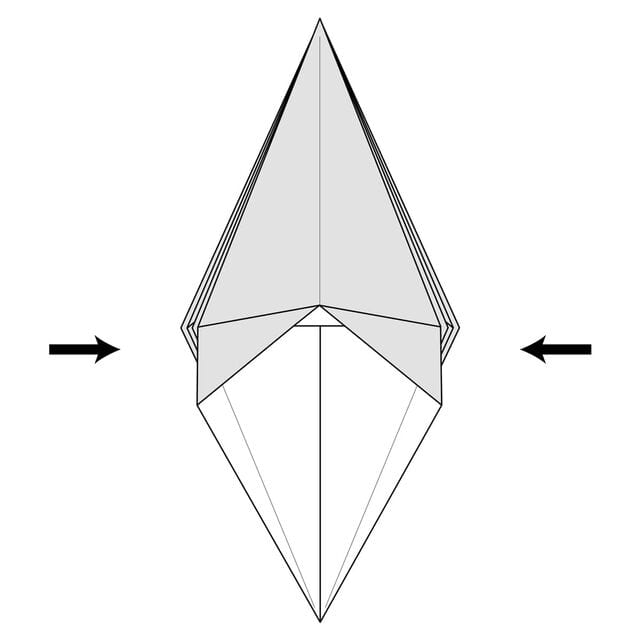
What you just did was take a Square Base, squash-fold each of the four flaps, and then make a petal fold on each one. You can fold each of the flaps in any order you want, but if you followed these instructions exactly, everything should be perfect. Take a moment to check that you have the same number of flaps of paper on each side of the model.




